- Electronic tutorial guitar playing

Содержание
- 2. Self-teachers of the last century Classic version of the paper self-instruction manual. Disadvantages: inconvenience, lack of
- 3. Prototype of foreign developers «FletX»
- 4. Disadvantages: Low learning effectiveness A large amount of time wasted Lack of autonomy Lack of visibility
- 5. Criteria for our device Cheapness Simplicity of construction Ease of use Autonomy Large base of musical
- 6. Block diagram of the device To operate the device we need: -Control element that corrects the
- 7. ELEMENTS USED: Controller As the control element, I choose the Arduino Uno controller The controller is
- 8. LCD 1602 I2C Liquid Crystal Display (LCD) 1602 I2C. We use it as a visual input-output
- 9. Button To control the microcontroller I use the buttons. I chose them because of their ease
- 10. Port extender PCF8574P We use to connect devices to the microcontroller using the I2C protocol I
- 11. Chip-LEDs We use to output the light indication These LEDs have a small size, which will
- 12. Electrical circuit To model the project, the Proteus program was chosen. We use it for convenience
- 13. Block diagram of the program
- 15. Скачать презентацию
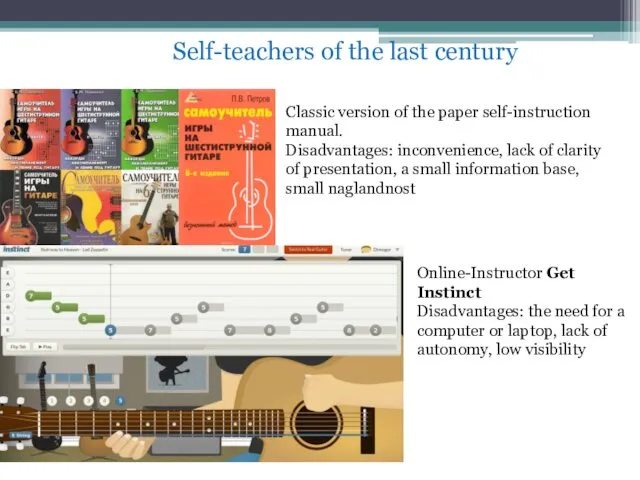
Self-teachers of the last century
Classic version of the paper self-instruction manual.
Disadvantages:
Self-teachers of the last century
Classic version of the paper self-instruction manual.
Disadvantages:
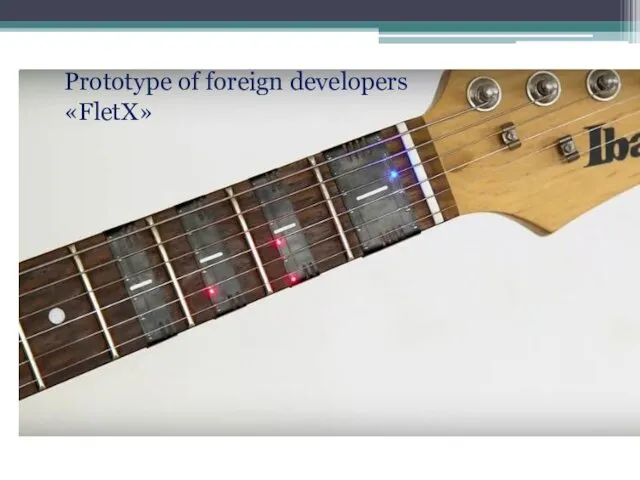
Prototype of foreign developers «FletX»
Prototype of foreign developers «FletX»
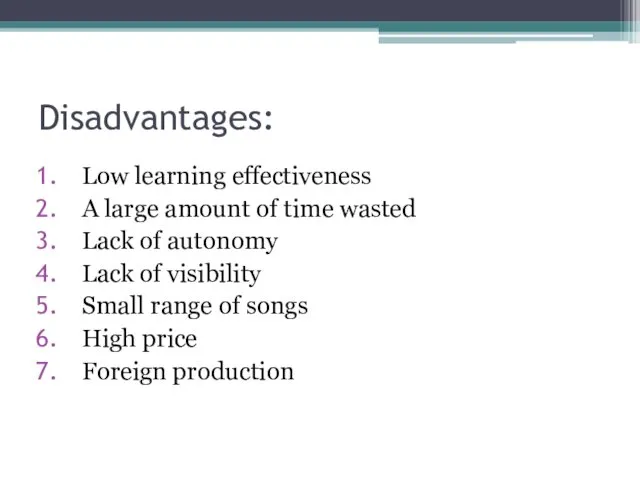
Disadvantages:
Low learning effectiveness
A large amount of time wasted
Lack of autonomy
Lack of
Disadvantages:
Low learning effectiveness
A large amount of time wasted
Lack of autonomy
Lack of
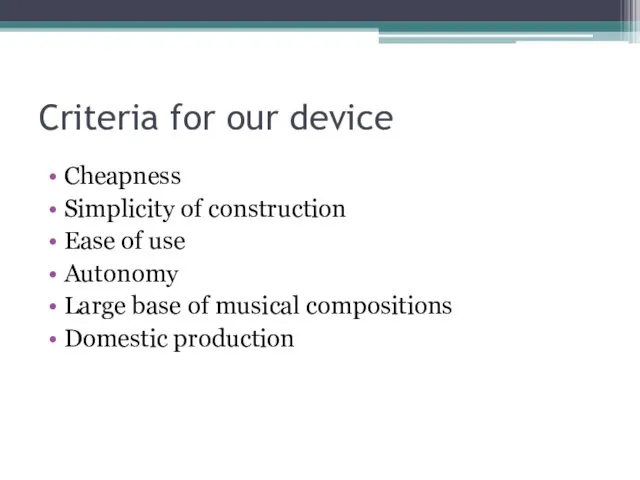
Criteria for our device
Cheapness
Simplicity of construction
Ease of use
Autonomy
Large base of musical
Criteria for our device
Cheapness
Simplicity of construction
Ease of use
Autonomy
Large base of musical
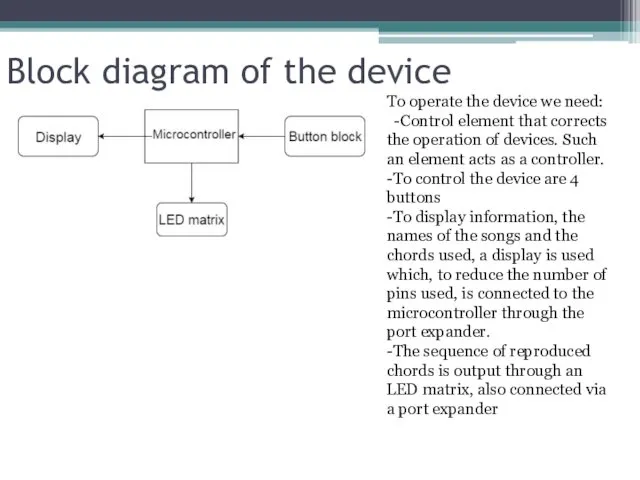
Block diagram of the device
To operate the device we need:
-Control
Block diagram of the device
To operate the device we need:
-Control
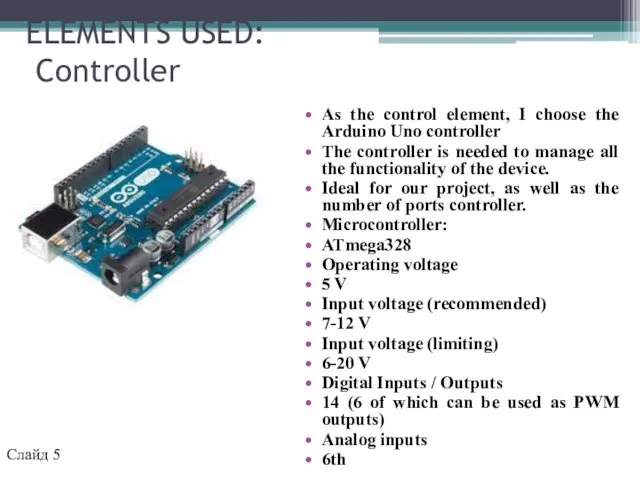
ELEMENTS USED: Controller
As the control element, I choose the Arduino
ELEMENTS USED: Controller
As the control element, I choose the Arduino
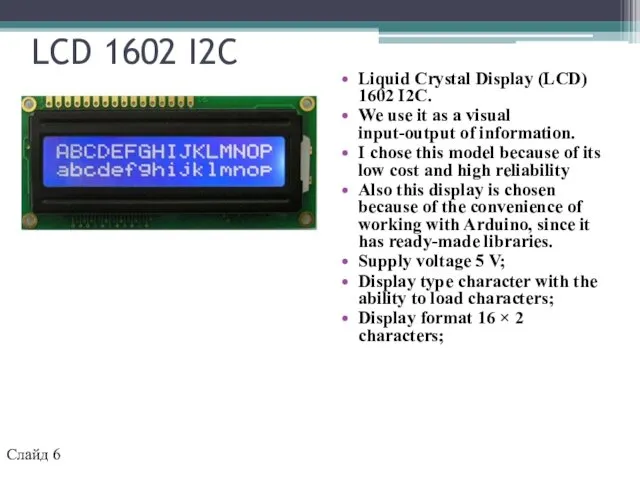
LCD 1602 I2C
Liquid Crystal Display (LCD) 1602 I2C.
We use it as
LCD 1602 I2C
Liquid Crystal Display (LCD) 1602 I2C.
We use it as
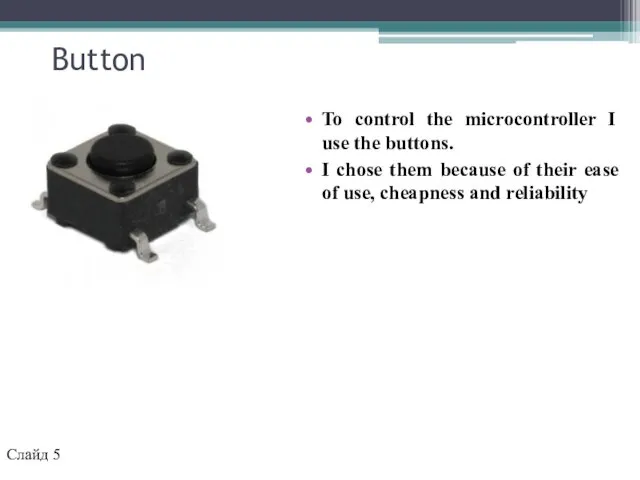
Button
To control the microcontroller I use the buttons.
I chose them
Button
To control the microcontroller I use the buttons.
I chose them
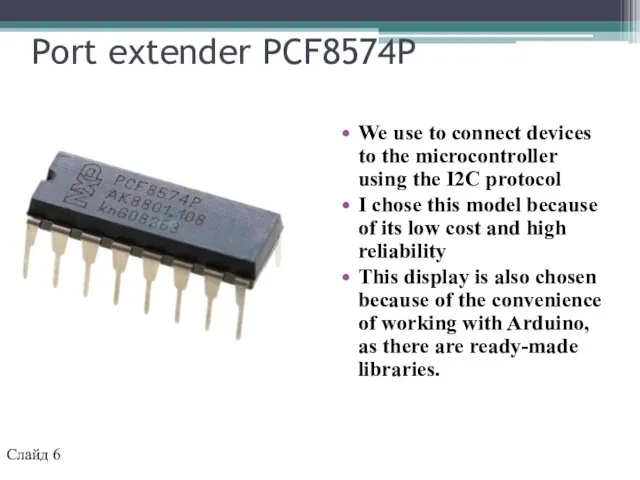
Port extender PCF8574P
We use to connect devices to the microcontroller using
Port extender PCF8574P
We use to connect devices to the microcontroller using
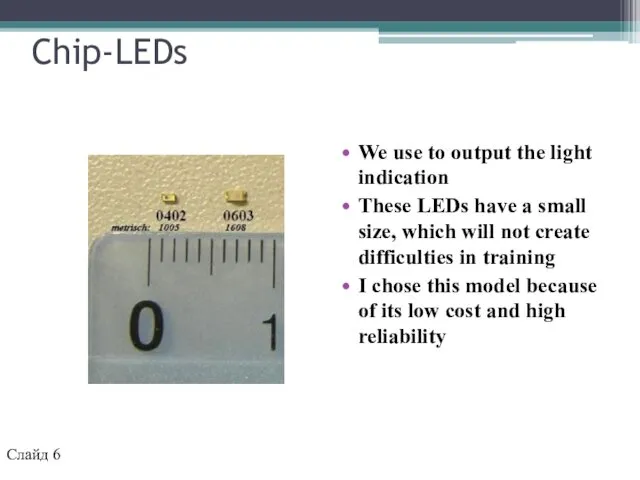
Chip-LEDs
We use to output the light indication
These LEDs have a small
Chip-LEDs
We use to output the light indication
These LEDs have a small
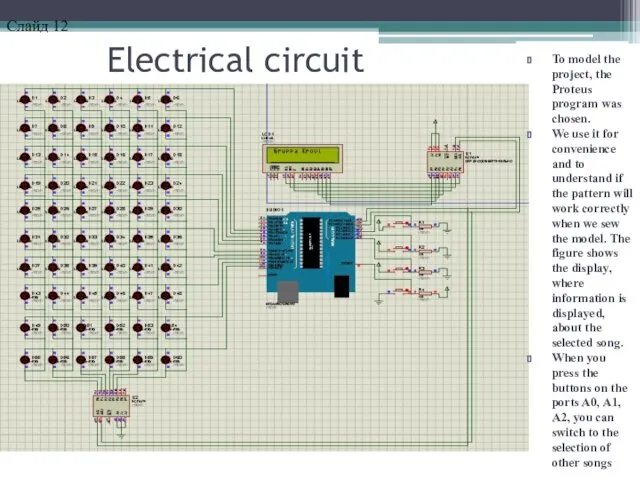
Electrical circuit
To model the project, the Proteus program was chosen.
We use
Electrical circuit
To model the project, the Proteus program was chosen.
We use
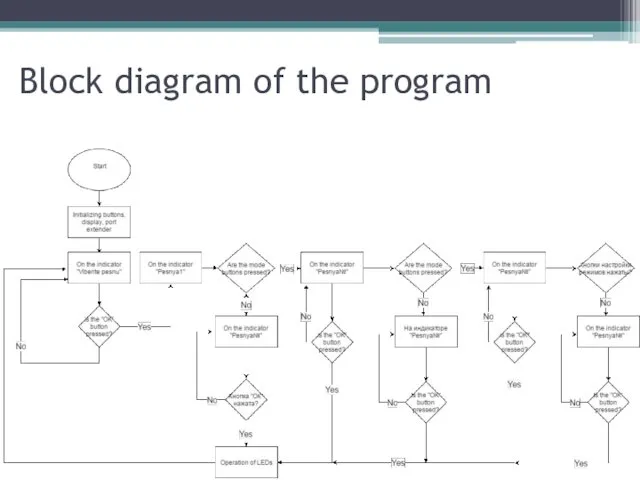
Block diagram of the program
Block diagram of the program
 Покраска автомобиля, подготовка, техника. Пошаговая инструкция
 Штат Переяслав - Хмельницького МВ
 20130713_maslyakovavf
 Материаловедение. Виды и назначение отпуска
 рЕШЕНИЕ ОПЕРАТИВНЫХ ЗАДАЧ (1)
 Генераторы постоянного тока
 МПиК.10.04.5а
 день ШСА
 Презентация2
 Вычисление водородного показателя, вычисление концентрации ионов водорода и гидроксид ионов
 Подземное и наземное оборудование объектов нефтегазодобычи. Осмотр АГЗУ и выявление неисправностей. ННОУ ИПК НКИ
 Илмор. Комментарии
 Основы мировых религиозных культур
 Тренировка перед самостоятельной работой
 SEO продвижение кейсы
 Major Express, экспресс-доставка
 Проект ловец слов.11 класс
 Урбанистика. Современные тренды в работе с городской средой
 c16323-4433-47aa-8bba-b02a4bb931c3
 Раннецветущие растения
 Прайс РФ NEWGARD (1)
 Фотоальбом
 Навеки в памяти народной
 20121029_prezentaciya01
 Профессиональное выгорание медицинских работников
 О мерах по недопущению нахождения детей в местах, представляющих опасность, в том числе в ночное время
 Шаблон презентации Технология перевозочного процесса
 Презентация 2