- 3D Animation I

Содержание
- 2. Let’s Get Started Start Lightwave Layout Select File > Clear Scene Command N This allows you
- 3. The Interface What you see Tabs on top Selectable items on left Based on tab selection
- 4. The Interface What you see Every new scene starts with a light and a camera The
- 5. Let’s Look at Something Make sure the Items tab is selected On the left, select Load
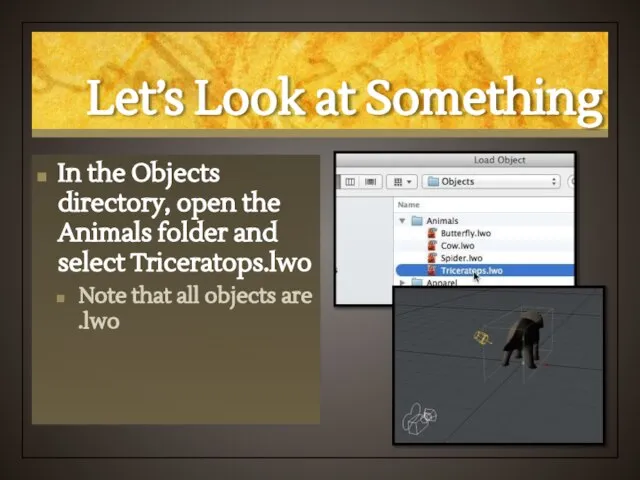
- 6. Let’s Look at Something In the Objects directory, open the Animals folder and select Triceratops.lwo Note
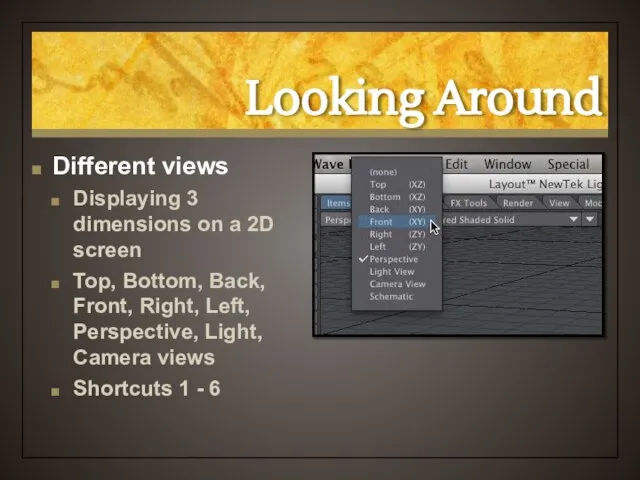
- 7. Looking Around Different views Displaying 3 dimensions on a 2D screen Top, Bottom, Back, Front, Right,
- 8. Have a Look Around Click on the View pop-up menu and choose Top Shortcut (2)
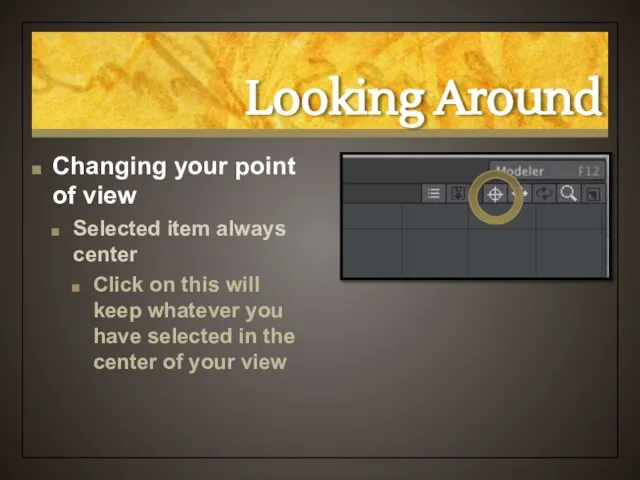
- 9. Looking Around Changing your point of view Selected item always center Click on this will keep
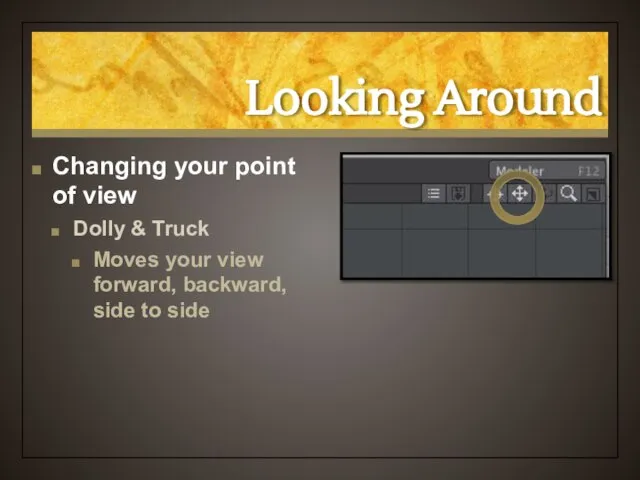
- 10. Looking Around Changing your point of view Dolly & Truck Moves your view forward, backward, side
- 11. Looking Around Changing your point of view Rotate Allows you to swing around the current view
- 12. Looking Around Changing your point of view Zoom Allows you to zoom in and out on
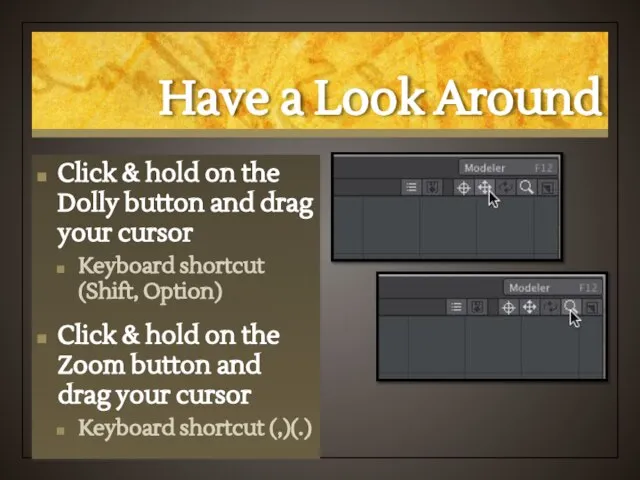
- 13. Have a Look Around Click & hold on the Dolly button and drag your cursor Keyboard
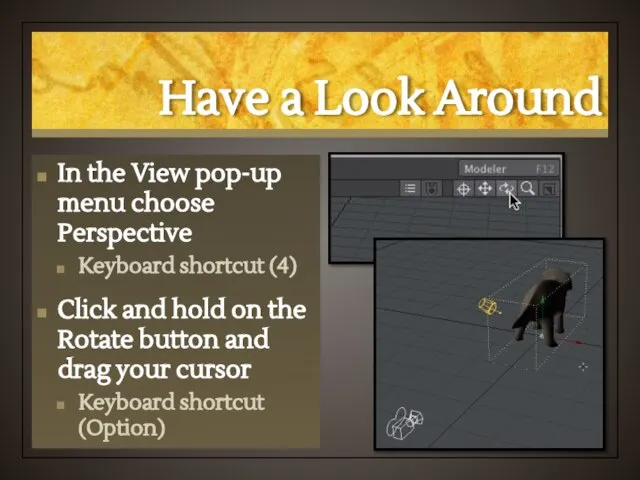
- 14. Have a Look Around In the View pop-up menu choose Perspective Keyboard shortcut (4) Click and
- 15. Have a Look Around In the View pop-up menu choose Light Keyboard shortcut (5) This shows
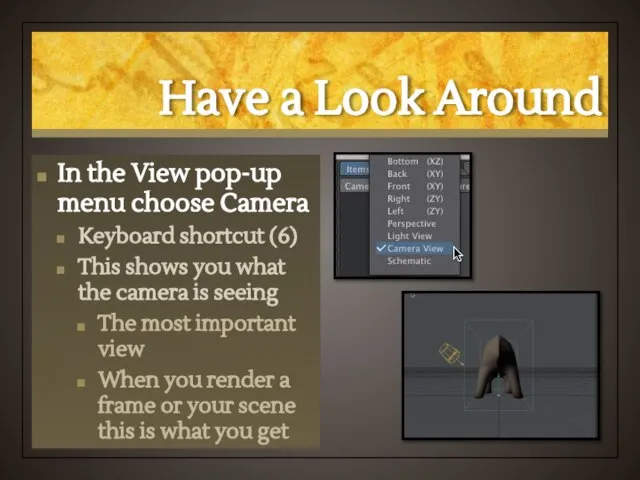
- 16. Have a Look Around In the View pop-up menu choose Camera Keyboard shortcut (6) This shows
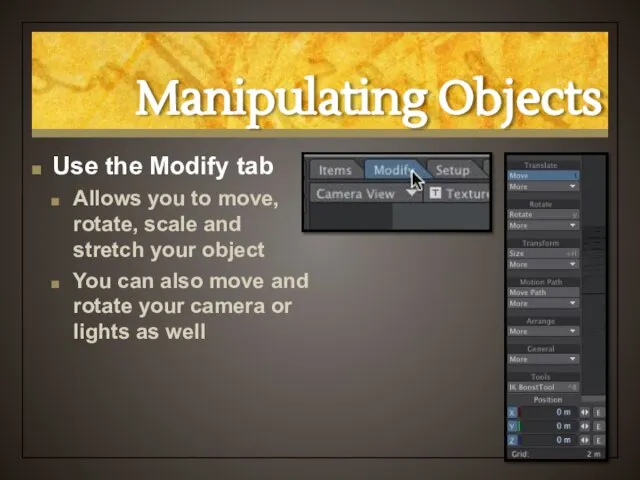
- 17. Manipulating Objects Use the Modify tab Allows you to move, rotate, scale and stretch your object
- 18. A Better View of Our Dino Select the Modify tab Select Rotate Shortcut (y) Click on
- 19. Manipulating Objects Numerics Bottom left Allows you to set specific settings to the type of manipulation
- 20. Tweak the Settings Using the Numerics, click on the button and change the horizontal setting Change
- 21. Timeline – Left Side Timeline Slider Drag this slider to the desired frame in your animation
- 22. Timeline – Left Side Item Type Allows you to choose the kind of item in your
- 23. Timeline – Left Side Current Item pop-up menu Once you have chosen the kind of item
- 24. Timeline – Left Side Item Properties This allows you to change features of the selected element
- 25. Timeline – Right Side Total frames in scene This is how long the scene is Measured
- 26. Change the Scene Duration Select inside the Scene Duration window and type 300 and press Enter
- 27. Timeline – Right Side Auto Key When checked, every time you change an item at any
- 28. Timeline – Right Side Create Key Allows you to manually create a key frame when Auto
- 29. Let’s Make a Simple Animation Make sure the Timeline slider is at frame 0 Using the
- 30. Let’s Make a Simple Animation Move the slider to frame 300 While Move is still selected,
- 31. Let’s Make a Simple Animation Move the slider to frame 150 While Move is still selected,
- 32. Timeline – Right Side Navigation Controls Allows you to move your slider to specific frames in
- 33. Timeline – Right Side Navigation Controls Handy keyboard shortcuts Go forward or backward 1 frame =
- 34. Zip to Your Key Frames Use the navigation controls to go to the beginning and end
- 35. Timeline – Right Side Preview pop-up menu Allows you to make a preview of your animation
- 36. Make a Preview Click on the Preview button and select Make Preview 1st frame = 0
- 37. Play the Preview Click the play button to play your preview You can scrub, step, go
- 38. Timeline – Right Side Viewport playback Plays the scene forward or backward Playback speed depends on
- 39. Rendering Render tab Render the current frame F9 Render the scene F10 Can render a selected
- 40. Render a Frame Using the timeline slider, select a frame you would like to render out
- 41. Rendering Render Status Window Shows you what Lightwave is doing when rendering your frame Watch Lightwave
- 42. Rendering Render Frame In its own window Allows you to save the image if you like
- 43. Save a Frame On the Render Window, select Save RGBA > LW_JPEG (.jpg) and save your
- 44. Save Your Scene Select File > Save Scene As… Select the Scenes folder (if necessary) and
- 46. Скачать презентацию
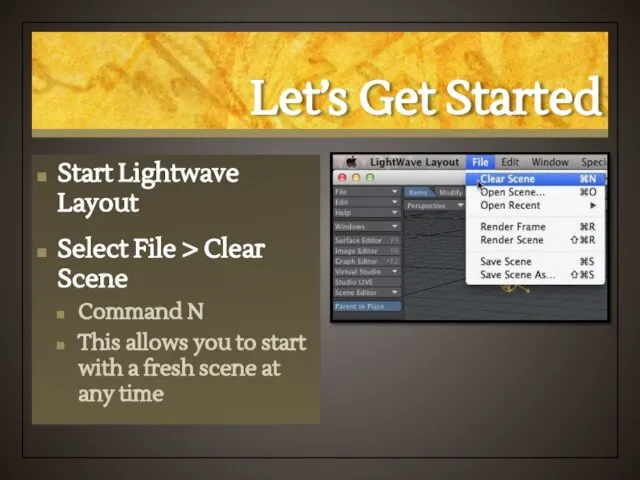
Let’s Get Started
Start Lightwave Layout
Select File > Clear Scene
Command N
This allows
Let’s Get Started
Start Lightwave Layout
Select File > Clear Scene
Command N
This allows
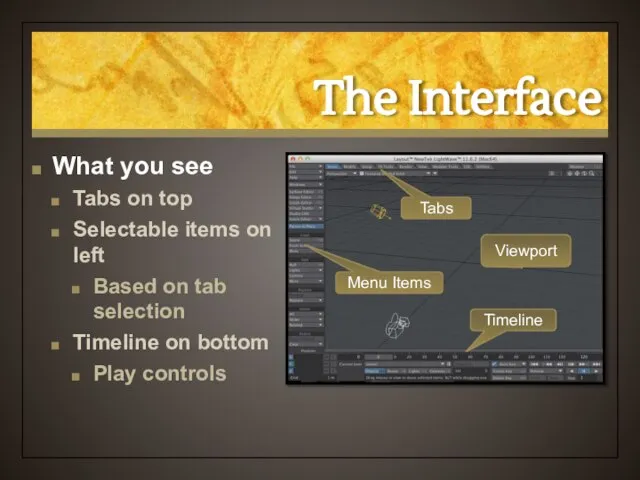
The Interface
What you see
Tabs on top
Selectable items on left
Based on tab
The Interface
What you see
Tabs on top
Selectable items on left
Based on tab
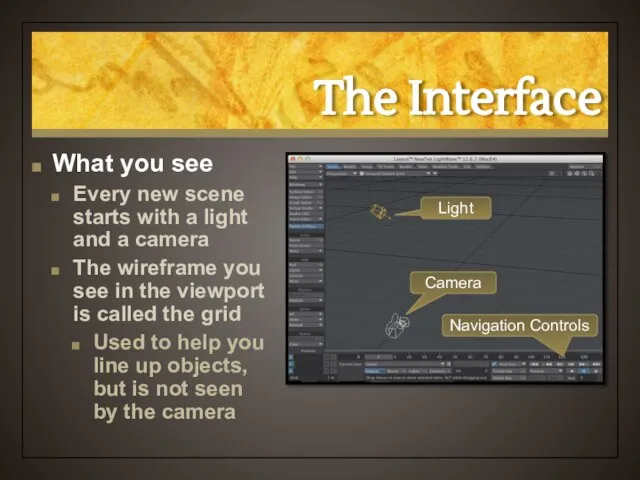
The Interface
What you see
Every new scene starts with a light and
The Interface
What you see
Every new scene starts with a light and
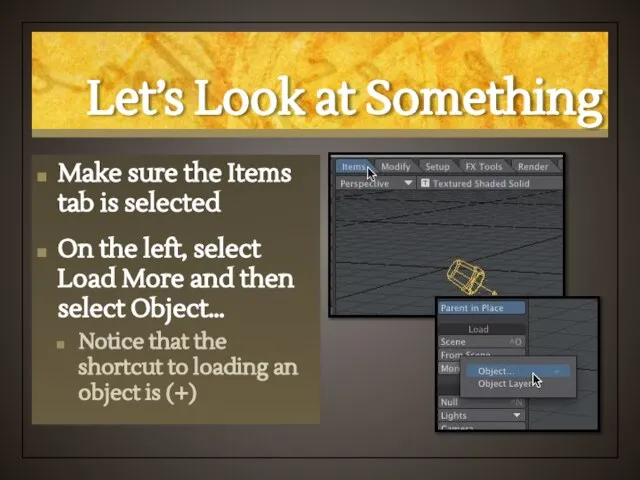
Let’s Look at Something
Make sure the Items tab is selected
On the
Let’s Look at Something
Make sure the Items tab is selected
On the
Let’s Look at Something
In the Objects directory, open the Animals folder
Let’s Look at Something
In the Objects directory, open the Animals folder
Looking Around
Different views
Displaying 3 dimensions on a 2D screen
Top, Bottom, Back,
Looking Around
Different views
Displaying 3 dimensions on a 2D screen
Top, Bottom, Back,

Have a Look Around
Click on the View pop-up menu and choose
Have a Look Around
Click on the View pop-up menu and choose
Looking Around
Changing your point of view
Selected item always center
Click on this
Looking Around
Changing your point of view
Selected item always center
Click on this
Looking Around
Changing your point of view
Dolly & Truck
Moves your view forward,
Looking Around
Changing your point of view
Dolly & Truck
Moves your view forward,

Looking Around
Changing your point of view
Rotate
Allows you to swing around the
Looking Around
Changing your point of view
Rotate
Allows you to swing around the

Looking Around
Changing your point of view
Zoom
Allows you to zoom in
Looking Around
Changing your point of view
Zoom
Allows you to zoom in
Have a Look Around
Click & hold on the Dolly button and
Have a Look Around
Click & hold on the Dolly button and
Have a Look Around
In the View pop-up menu choose Perspective
Keyboard shortcut
Have a Look Around
In the View pop-up menu choose Perspective
Keyboard shortcut

Have a Look Around
In the View pop-up menu choose Light
Keyboard shortcut
Have a Look Around
In the View pop-up menu choose Light
Keyboard shortcut
Have a Look Around
In the View pop-up menu choose Camera
Keyboard shortcut
Have a Look Around
In the View pop-up menu choose Camera
Keyboard shortcut
Manipulating Objects
Use the Modify tab
Allows you to move, rotate, scale and
Manipulating Objects
Use the Modify tab
Allows you to move, rotate, scale and

A Better View of Our Dino
Select the Modify tab
Select Rotate
Shortcut (y)
Click
A Better View of Our Dino
Select the Modify tab
Select Rotate
Shortcut (y)
Click
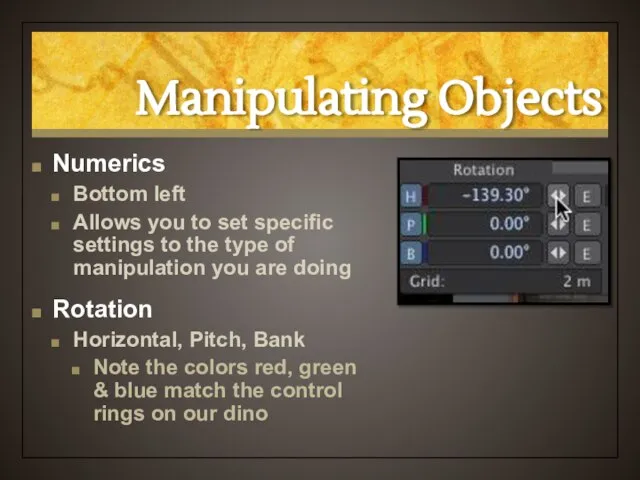
Manipulating Objects
Numerics
Bottom left
Allows you to set specific settings to the type
Manipulating Objects
Numerics
Bottom left
Allows you to set specific settings to the type
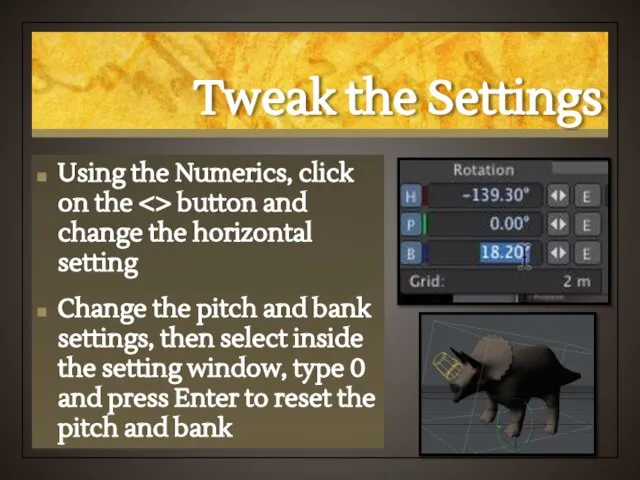
Tweak the Settings
Using the Numerics, click on the <> button and
Tweak the Settings
Using the Numerics, click on the <> button and

Timeline – Left Side
Timeline Slider
Drag this slider to the desired frame
Timeline – Left Side
Timeline Slider
Drag this slider to the desired frame
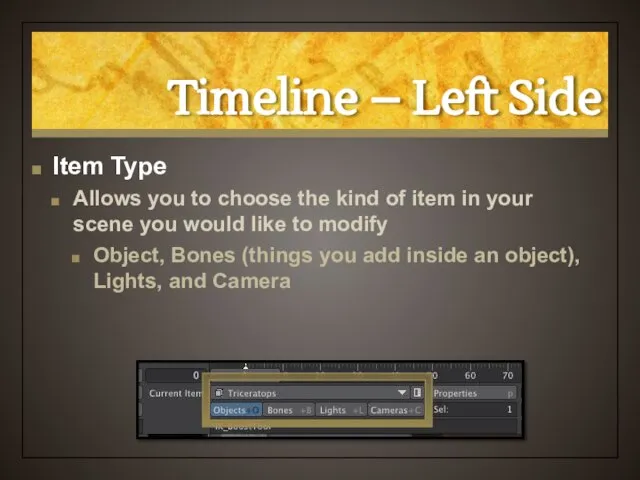
Timeline – Left Side
Item Type
Allows you to choose the kind of
Timeline – Left Side
Item Type
Allows you to choose the kind of

Timeline – Left Side
Current Item pop-up menu
Once you have chosen the
Timeline – Left Side
Current Item pop-up menu
Once you have chosen the

Timeline – Left Side
Item Properties
This allows you to change features of
Timeline – Left Side
Item Properties
This allows you to change features of
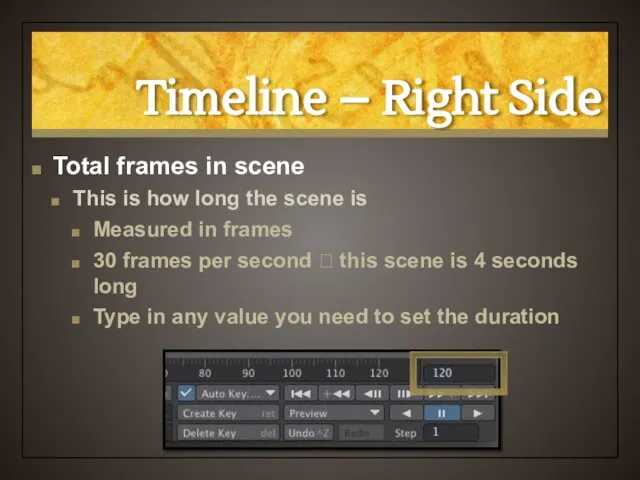
Timeline – Right Side
Total frames in scene
This is how long the
Timeline – Right Side
Total frames in scene
This is how long the

Change the Scene Duration
Select inside the Scene Duration window and type
Change the Scene Duration
Select inside the Scene Duration window and type

Timeline – Right Side
Auto Key
When checked, every time you change an
Timeline – Right Side
Auto Key
When checked, every time you change an

Timeline – Right Side
Create Key
Allows you to manually create a key
Timeline – Right Side
Create Key
Allows you to manually create a key
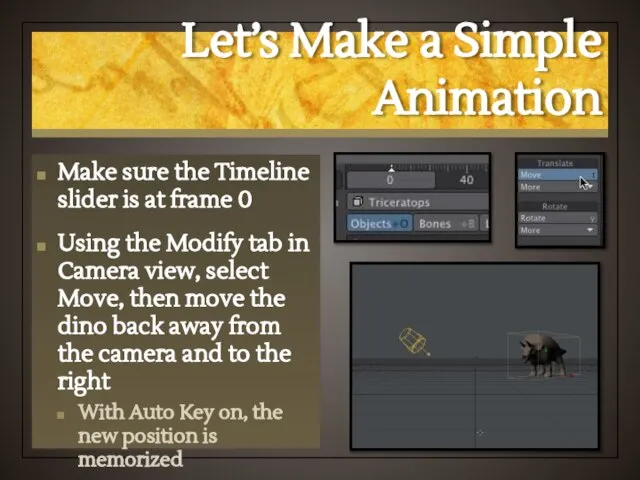
Let’s Make a Simple Animation
Make sure the Timeline slider is at
Let’s Make a Simple Animation
Make sure the Timeline slider is at

Let’s Make a Simple Animation
Move the slider to frame 300
While Move
Let’s Make a Simple Animation
Move the slider to frame 300
While Move
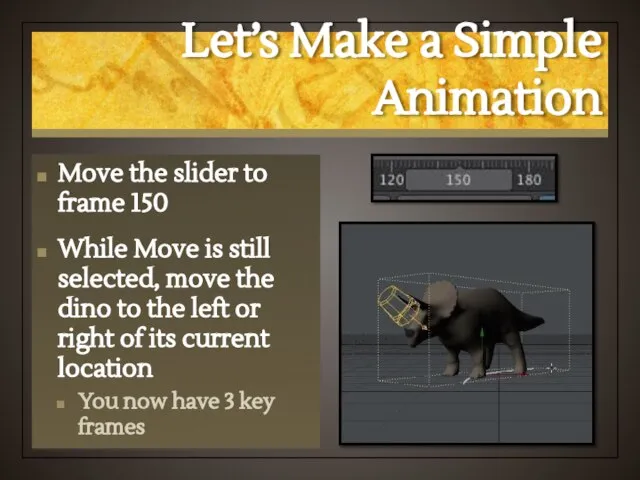
Let’s Make a Simple Animation
Move the slider to frame 150
While Move
Let’s Make a Simple Animation
Move the slider to frame 150
While Move

Timeline – Right Side
Navigation Controls
Allows you to move your slider to
Timeline – Right Side
Navigation Controls
Allows you to move your slider to
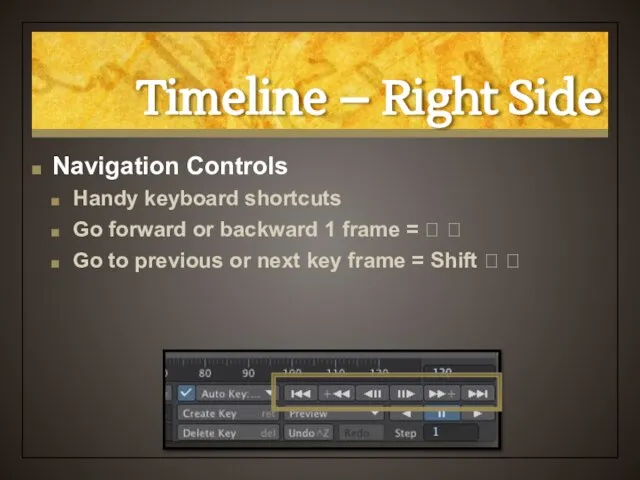
Timeline – Right Side
Navigation Controls
Handy keyboard shortcuts
Go forward or backward 1
Timeline – Right Side
Navigation Controls
Handy keyboard shortcuts
Go forward or backward 1

Zip to Your Key Frames
Use the navigation controls to go to
Zip to Your Key Frames
Use the navigation controls to go to

Timeline – Right Side
Preview pop-up menu
Allows you to make a preview
Timeline – Right Side
Preview pop-up menu
Allows you to make a preview

Make a Preview
Click on the Preview button and select Make Preview
1st
Make a Preview
Click on the Preview button and select Make Preview
1st

Play the Preview
Click the play button to play your preview
You can
Play the Preview
Click the play button to play your preview
You can
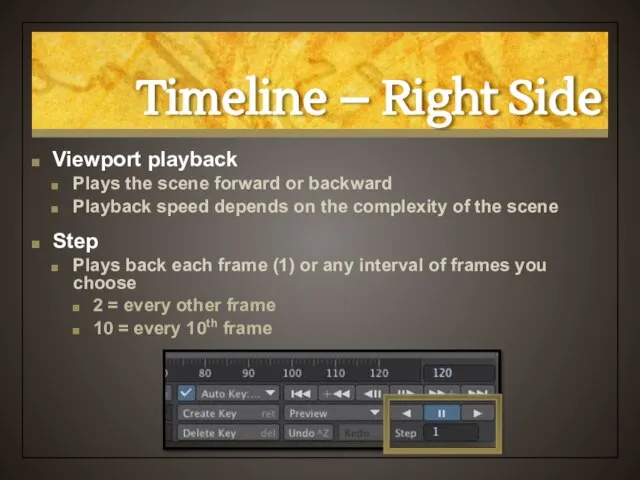
Timeline – Right Side
Viewport playback
Plays the scene forward or backward
Playback speed
Timeline – Right Side
Viewport playback
Plays the scene forward or backward
Playback speed
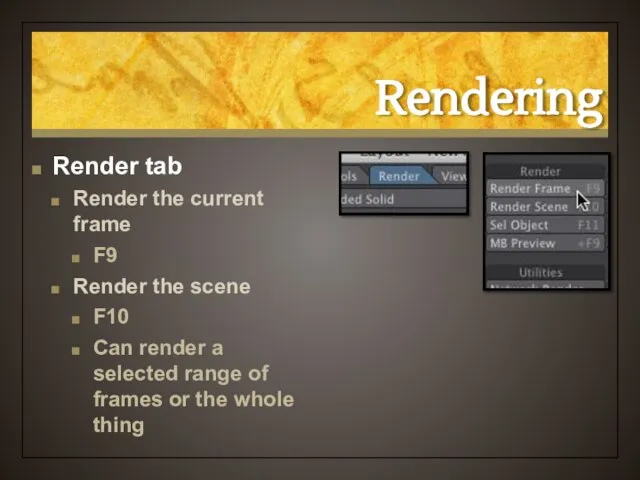
Rendering
Render tab
Render the current frame
F9
Render the scene
F10
Can render a selected range
Rendering
Render tab
Render the current frame
F9
Render the scene
F10
Can render a selected range

Render a Frame
Using the timeline slider, select a frame you would
Render a Frame
Using the timeline slider, select a frame you would
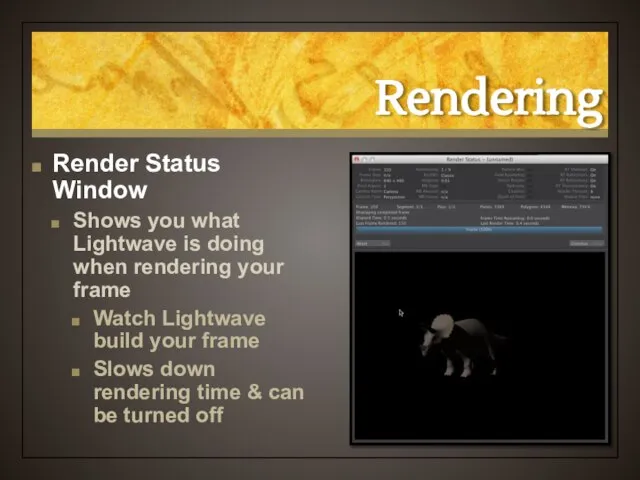
Rendering
Render Status Window
Shows you what Lightwave is doing when rendering your
Rendering
Render Status Window
Shows you what Lightwave is doing when rendering your
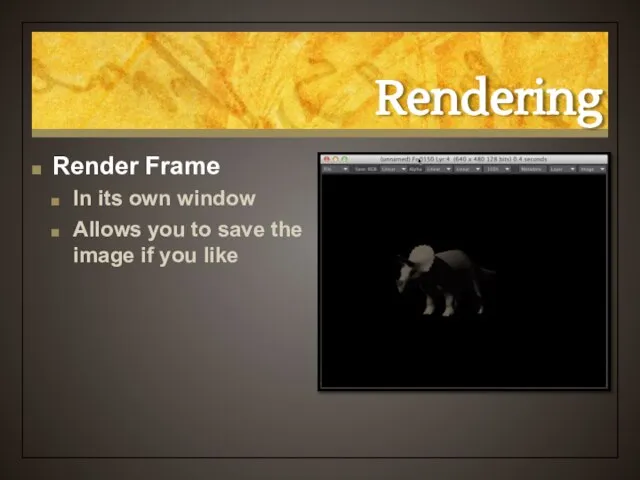
Rendering
Render Frame
In its own window
Allows you to save the image if
Rendering
Render Frame
In its own window
Allows you to save the image if

Save a Frame
On the Render Window, select Save RGBA > LW_JPEG
Save a Frame
On the Render Window, select Save RGBA > LW_JPEG
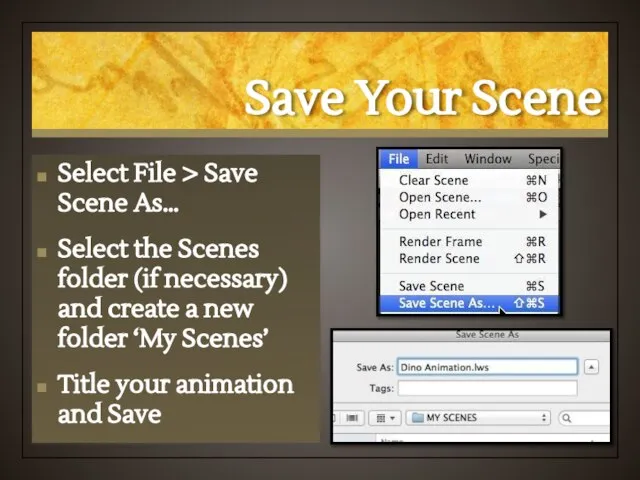
Save Your Scene
Select File > Save Scene As…
Select the Scenes folder
Save Your Scene
Select File > Save Scene As…
Select the Scenes folder
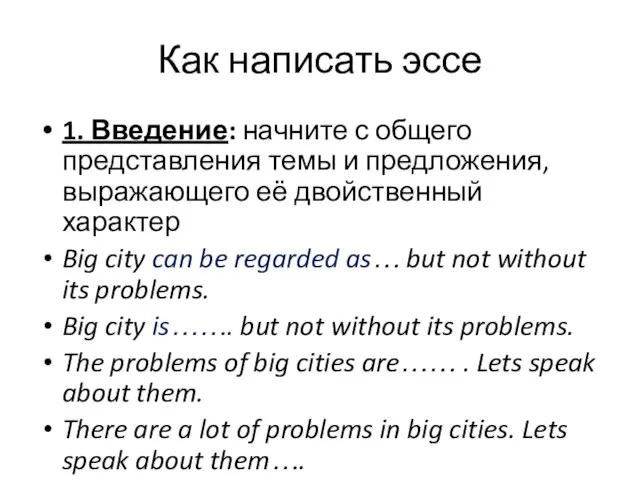 Big city problems. Как написать эссе
 Green issues
 Homework
 Spotlight 9. Module 5. Art &Literature
 Презентация к уроку английского языка "Seasons" - скачать
  Презентация к уроку английского языка "What do you want to eat?" - скачать
  Groups and movements
 Animals
 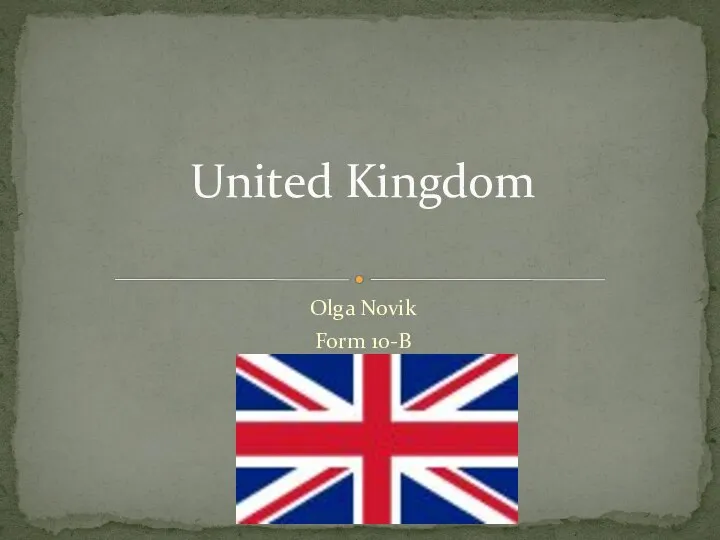 United Kingdom Olga Novik Form 10-B
  Презентация к уроку английского языка "ПРАЗДНИК АНГЛИЙСКОЙ ПОЭЗИИ" - скачать бесплатно
 Animal Sounds
 W.Shakespear’s heroines
 Holidays and festivals in Britain выполнила учитель английского языка МОУ «СОШ №77», г. Омска, Тонких Т.А.
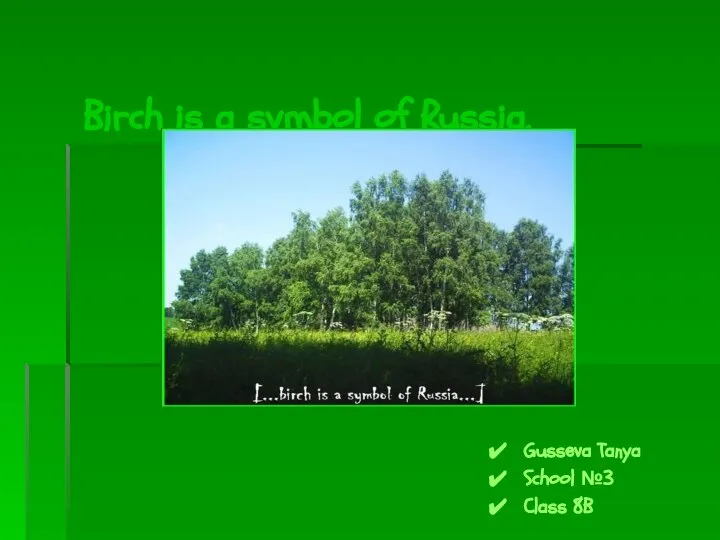 Birch is a symbol of Russia. Gusseva Tanya School №3 Class 8B
 Презентация к уроку английского языка "Root Words" - скачать бесплатно
 Презентация English
 Презентация к уроку английского языка "Голливуд" - скачать бесплатно
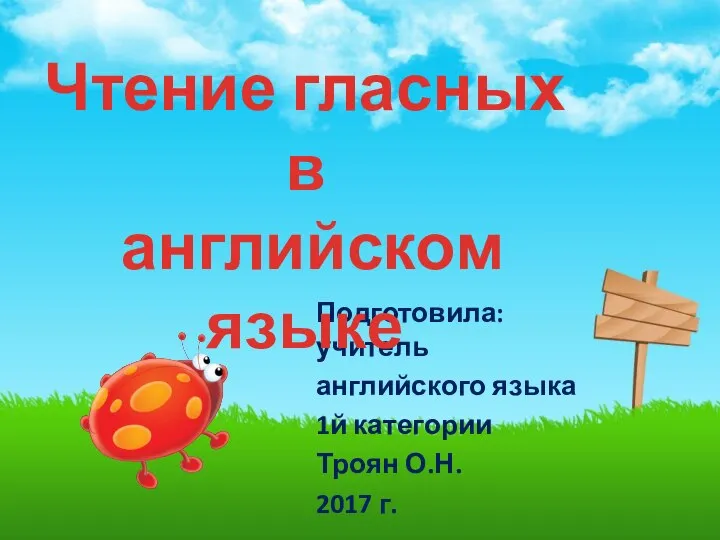 Чтение гласных в английском языке
 One photo to describe (day 2)
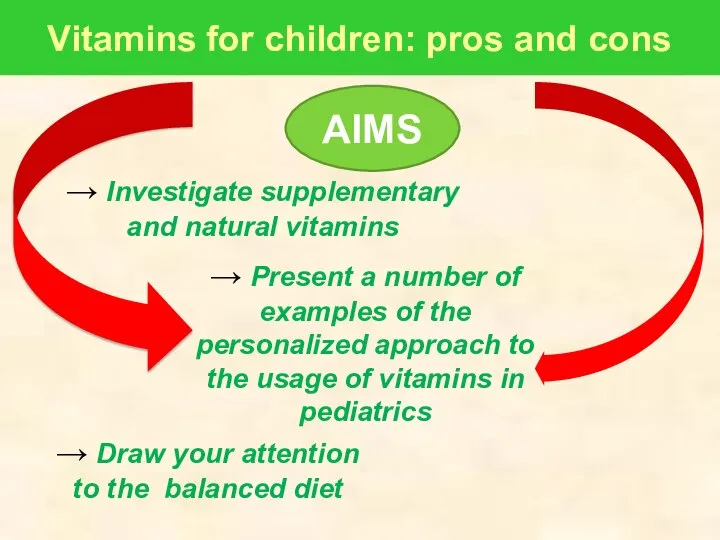 Vitamins for children: pros and cons
 Evolution of Youth Groups in Russia
 Презентация по английскому языку Past, Present, Future. 5 класс
  Глаголы put on и take off. Look and read
 MY HOUSE
  Презентация к уроку английского языка "Техника запоминания иностранных слов" - скачать
  Презентация к уроку английского языка "Britain. The country and its people" - скачать
  Party games for esl
 Презентация к уроку английского языка "Youth subculture" - скачать