- Fuel normal operation

Содержание
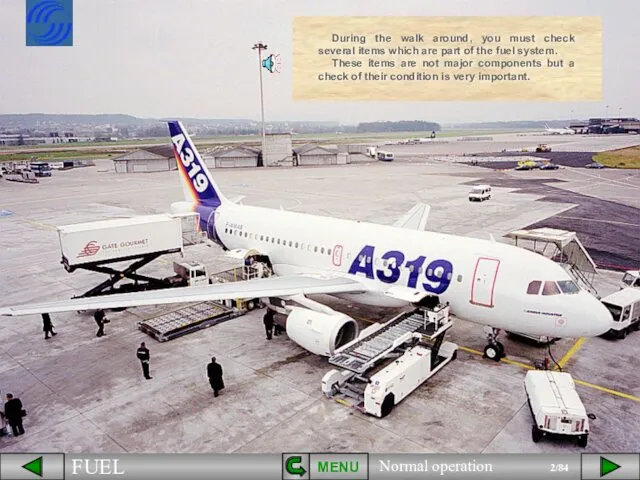
- 2. MENU During the walk around, you must check several items which are part of the fuel
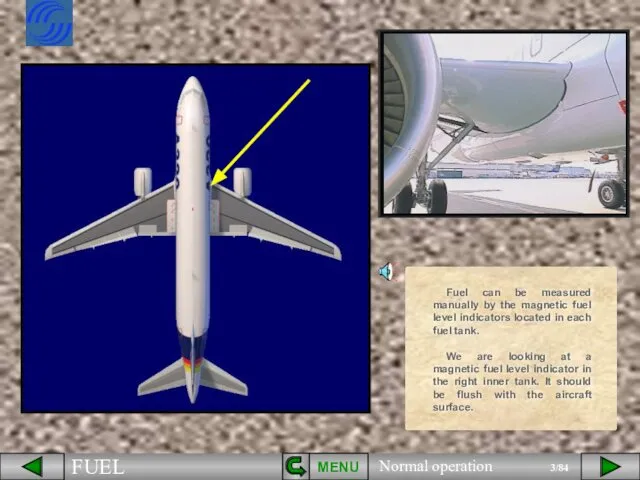
- 3. MENU Fuel can be measured manually by the magnetic fuel level indicators located in each fuel
- 4. MENU We are looking at the water drain valve in the right inner tank. Each tank
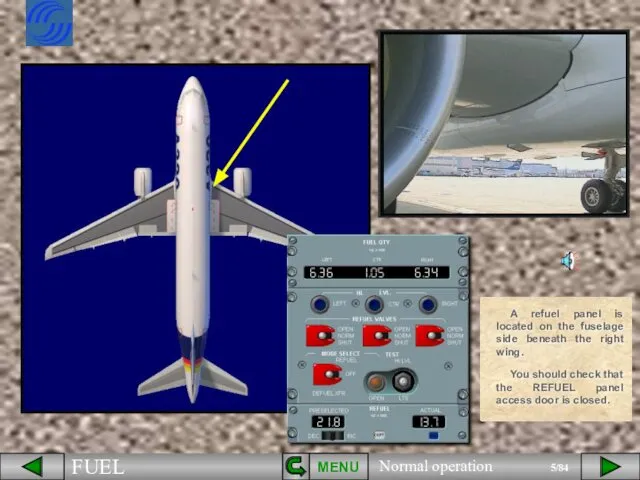
- 5. MENU You should check that the REFUEL panel access door is closed. A refuel panel is
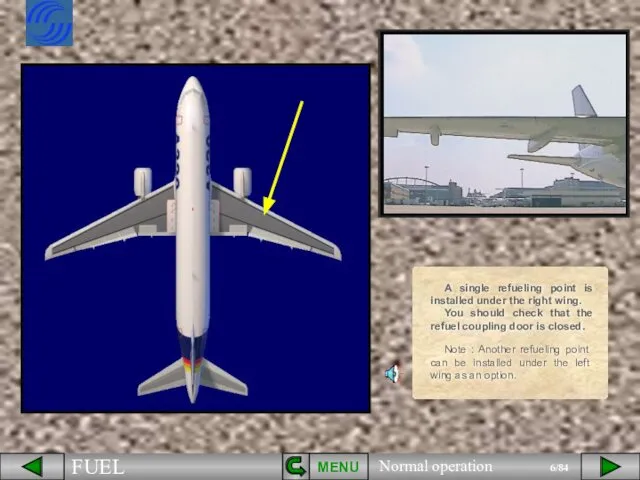
- 6. MENU Note : Another refueling point can be installed under the left wing as an option.
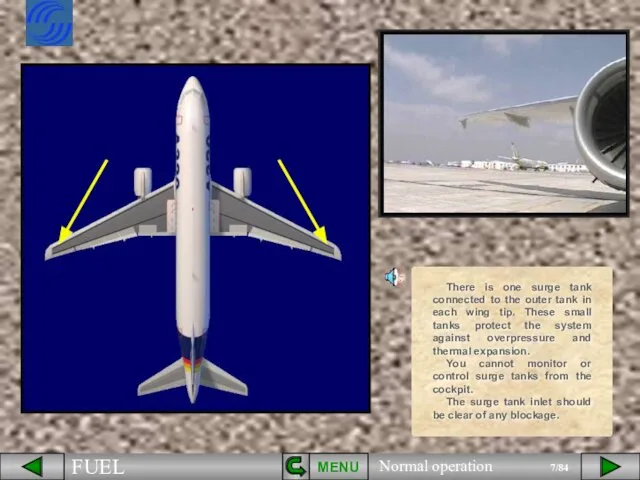
- 7. MENU There is one surge tank connected to the outer tank in each wing tip. These
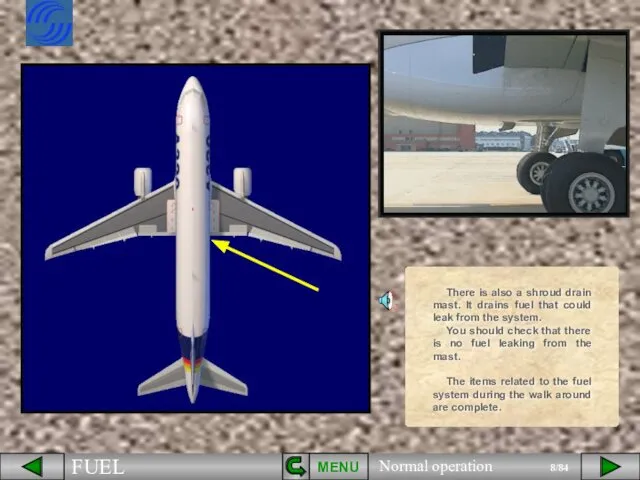
- 8. MENU There is also a shroud drain mast. It drains fuel that could leak from the
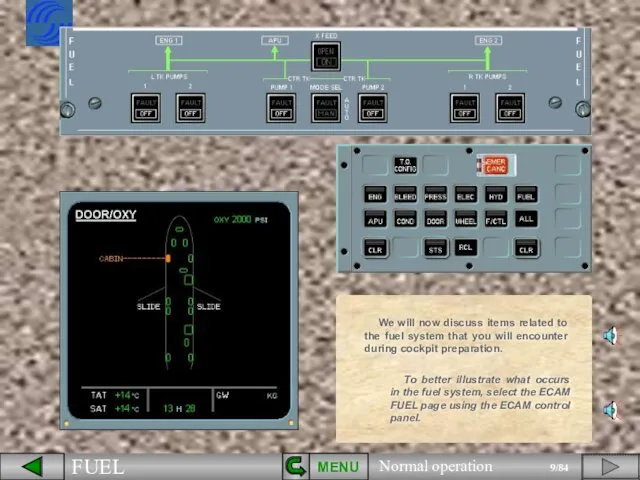
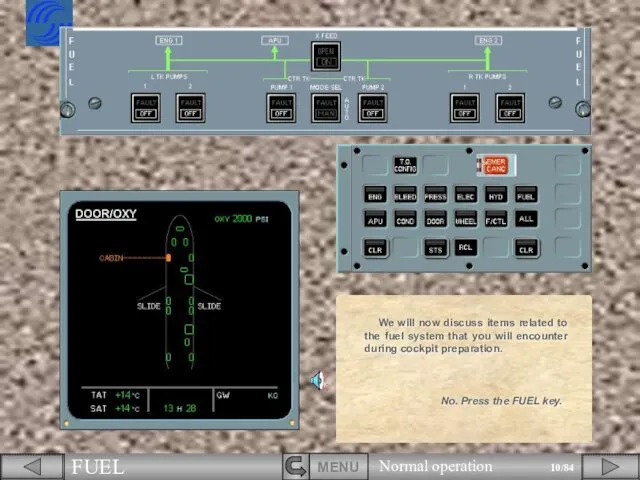
- 9. MENU We will now discuss items related to the fuel system that you will encounter during
- 10. We will now discuss items related to the fuel system that you will encounter during cockpit
- 11. We will now discuss items related to the fuel system that you will encounter during cockpit
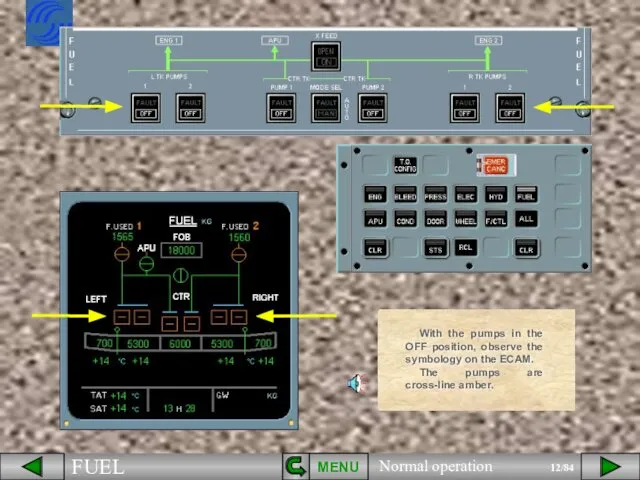
- 12. MENU With the pumps in the OFF position, observe the symbology on the ECAM. The pumps
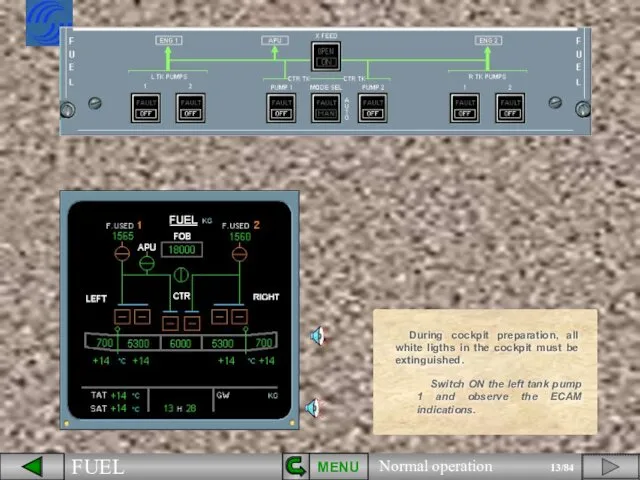
- 13. MENU During cockpit preparation, all white ligths in the cockpit must be extinguished. Switch ON the
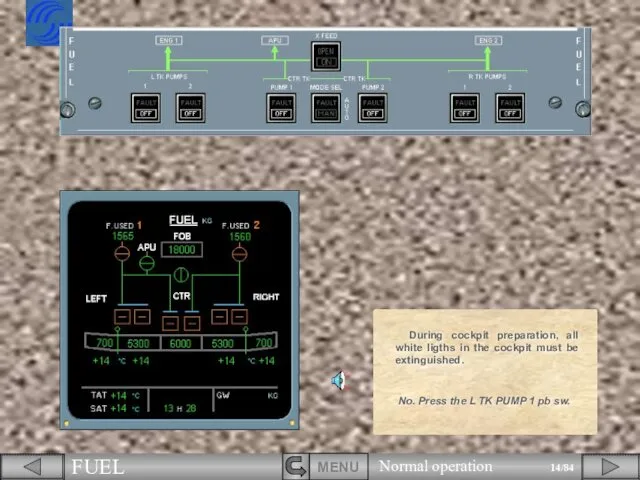
- 14. During cockpit preparation, all white ligths in the cockpit must be extinguished. No. Press the L
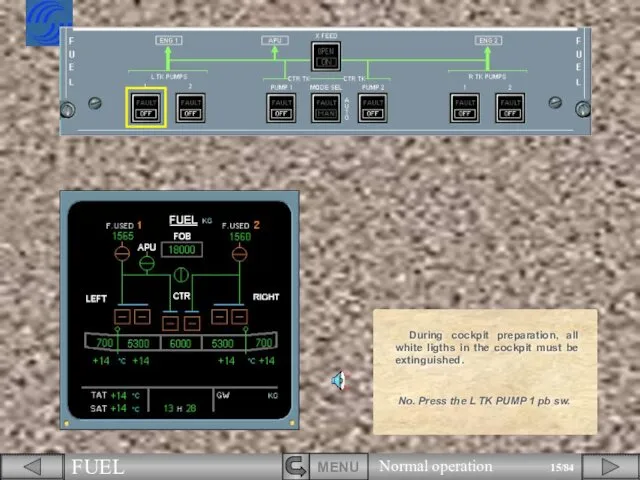
- 15. During cockpit preparation, all white ligths in the cockpit must be extinguished. No. Press the L
- 16. MENU The left tank pump 1 on the ECAM FUEL page is in-line green, indicating that
- 17. The left tank pump 1 on the ECAM FUEL page is in-line green, indicating that the
- 18. The left tank pump 1 on the ECAM FUEL page is in-line green, indicating that the
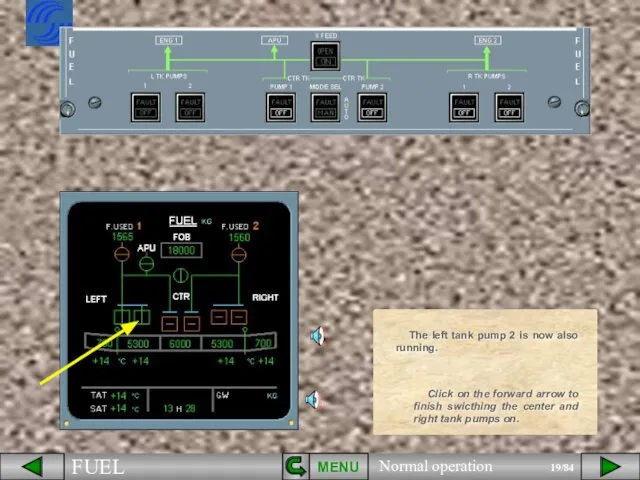
- 19. MENU The left tank pump 2 is now also running. Click on the forward arrow to
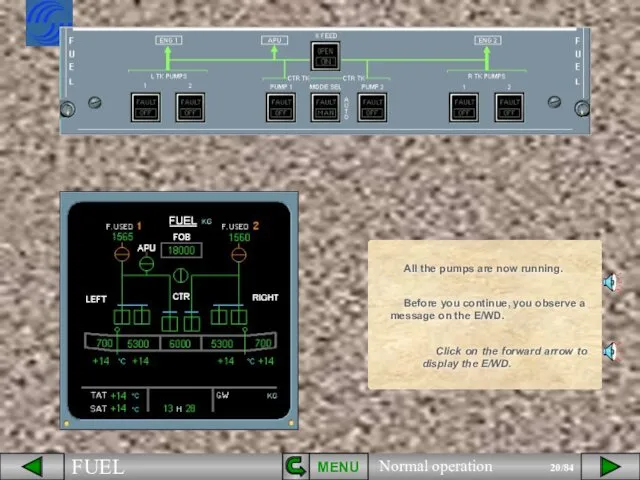
- 20. MENU All the pumps are now running. Click on the forward arrow to display the E/WD.
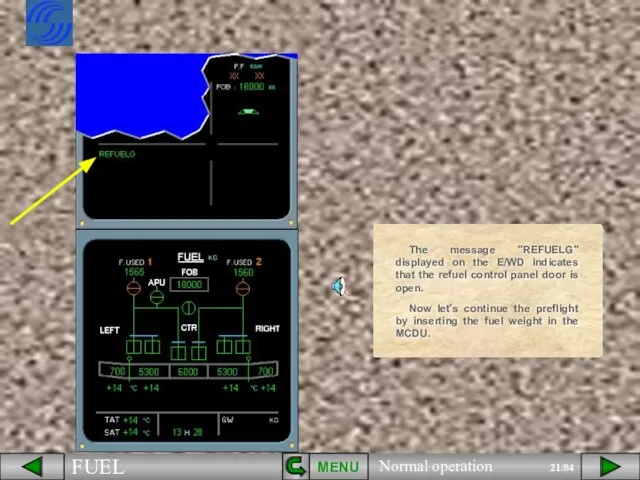
- 21. MENU The message "REFUELG" displayed on the E/WD indicates that the refuel control panel door is
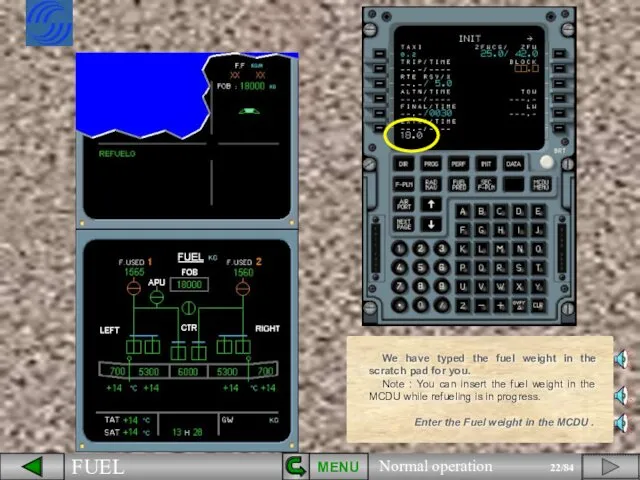
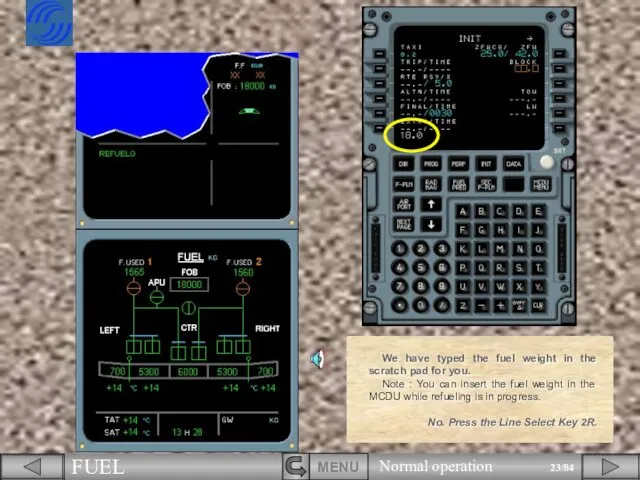
- 22. MENU We have typed the fuel weight in the scratch pad for you. Note : You
- 23. We have typed the fuel weight in the scratch pad for you. Note : You can
- 24. We have typed the fuel weight in the scratch pad for you. Note : You can
- 25. MENU Click on the forward arrow to continue.
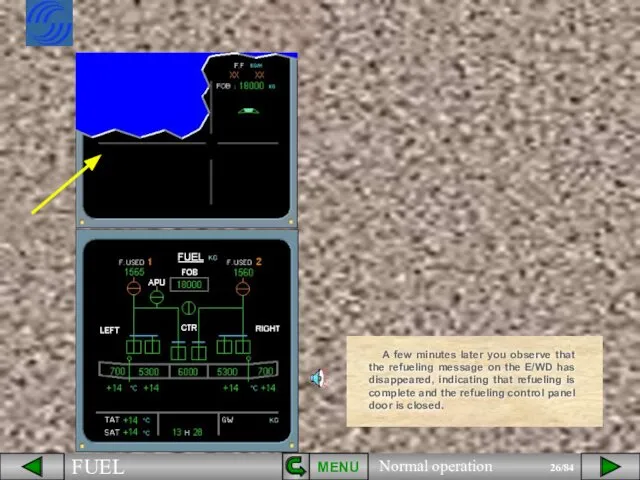
- 26. MENU A few minutes later you observe that the refueling message on the E/WD has disappeared,
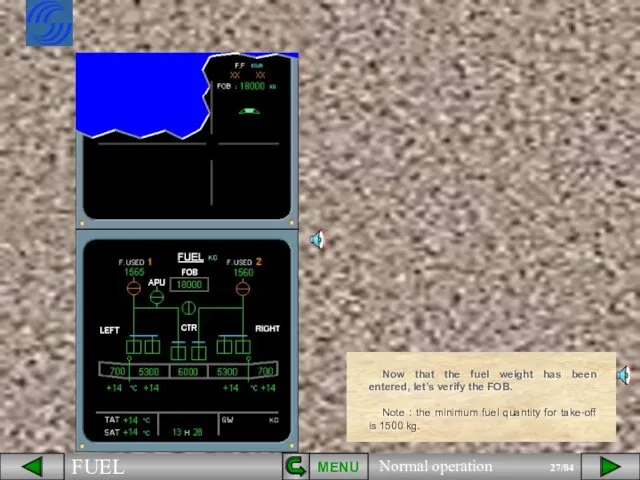
- 27. MENU Now that the fuel weight has been entered, let’s verify the FOB. Note : the
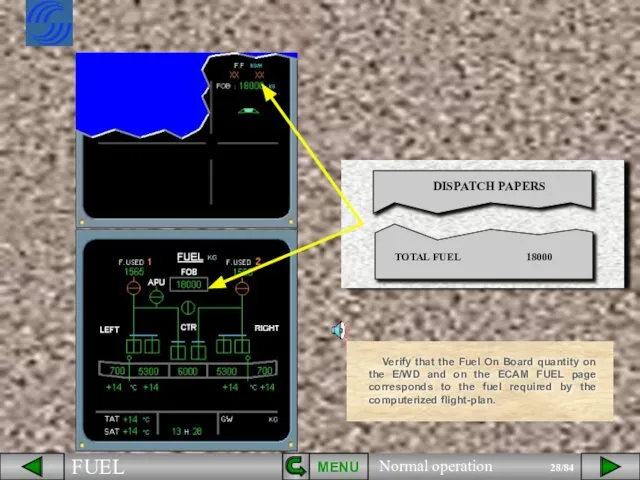
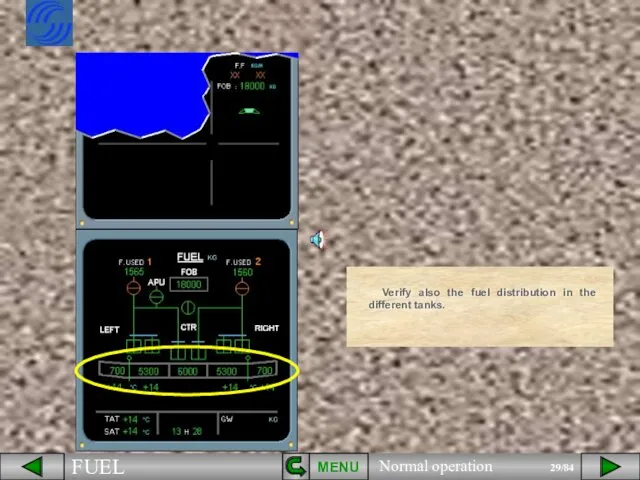
- 28. MENU Verify that the Fuel On Board quantity on the E/WD and on the ECAM FUEL
- 29. MENU Verify also the fuel distribution in the different tanks.
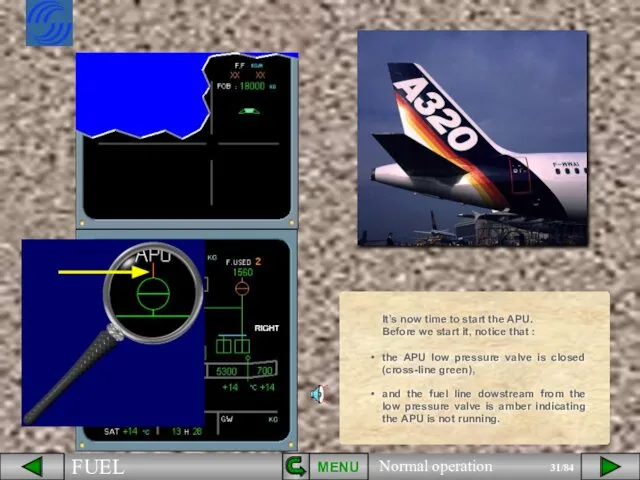
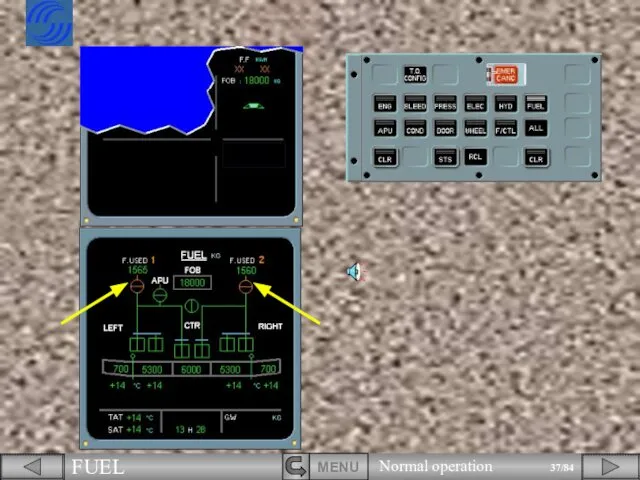
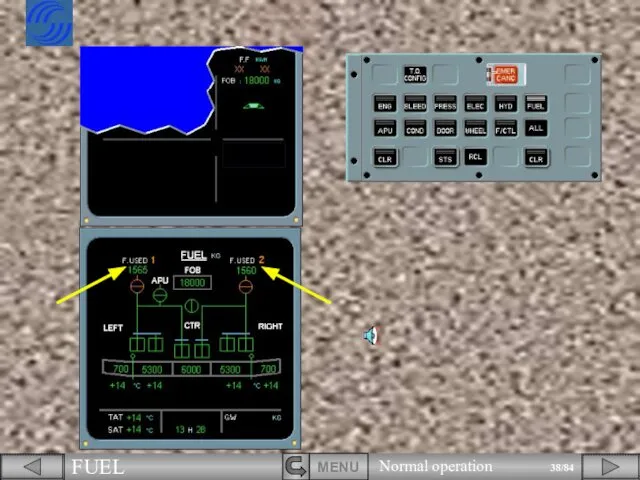
- 31. MENU and the fuel line dowstream from the low pressure valve is amber indicating the APU
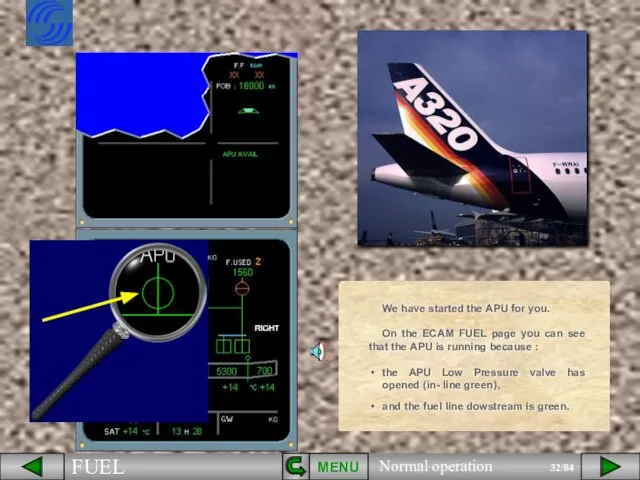
- 32. MENU We have started the APU for you. On the ECAM FUEL page you can see
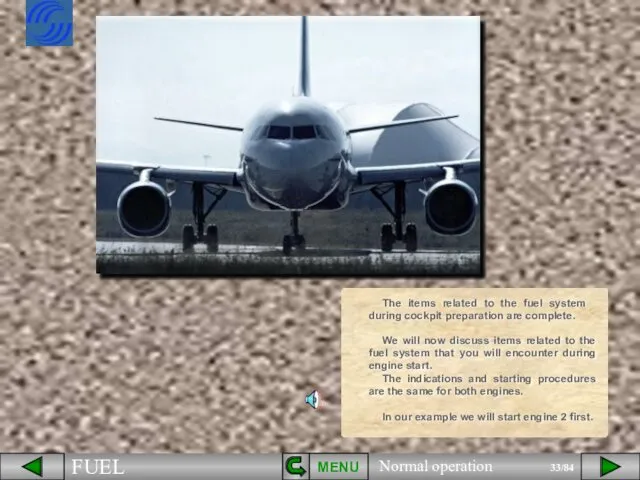
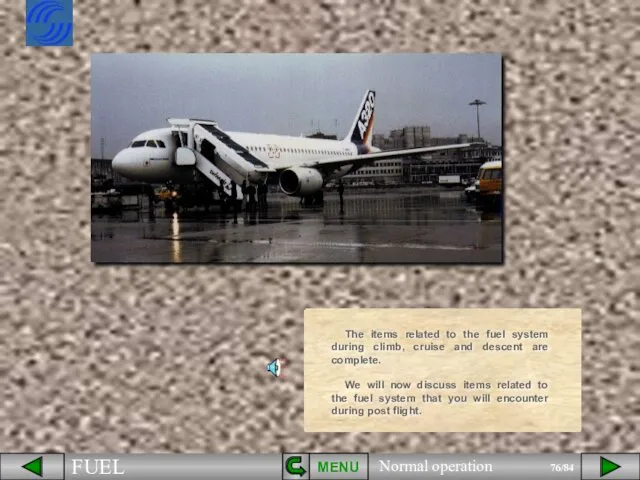
- 33. MENU The items related to the fuel system during cockpit preparation are complete. We will now
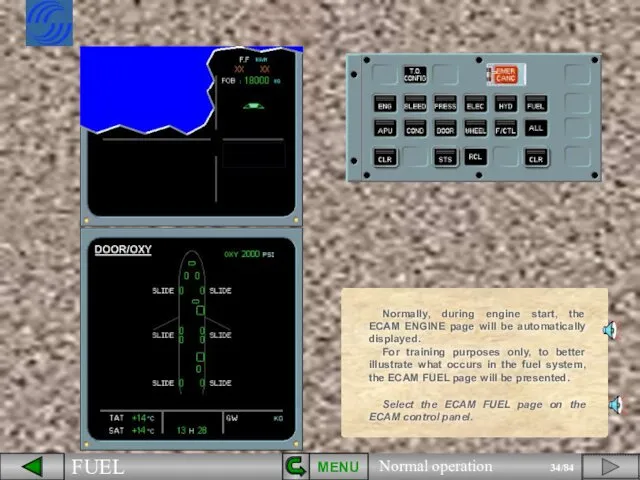
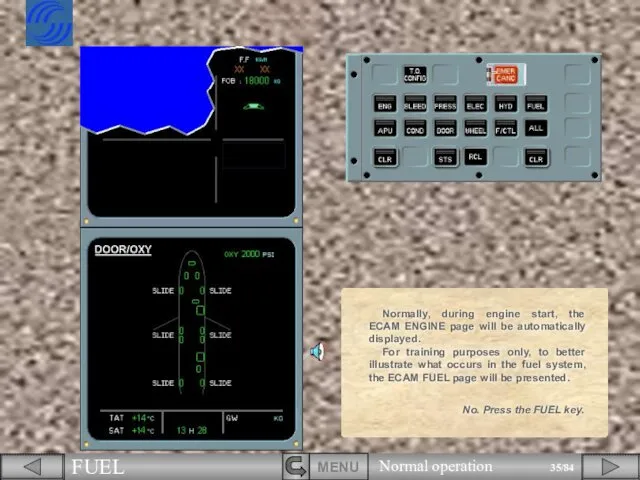
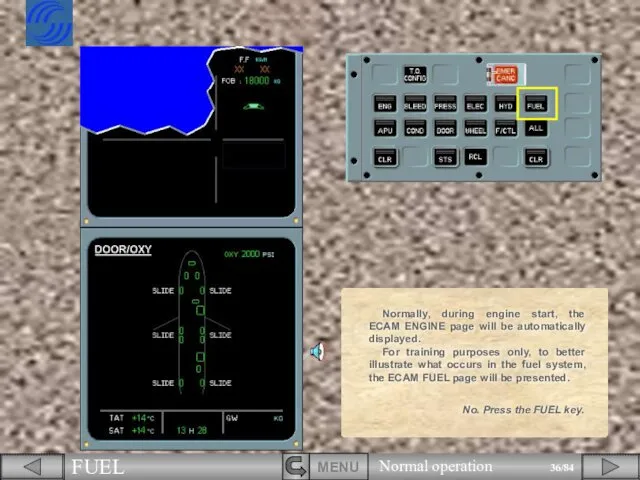
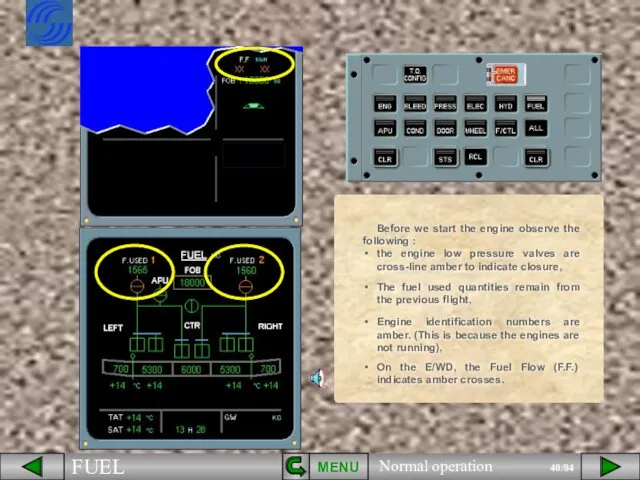
- 34. MENU Normally, during engine start, the ECAM ENGINE page will be automatically displayed. For training purposes
- 35. No. Press the FUEL key. Normally, during engine start, the ECAM ENGINE page will be automatically
- 36. No. Press the FUEL key. Normally, during engine start, the ECAM ENGINE page will be automatically
- 40. MENU
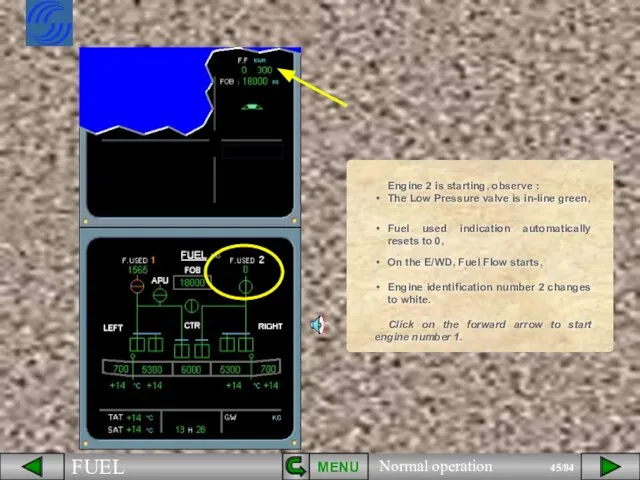
- 45. MENU Engine identification number 2 changes to white. Click on the forward arrow to start engine
- 50. MENU
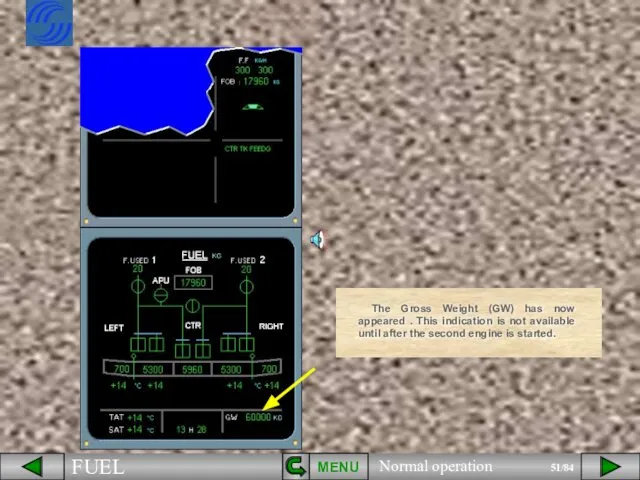
- 51. MENU The Gross Weight (GW) has now appeared . This indication is not available until after
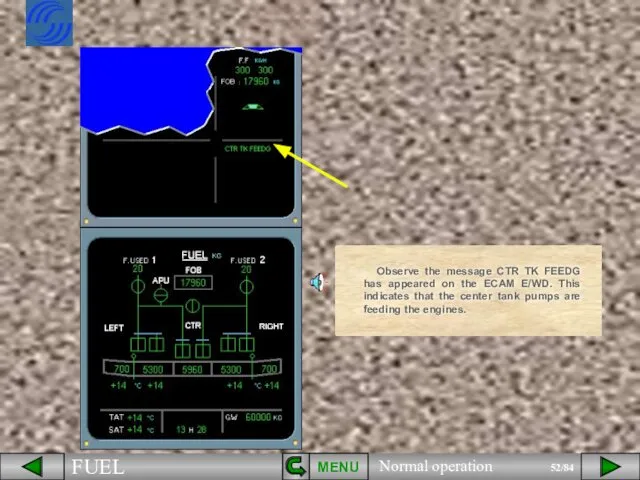
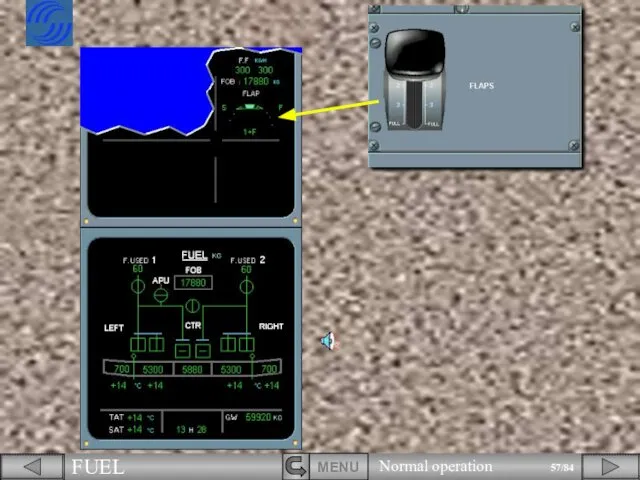
- 52. MENU Observe the message CTR TK FEEDG has appeared on the ECAM E/WD. This indicates that
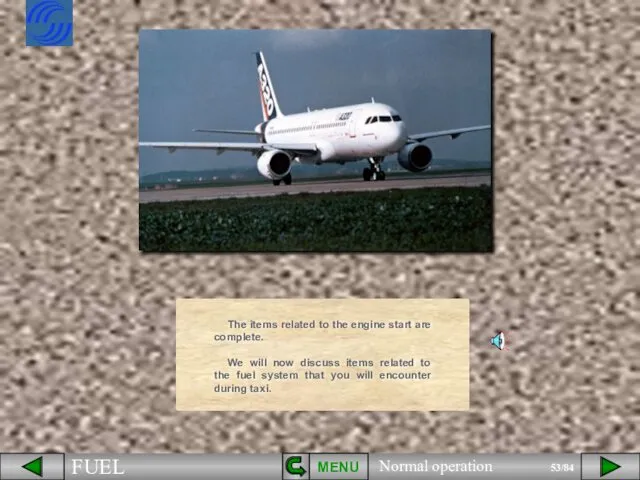
- 53. MENU The items related to the engine start are complete. We will now discuss items related
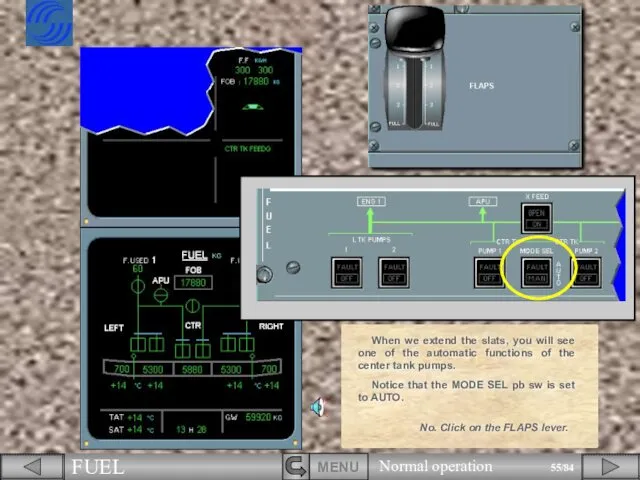
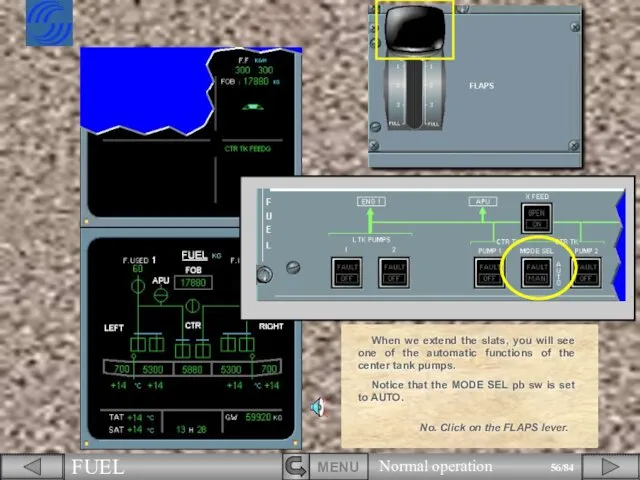
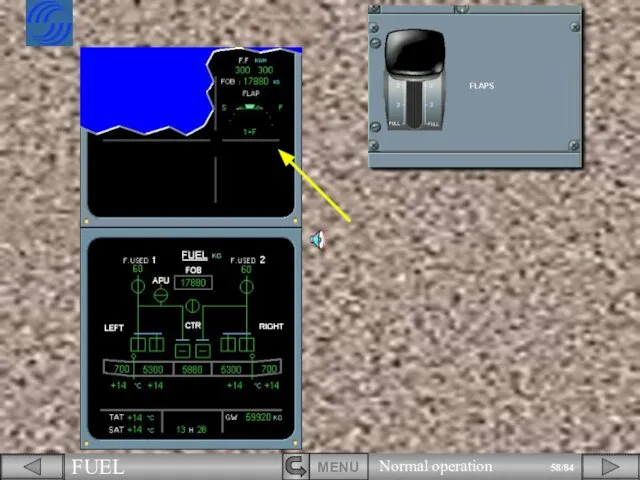
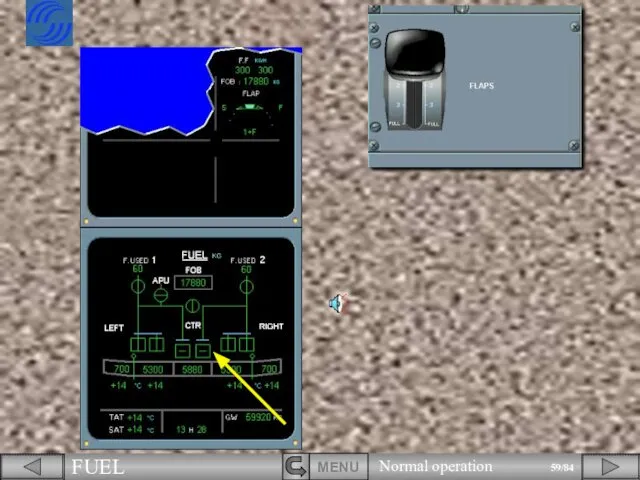
- 54. MENU Extend the slats, and observe the indications. When we extend the slats, you will see
- 55. No. Click on the FLAPS lever. When we extend the slats, you will see one of
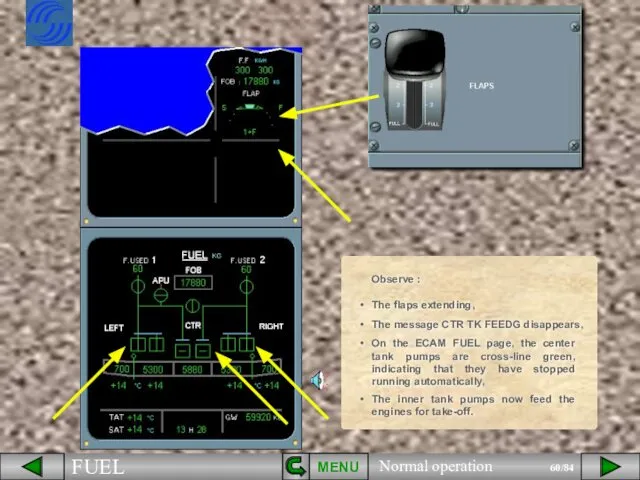
- 56. When we extend the slats, you will see one of the automatic functions of the center
- 60. MENU
- 61. MENU The items related to TAXI are complete. We will now discuss items related to the
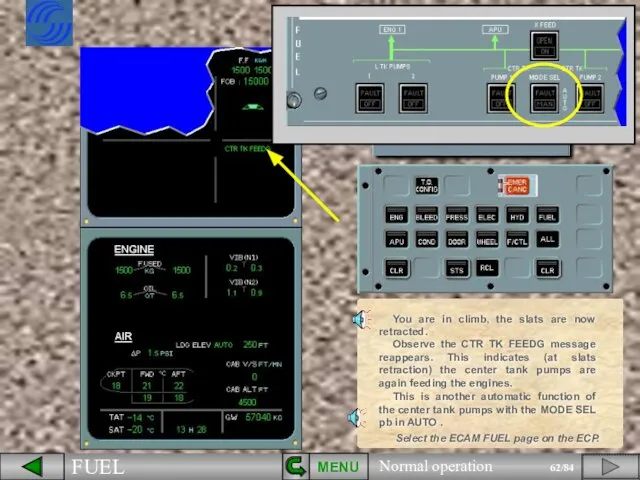
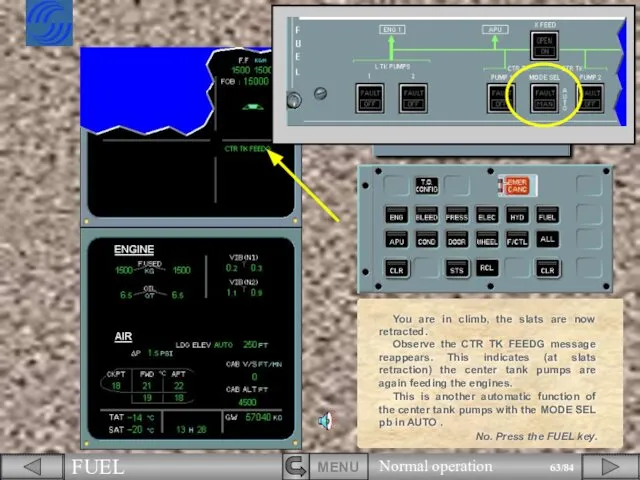
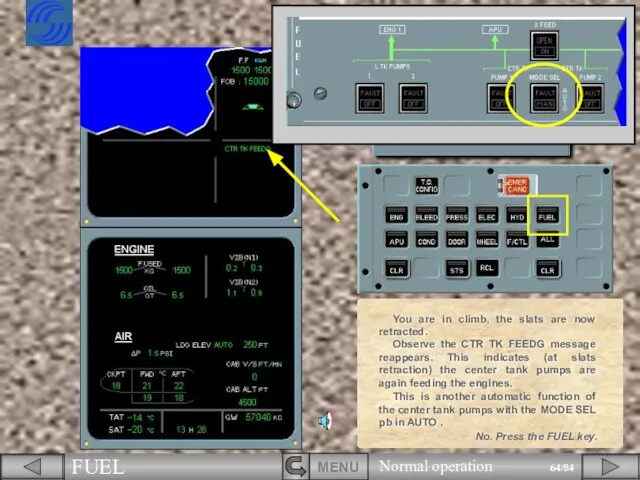
- 62. MENU You are in climb, the slats are now retracted. Observe the CTR TK FEEDG message
- 63. You are in climb, the slats are now retracted. Observe the CTR TK FEEDG message reappears.
- 64. You are in climb, the slats are now retracted. Observe the CTR TK FEEDG message reappears.
- 65. Observe the corresponding pump indications on the ECAM (in-line green). MENU
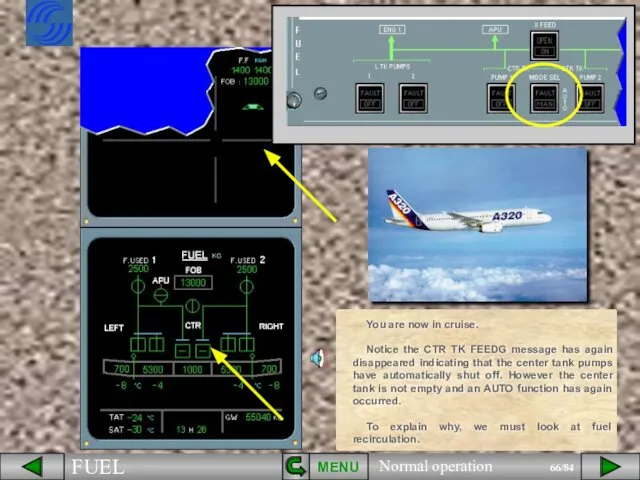
- 66. MENU You are now in cruise. Notice the CTR TK FEEDG message has again disappeared indicating
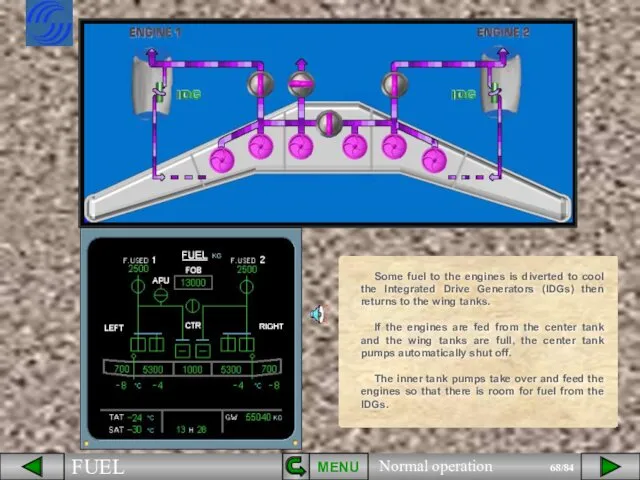
- 68. MENU Some fuel to the engines is diverted to cool the Integrated Drive Generators (IDGs) then
- 69. After the inner tank pumps have fed approximately 500 kg of fuel, the center tank pumps
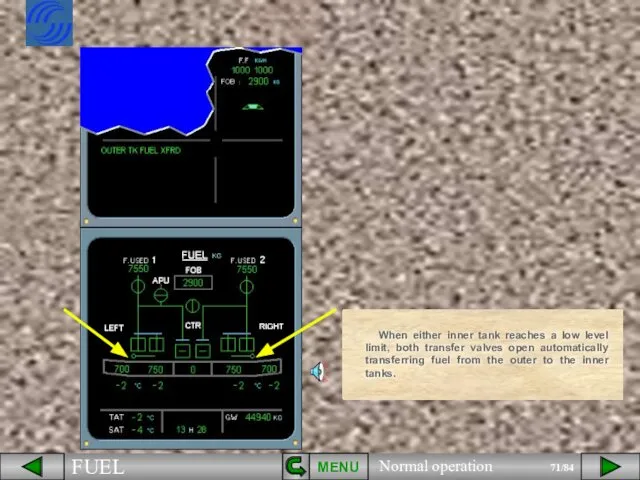
- 70. You are in descent. To better illustrate the remaining indications, we will keep the ECAM FUEL
- 71. When either inner tank reaches a low level limit, both transfer valves open automatically transferring fuel
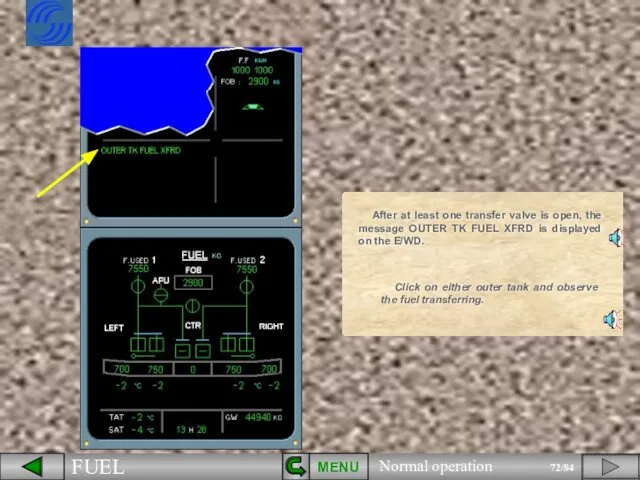
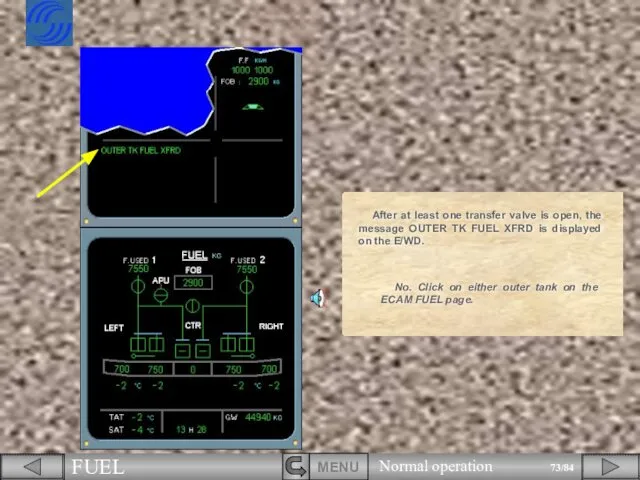
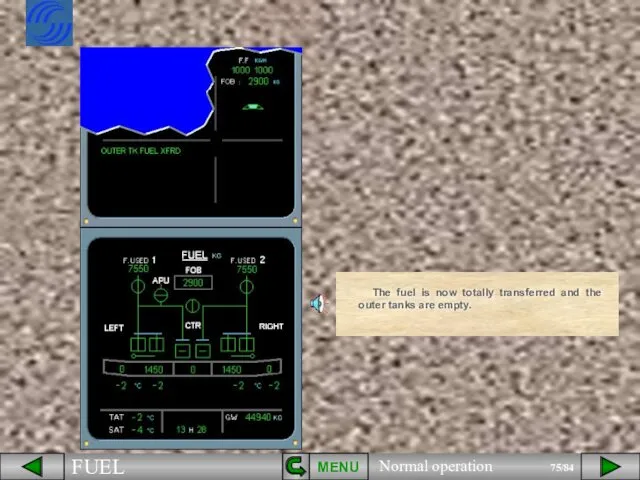
- 72. MENU Click on either outer tank and observe the fuel transferring. After at least one transfer
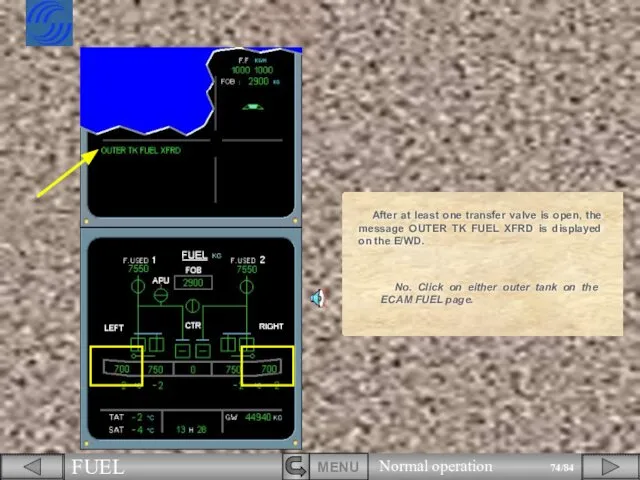
- 73. No. Click on either outer tank on the ECAM FUEL page. After at least one transfer
- 74. No. Click on either outer tank on the ECAM FUEL page. After at least one transfer
- 75. The fuel is now totally transferred and the outer tanks are empty. MENU
- 76. MENU The items related to the fuel system during climb, cruise and descent are complete. We
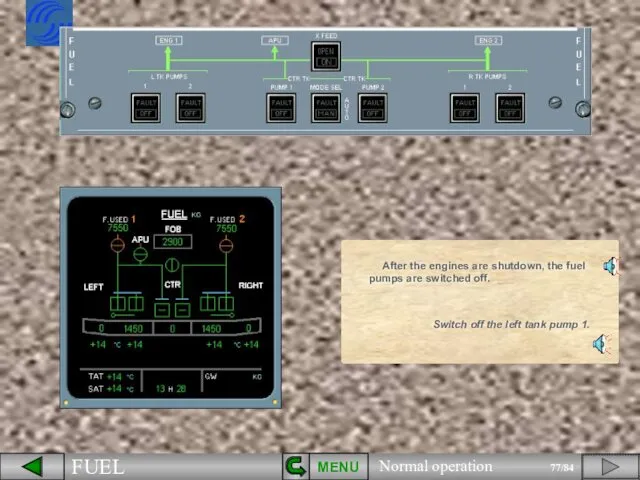
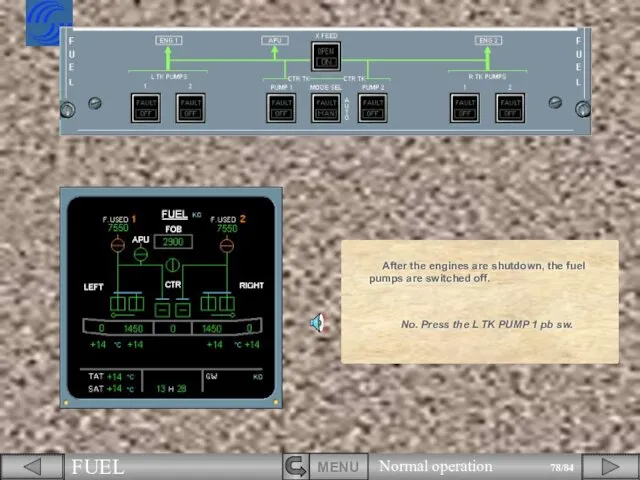
- 77. MENU After the engines are shutdown, the fuel pumps are switched off. Switch off the left
- 78. After the engines are shutdown, the fuel pumps are switched off. No. Press the L TK
- 79. After the engines are shutdown, the fuel pumps are switched off. No. Press the L TK
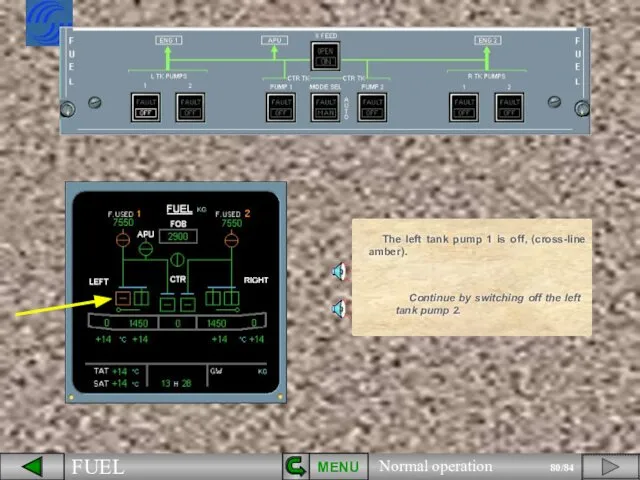
- 80. MENU Continue by switching off the left tank pump 2. The left tank pump 1 is
- 81. No. Press the L TK PUMP 2 pb sw. The left tank pump 1 is off,
- 82. The left tank pump 1 is off, (cross-line amber). No. Press the L TK PUMP 2
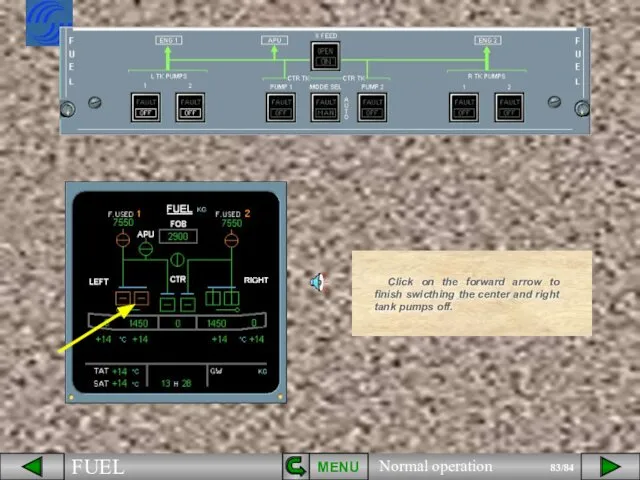
- 83. MENU Click on the forward arrow to finish swicthing the center and right tank pumps off.
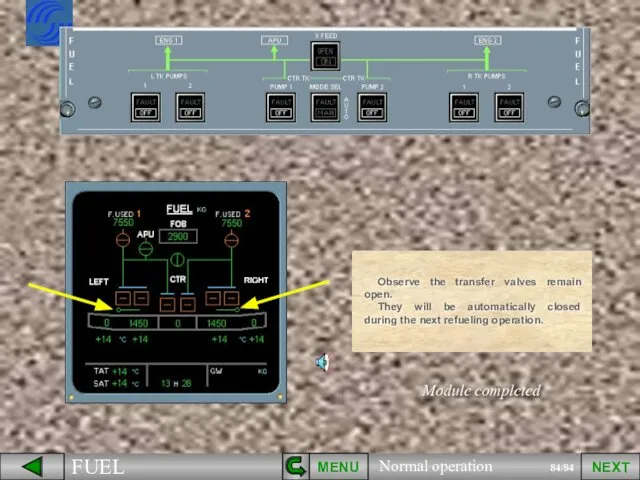
- 84. Observe the transfer valves remain open. They will be automatically closed during the next refueling operation.
- 86. Скачать презентацию
MENU
During the walk around, you must check several items which are
MENU
During the walk around, you must check several items which are
MENU
Fuel can be measured manually by the magnetic fuel level indicators
MENU
Fuel can be measured manually by the magnetic fuel level indicators

MENU
We are looking at the water drain valve in the right
MENU
We are looking at the water drain valve in the right
MENU
You should check that the REFUEL panel access door is closed.
A
MENU
You should check that the REFUEL panel access door is closed.
A
MENU
Note : Another refueling point can be installed under the left
MENU
Note : Another refueling point can be installed under the left
MENU
There is one surge tank connected to the outer tank in
MENU
There is one surge tank connected to the outer tank in
MENU
There is also a shroud drain mast. It drains fuel that
MENU
There is also a shroud drain mast. It drains fuel that
MENU
We will now discuss items related to the fuel system that
MENU
We will now discuss items related to the fuel system that
We will now discuss items related to the fuel system that
We will now discuss items related to the fuel system that

We will now discuss items related to the fuel system that
We will now discuss items related to the fuel system that
MENU
With the pumps in the OFF position, observe the symbology on
MENU
With the pumps in the OFF position, observe the symbology on
MENU
During cockpit preparation, all white ligths in the cockpit must be
MENU
During cockpit preparation, all white ligths in the cockpit must be
During cockpit preparation, all white ligths in the cockpit must be
During cockpit preparation, all white ligths in the cockpit must be
During cockpit preparation, all white ligths in the cockpit must be
During cockpit preparation, all white ligths in the cockpit must be

MENU
The left tank pump 1 on the ECAM FUEL page is
MENU
The left tank pump 1 on the ECAM FUEL page is

The left tank pump 1 on the ECAM FUEL page is
The left tank pump 1 on the ECAM FUEL page is

The left tank pump 1 on the ECAM FUEL page is
The left tank pump 1 on the ECAM FUEL page is
MENU
The left tank pump 2 is now also running.
Click on the
MENU
The left tank pump 2 is now also running.
Click on the
MENU
All the pumps are now running.
Click on the forward arrow to
MENU
All the pumps are now running.
Click on the forward arrow to
MENU
The message "REFUELG" displayed on the E/WD indicates that the refuel
MENU
The message "REFUELG" displayed on the E/WD indicates that the refuel
MENU
We have typed the fuel weight in the scratch pad for
MENU
We have typed the fuel weight in the scratch pad for
We have typed the fuel weight in the scratch pad for
We have typed the fuel weight in the scratch pad for

We have typed the fuel weight in the scratch pad for
We have typed the fuel weight in the scratch pad for

MENU
Click on the forward arrow to continue.
MENU
Click on the forward arrow to continue.
MENU
A few minutes later you observe that the refueling message on
MENU
A few minutes later you observe that the refueling message on
MENU
Now that the fuel weight has been entered, let’s verify the
MENU
Now that the fuel weight has been entered, let’s verify the
MENU
Verify that the Fuel On Board quantity on the E/WD and
MENU
Verify that the Fuel On Board quantity on the E/WD and
MENU
Verify also the fuel distribution in the different tanks.
MENU
Verify also the fuel distribution in the different tanks.
MENU
and the fuel line dowstream from the low pressure valve is
MENU
and the fuel line dowstream from the low pressure valve is
MENU
We have started the APU for you.
On the ECAM FUEL page
MENU
We have started the APU for you.
On the ECAM FUEL page
MENU
The items related to the fuel system during cockpit preparation are
MENU
The items related to the fuel system during cockpit preparation are
MENU
Normally, during engine start, the ECAM ENGINE page will be automatically
MENU
Normally, during engine start, the ECAM ENGINE page will be automatically
No. Press the FUEL key.
Normally, during engine start, the ECAM ENGINE
No. Press the FUEL key.
Normally, during engine start, the ECAM ENGINE
No. Press the FUEL key.
Normally, during engine start, the ECAM ENGINE
No. Press the FUEL key.
Normally, during engine start, the ECAM ENGINE
MENU
MENU


MENU
Engine identification number 2 changes to white.
Click on the forward arrow
MENU
Engine identification number 2 changes to white.
Click on the forward arrow


MENU
MENU
MENU
The Gross Weight (GW) has now appeared . This indication is
MENU
The Gross Weight (GW) has now appeared . This indication is
MENU
Observe the message CTR TK FEEDG has appeared on the ECAM
MENU
Observe the message CTR TK FEEDG has appeared on the ECAM
MENU
The items related to the engine start are complete.
We will now
MENU
The items related to the engine start are complete.
We will now

MENU
Extend the slats, and observe the indications.
When we extend the slats,
MENU
Extend the slats, and observe the indications.
When we extend the slats,
No. Click on the FLAPS lever.
When we extend the slats, you
No. Click on the FLAPS lever.
When we extend the slats, you
When we extend the slats, you will see one of the
When we extend the slats, you will see one of the
MENU
MENU
MENU
The items related to TAXI are complete.
We will now discuss items
MENU
The items related to TAXI are complete.
We will now discuss items
MENU
You are in climb, the slats are now retracted.
Observe the CTR
MENU
You are in climb, the slats are now retracted.
Observe the CTR
You are in climb, the slats are now retracted.
Observe the CTR
You are in climb, the slats are now retracted.
Observe the CTR
You are in climb, the slats are now retracted.
Observe the CTR
You are in climb, the slats are now retracted.
Observe the CTR

Observe the corresponding pump indications on the ECAM (in-line green).
MENU
Observe the corresponding pump indications on the ECAM (in-line green).
MENU
MENU
You are now in cruise.
Notice the CTR TK FEEDG message has
MENU
You are now in cruise.
Notice the CTR TK FEEDG message has
MENU
Some fuel to the engines is diverted to cool the Integrated
MENU
Some fuel to the engines is diverted to cool the Integrated
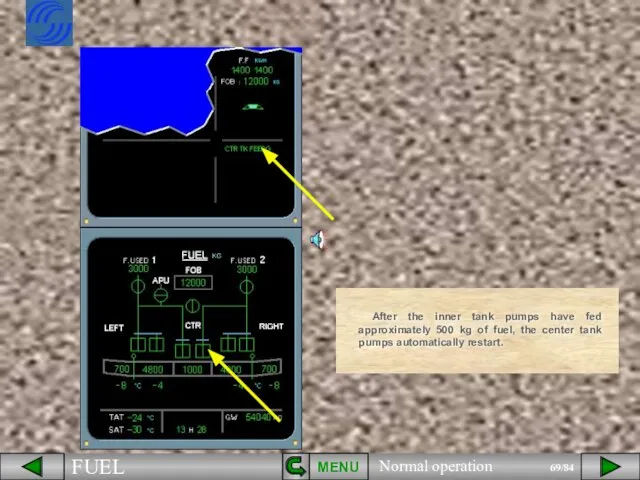
After the inner tank pumps have fed approximately 500 kg of
After the inner tank pumps have fed approximately 500 kg of

You are in descent.
To better illustrate the remaining indications, we will
You are in descent.
To better illustrate the remaining indications, we will
When either inner tank reaches a low level limit, both transfer
When either inner tank reaches a low level limit, both transfer
MENU
Click on either outer tank and observe the fuel transferring.
After at
MENU
Click on either outer tank and observe the fuel transferring.
After at
No. Click on either outer tank on the ECAM FUEL page.
After
No. Click on either outer tank on the ECAM FUEL page.
After
No. Click on either outer tank on the ECAM FUEL page.
After
No. Click on either outer tank on the ECAM FUEL page.
After
The fuel is now totally transferred and the outer tanks are
The fuel is now totally transferred and the outer tanks are
MENU
The items related to the fuel system during climb, cruise and
MENU
The items related to the fuel system during climb, cruise and
MENU
After the engines are shutdown, the fuel pumps are switched off.
Switch
MENU
After the engines are shutdown, the fuel pumps are switched off.
Switch
After the engines are shutdown, the fuel pumps are switched off.
No.
After the engines are shutdown, the fuel pumps are switched off.
No.

After the engines are shutdown, the fuel pumps are switched off.
No.
After the engines are shutdown, the fuel pumps are switched off.
No.
MENU
Continue by switching off the left tank pump 2.
The left tank
MENU
Continue by switching off the left tank pump 2.
The left tank

No. Press the L TK PUMP 2 pb sw.
The left tank
No. Press the L TK PUMP 2 pb sw.
The left tank

The left tank pump 1 is off, (cross-line amber).
No. Press the
The left tank pump 1 is off, (cross-line amber).
No. Press the
MENU
Click on the forward arrow to finish swicthing the center and
MENU
Click on the forward arrow to finish swicthing the center and
Observe the transfer valves remain open.
They will be automatically closed during
Observe the transfer valves remain open.
They will be automatically closed during
 There is/ There are
 Конкурс «Интерактивная мозаика» сайт http://pedsovet.su Козлова Елена Владимировна МОУ СОШ №10. Г. Североморск Мурманская область учит
 Thomas Alva Edison The “Father” of Light Bulb
 Отчет по психолого-педагогической практике. The sights of London
 Choosing a profession people with disabilities
 Story about Chicken Licken
 Презентация к уроку английского языка "Edinburgh (Эдинбург)" - скачать
  Sir Isaac “Nature and Nature's laws lay hid in night God said ‘Let Newton be!’ And all was light.” - Alexander Pope
  What should I do
 Punctuation in writing
 Geographical Position of the USA Юркова Ирина 10-Б класс
  Сравнительная степень прилагательных
 English. Test
 Go vs Play vs Do
 Презентация к уроку английского языка "At the post office" - скачать
  Legends of Great Britain
 Технологии систематизации и обобщения знаний на уроках английского языка с применением цифровых образовательных ресурсов По
 About myself and my family
 Philosophy of Existentialism
 Подготовила: учитель английского языка Горбунова О.В. МБОУ СОШ № 28
 Country I want to visit is Canada. Канада
 Essays for and against
 Flowers are all around
 Tempo and the European Language Portfolio Chris Barker
 If you could only do one thing for the rest of your life, what would it be?
 Food
Food  Прилагательные
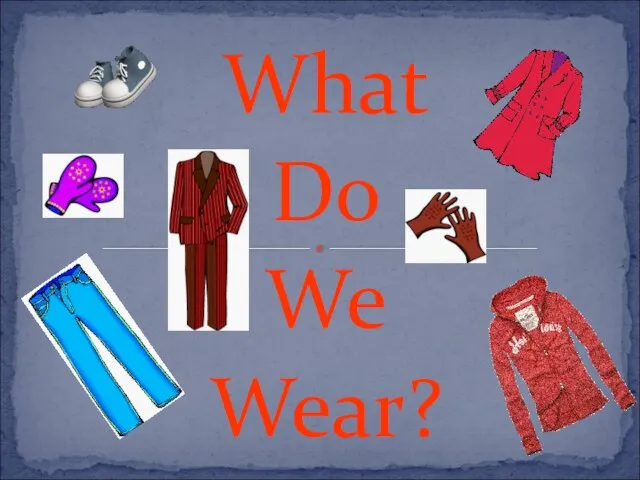 What What Do We Wear?