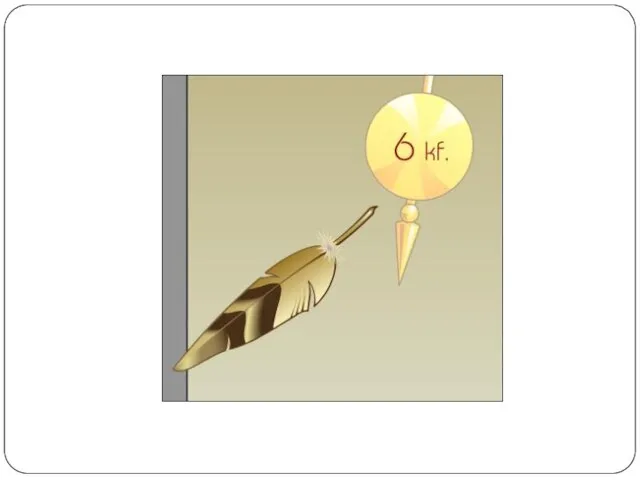
- Pendulum with a pen

Содержание
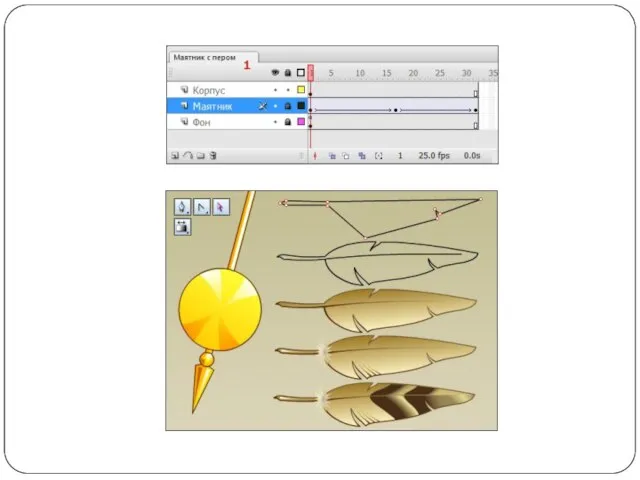
- 2. Step 1. Create a new layer over a layer "Pendulum" and call it - "Pen". By
- 4. By means of the instrument of the free transformation of Free Transform Tool (Q), "Pen" set
- 5. Step 3. As a binding element between a pen and a pendulum at us the thin
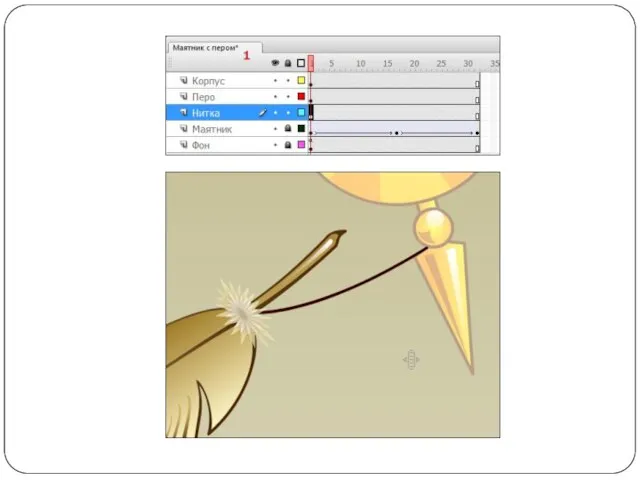
- 6. We will create a new layer between layers "Pendulum" and "Pen" in which by means of
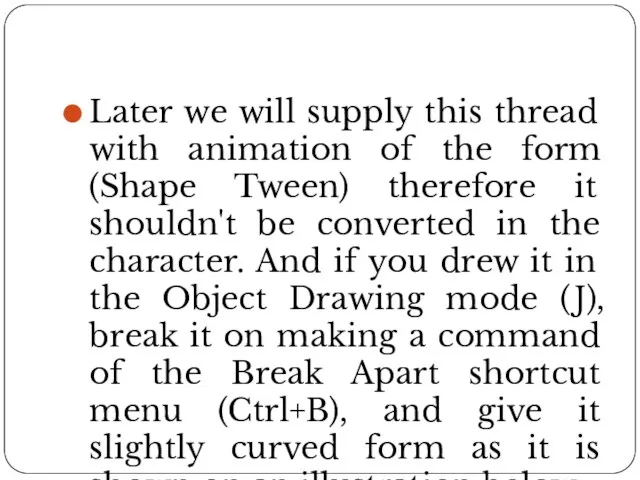
- 7. Later we will supply this thread with animation of the form (Shape Tween) therefore it shouldn't
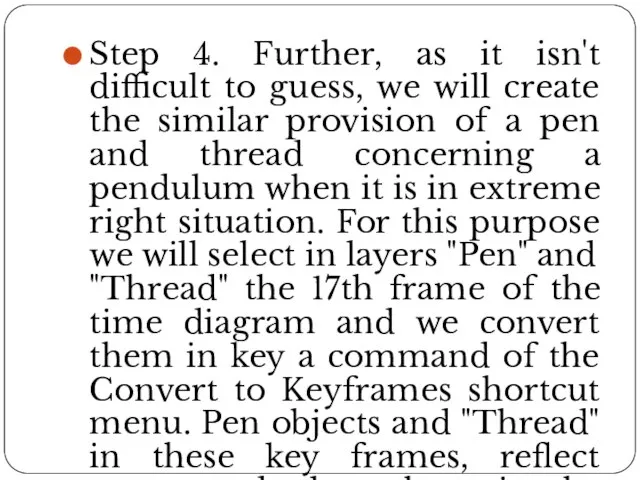
- 9. Step 4. Further, as it isn't difficult to guess, we will create the similar provision of
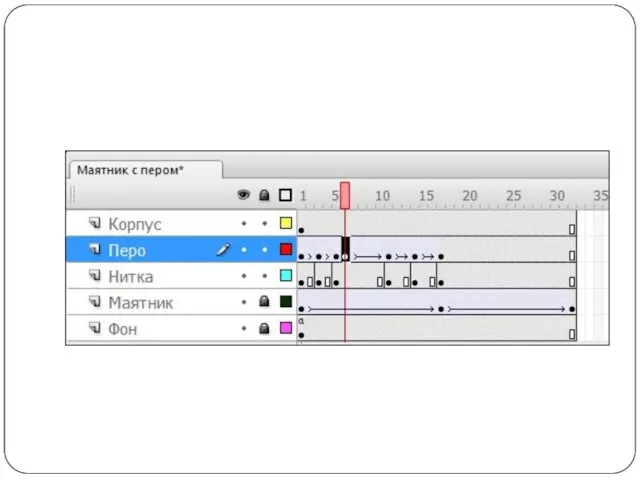
- 11. Step 5. Now it is possible to start creation of new key frames between 1 and
- 12. Besides that the pendulum already began at this time the movement to the right, the pen
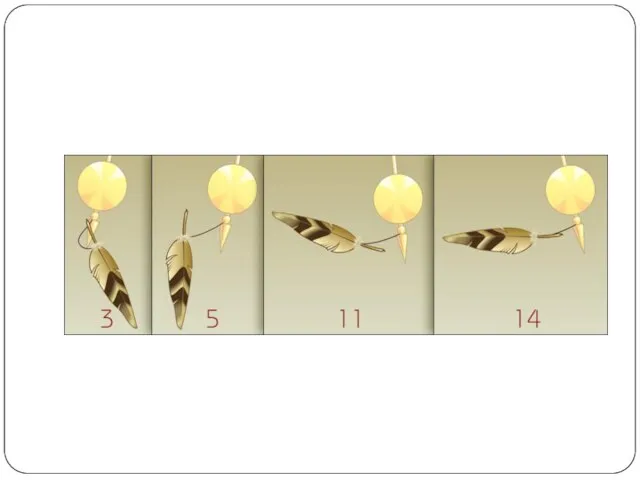
- 13. The thread connecting them will lose a tension and will take more curved form. In a
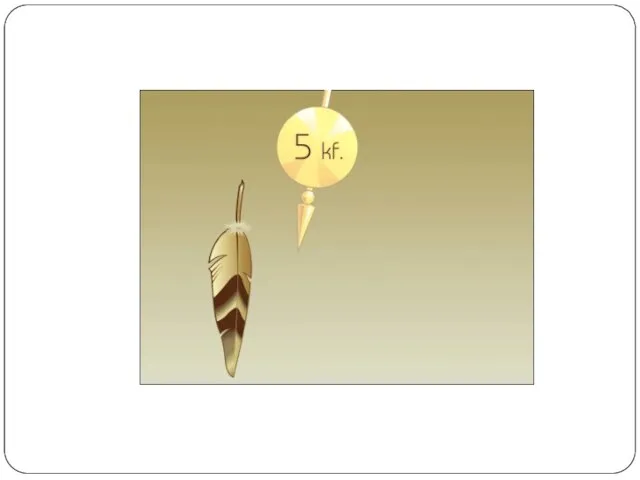
- 15. Step 5. You, for certain, paid attention that a pen object, agrees to the diagram given
- 16. In this case (if it isn't part of a creative intention), the additional key frame will
- 17. Delete animation of movement from 5 key frames if you assigned it, convert the 6th frame
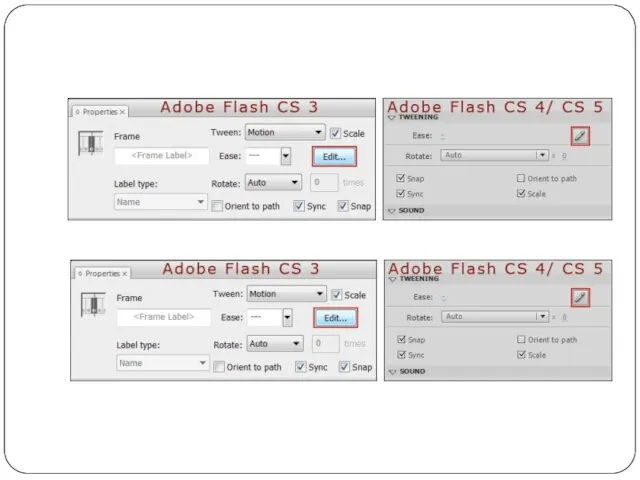
- 20. Step 6. Now in a layer "Pen" we will assign animation of type to all key
- 21. It is better to make it now that then it was simpler to decide on the
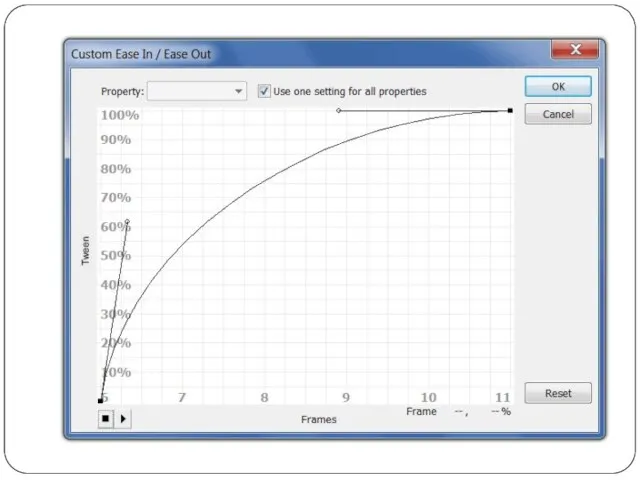
- 22. The curve of speed has in the beginning, at 6 key frames, the steep slope and
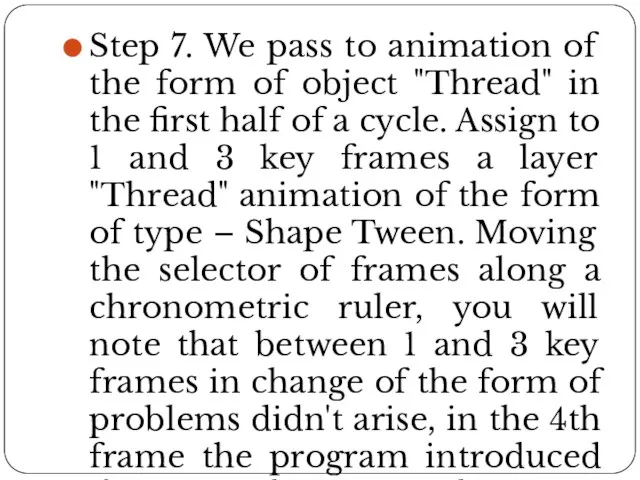
- 26. Step 7. We pass to animation of the form of object "Thread" in the first half
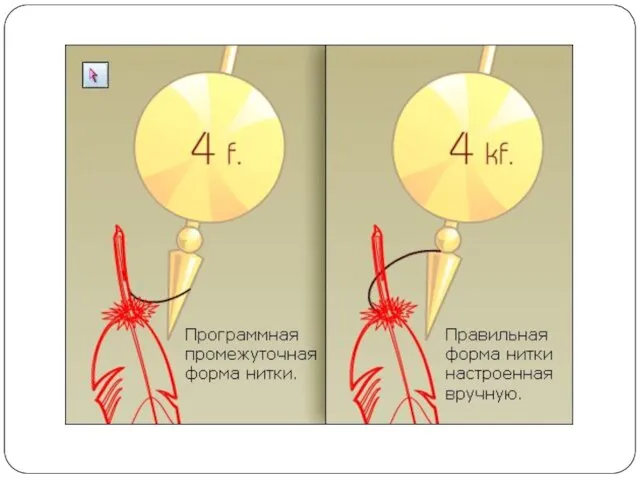
- 27. Peaks of the line traded places and, any of them, didn't appear in the right place.
- 29. Step 8. Select all key frames with 5 on 14 and set to them animation of
- 31. Скачать презентацию
Step 1. Create a new layer over a layer "Pendulum" and
Step 1. Create a new layer over a layer "Pendulum" and

By means of the instrument of the free transformation of Free
By means of the instrument of the free transformation of Free
Step 3. As a binding element between a pen and a
Step 3. As a binding element between a pen and a
We will create a new layer between layers "Pendulum" and "Pen"
We will create a new layer between layers "Pendulum" and "Pen"
Later we will supply this thread with animation of the form
Later we will supply this thread with animation of the form
Step 4. Further, as it isn't difficult to guess, we will
Step 4. Further, as it isn't difficult to guess, we will
Step 5. Now it is possible to start creation of new
Step 5. Now it is possible to start creation of new
Besides that the pendulum already began at this time the movement
Besides that the pendulum already began at this time the movement
The thread connecting them will lose a tension and will take
The thread connecting them will lose a tension and will take
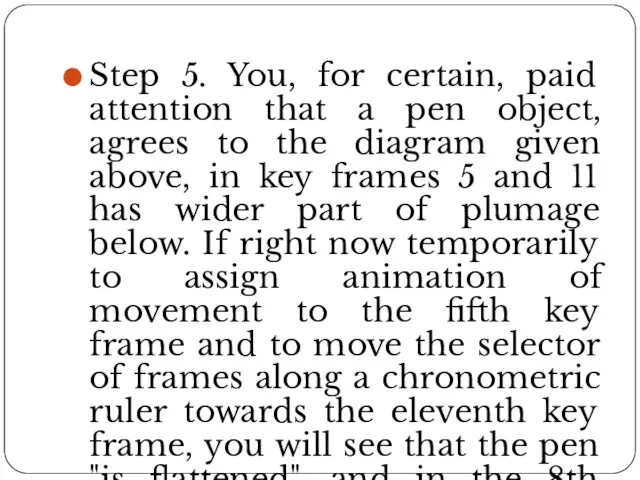
Step 5. You, for certain, paid attention that a pen object,
Step 5. You, for certain, paid attention that a pen object,
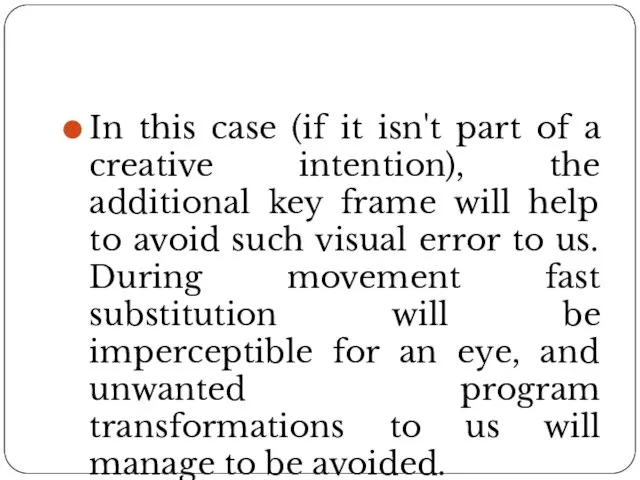
In this case (if it isn't part of a creative intention),
In this case (if it isn't part of a creative intention),
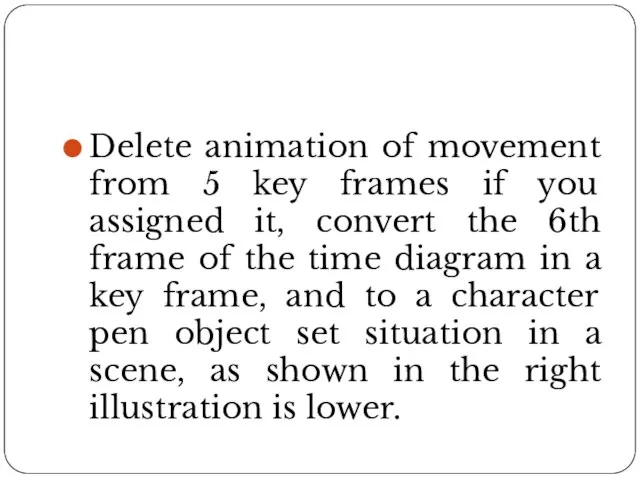
Delete animation of movement from 5 key frames if you assigned
Delete animation of movement from 5 key frames if you assigned
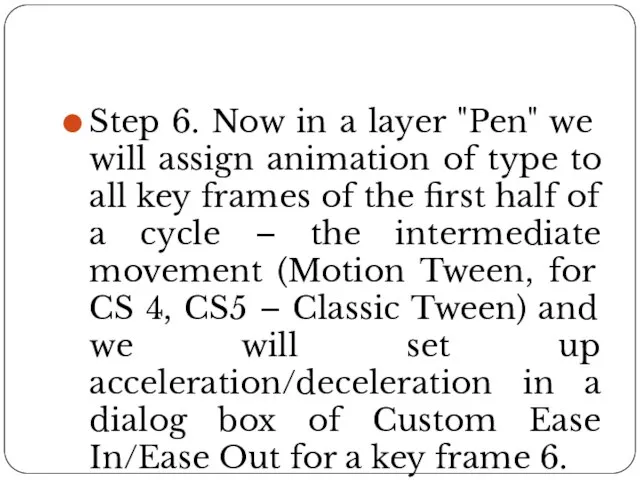
Step 6. Now in a layer "Pen" we will assign animation
Step 6. Now in a layer "Pen" we will assign animation
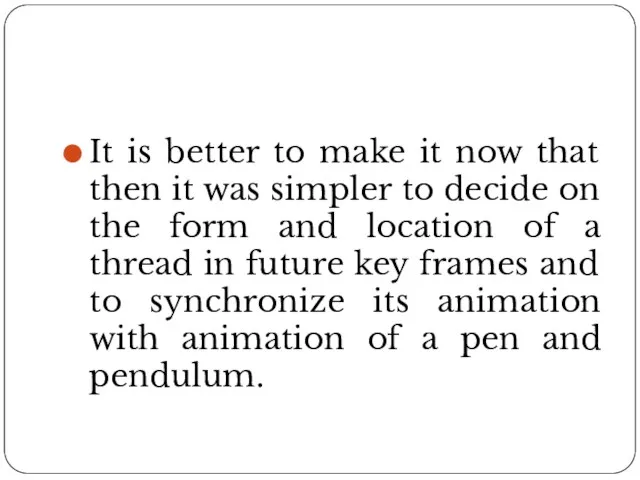
It is better to make it now that then it was
It is better to make it now that then it was
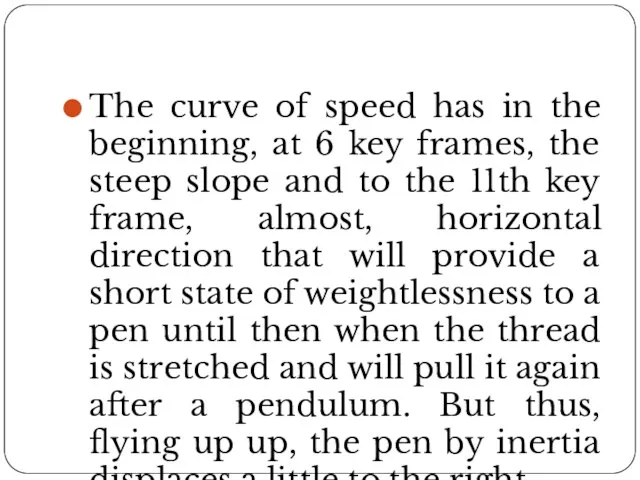
The curve of speed has in the beginning, at 6 key
The curve of speed has in the beginning, at 6 key
Step 7. We pass to animation of the form of object
Step 7. We pass to animation of the form of object
Peaks of the line traded places and, any of them, didn't
Peaks of the line traded places and, any of them, didn't
Step 8. Select all key frames with 5 on 14 and
Step 8. Select all key frames with 5 on 14 and
 MS Exсel. Построение диаграмм
 Интернет – технология будущего
 Пример структуры данных модели предметной области
 Кодирование информации ( шифровка информации ) Подготовила: Беломестнова Марина Вадимовна учитель начальных классов МОУ ООШ № 1
 Программа курса “Введение в тестирование ПО”. Статическое тестирование
 Интерактивная игра По страницам русской классики (10 – 11 класс)
 ПК комплектующие
 Онлайн или не онлайн – вот в чем вопрос
 Колонки. Стили.
 Функциональные зависимости в реляционной модели данных. Декомпозиция. Нормальные формы
 Презентация Информационные технологии в ООО «Котэкс-Торг»
  Работу выполнила ученица 11 класса Гибельгаус Таня.
  Контент. Наиболее частые ошибки
 Проектирование информационных систем. Лекция 2. Аспекты разработки ИС: стандарты моделирования IDEF, стандарты планирования MRP
 ГОСТ 19.402-78. Описание программы
 Общество Интернета
 Аттестационная работа. Применение проектной и исследовательской деятельности на уроках информатики через межпредметную связь
 Защита в сети интернет
 Компьютерная безопасность
 Биороботы
 Открытый межрегиональный фестиваль информационных технологий IT-Fest в г. Севастополе. Детское научное творчество
 Устройства ввода и вывода информации. 8 класс (3)
 Instagram для работы
 Пример информационного поиска в Web of Science
 Поиск недостающей информации, сбор, анализ
 Виртуальное облако
 Інформатика. Контрольна робота 5 клас
 Портфолио проектов