- Jira Advanced - Module 1

Содержание
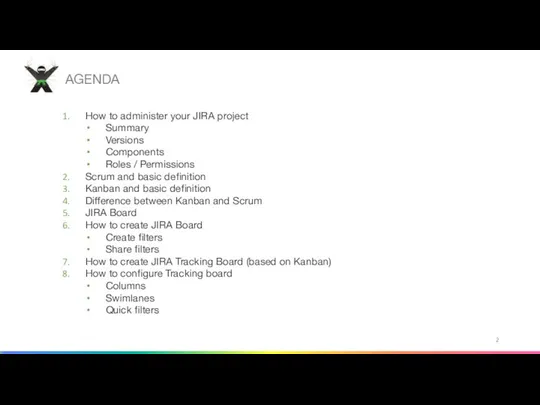
- 2. AGENDA How to administer your JIRA project Summary Versions Components Roles / Permissions Scrum and basic
- 3. HOW TO ADMINISTER YOUR JIRA PROJECT Select Projects → your Project → Administration tab 5 main
- 4. HOW TO ADMINISTER YOUR JIRA PROJECT - SUMMARY Summary – short project description Click Edit Project
- 5. HOW TO ADMINISTER YOUR JIRA PROJECT – VERSIONS In the blue area, type the 'Name‘ and
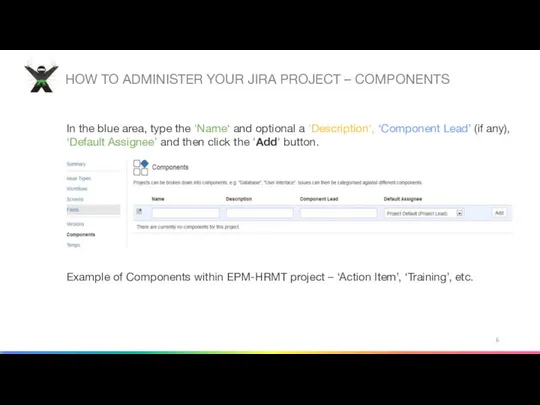
- 6. HOW TO ADMINISTER YOUR JIRA PROJECT – COMPONENTS In the blue area, type the 'Name‘ and
- 7. HOW TO ADMINISTER YOUR JIRA PROJECT – COMPONENTS Link to the list of possible components: https://kb.epam.com/display/EPMHRM/JIRA+Components
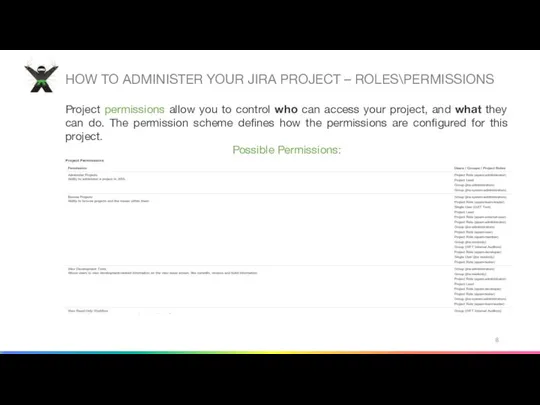
- 8. HOW TO ADMINISTER YOUR JIRA PROJECT – ROLES\PERMISSIONS Project permissions allow you to control who can
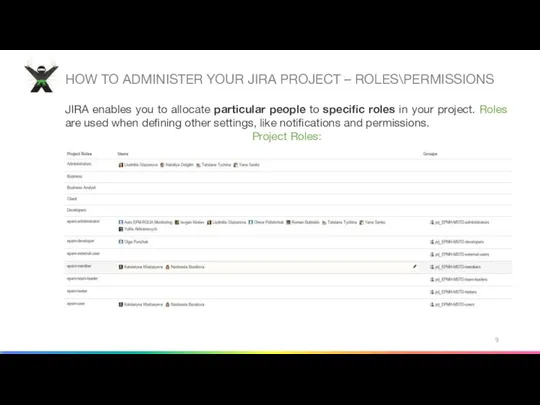
- 9. HOW TO ADMINISTER YOUR JIRA PROJECT – ROLES\PERMISSIONS JIRA enables you to allocate particular people to
- 10. SCRUM AND BASIC DEFINITIONS Scrum is an iterative and incremental agile software development framework for managing
- 11. KANBAN AND BASIC DEFINITIONS Kanban is a scheduling system for lean and just-in-time (JIT) production. Kanban
- 12. DIFFERENCE BETWEEN KANBAN AND SCRUM Time box doesn’t use for tasks and sprints in Kanban. Size
- 13. JIRA BOARDS Board displays issues from one or more projects, giving you a flexible way of
- 14. HOW TO CREATE TRACKING BOARD – CREATE FILTER All Tracking Boards are based on Filters. To
- 15. HOW TO CREATE TRACKING BOARD – SHARE FILTER IMPORTANT! For your project team members to have
- 16. HOW TO CREATE TRACKING BOARD – SHARE FILTER For example you want to share your Filter
- 17. HOW TO CREATE TRACKING BOARD (based on Kanban) To create new Tracking Dashboard the following actions
- 18. HOW TO CONFIGURE TRACKING BOARD To configure your newly created board you need to perform the
- 19. HOW TO CONFIGURE TRACKING BOARD - COLUMNS By default, each board contains three columns, called 'To
- 20. HOW TO CREATE TRACKING BOARD - SWIMLINES A swimlane is a horizontal categorisation of issues in
- 22. Скачать презентацию
AGENDA
How to administer your JIRA project
Summary
Versions
Components
Roles / Permissions
Scrum and
AGENDA
How to administer your JIRA project
Summary
Versions
Components
Roles / Permissions
Scrum and
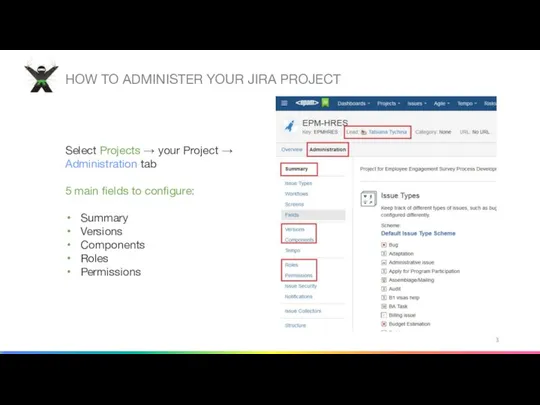
HOW TO ADMINISTER YOUR JIRA PROJECT
Select Projects → your Project →
Administration
HOW TO ADMINISTER YOUR JIRA PROJECT
Select Projects → your Project →
Administration
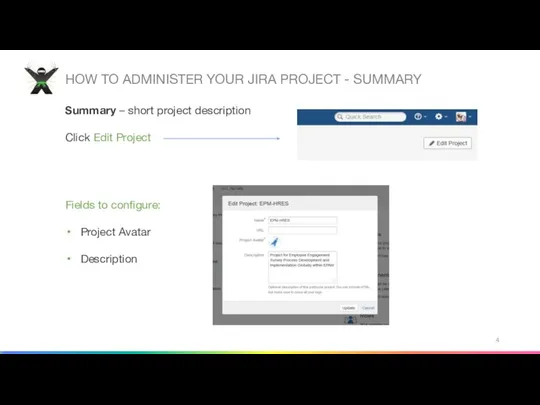
HOW TO ADMINISTER YOUR JIRA PROJECT - SUMMARY
Summary – short project
HOW TO ADMINISTER YOUR JIRA PROJECT - SUMMARY
Summary – short project
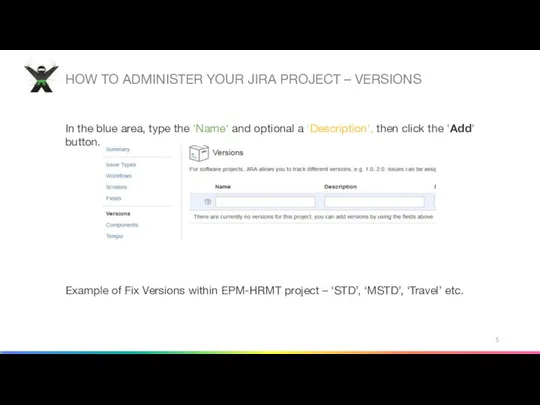
HOW TO ADMINISTER YOUR JIRA PROJECT – VERSIONS
In the blue area,
HOW TO ADMINISTER YOUR JIRA PROJECT – VERSIONS
In the blue area,
HOW TO ADMINISTER YOUR JIRA PROJECT – COMPONENTS
In the blue area,
HOW TO ADMINISTER YOUR JIRA PROJECT – COMPONENTS
In the blue area,
HOW TO ADMINISTER YOUR JIRA PROJECT – COMPONENTS
Link to the list
HOW TO ADMINISTER YOUR JIRA PROJECT – COMPONENTS
Link to the list
HOW TO ADMINISTER YOUR JIRA PROJECT – ROLES\PERMISSIONS
Project permissions allow you
HOW TO ADMINISTER YOUR JIRA PROJECT – ROLES\PERMISSIONS
Project permissions allow you
HOW TO ADMINISTER YOUR JIRA PROJECT – ROLES\PERMISSIONS
JIRA enables you to
HOW TO ADMINISTER YOUR JIRA PROJECT – ROLES\PERMISSIONS
JIRA enables you to
SCRUM AND BASIC DEFINITIONS
Scrum is an iterative and incremental agile software
SCRUM AND BASIC DEFINITIONS
Scrum is an iterative and incremental agile software
KANBAN AND BASIC DEFINITIONS
Kanban is a scheduling system for lean and
KANBAN AND BASIC DEFINITIONS
Kanban is a scheduling system for lean and

DIFFERENCE BETWEEN KANBAN AND SCRUM
Time box doesn’t use for tasks and
DIFFERENCE BETWEEN KANBAN AND SCRUM
Time box doesn’t use for tasks and

JIRA BOARDS
Board displays issues from one or more projects, giving you
JIRA BOARDS
Board displays issues from one or more projects, giving you
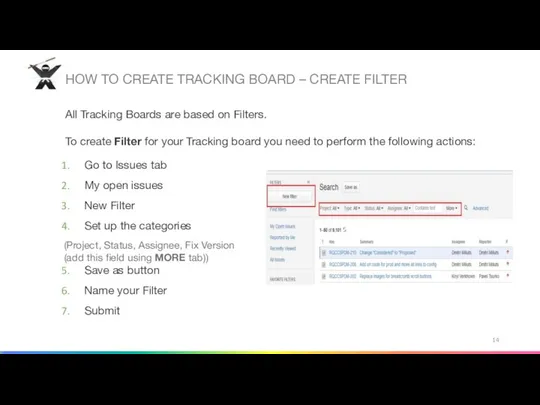
HOW TO CREATE TRACKING BOARD – CREATE FILTER
All Tracking Boards are
HOW TO CREATE TRACKING BOARD – CREATE FILTER
All Tracking Boards are
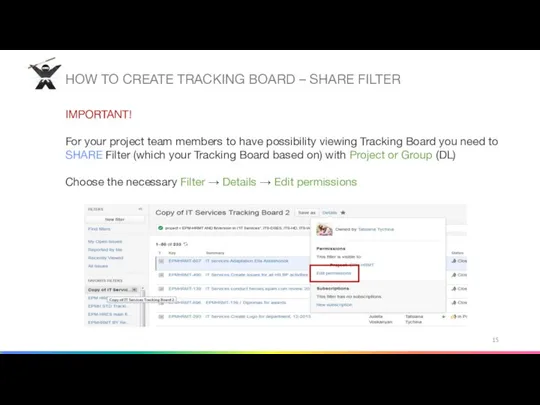
HOW TO CREATE TRACKING BOARD – SHARE FILTER
IMPORTANT!
For your project team
HOW TO CREATE TRACKING BOARD – SHARE FILTER
IMPORTANT!
For your project team
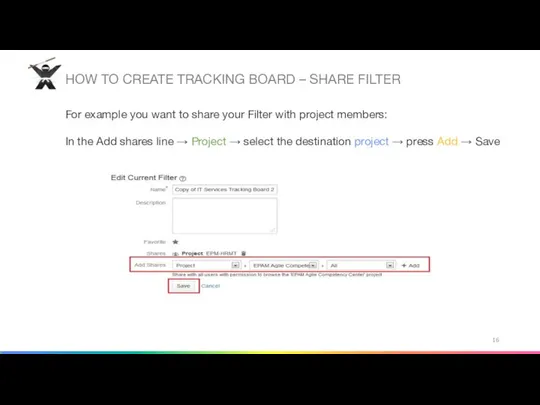
HOW TO CREATE TRACKING BOARD – SHARE FILTER
For example you want
HOW TO CREATE TRACKING BOARD – SHARE FILTER
For example you want
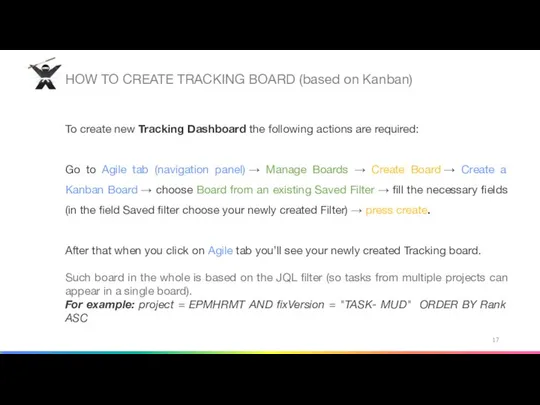
HOW TO CREATE TRACKING BOARD (based on Kanban)
To create new Tracking
HOW TO CREATE TRACKING BOARD (based on Kanban)
To create new Tracking
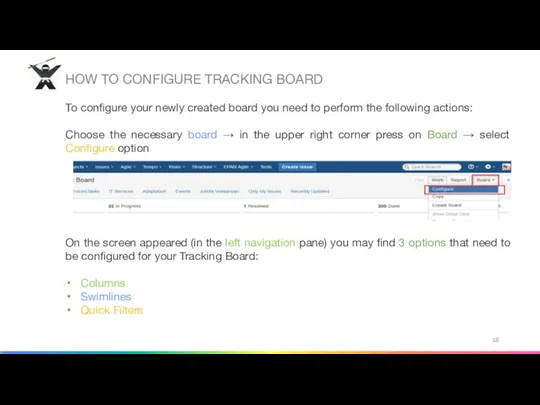
HOW TO CONFIGURE TRACKING BOARD
To configure your newly created board you
HOW TO CONFIGURE TRACKING BOARD
To configure your newly created board you
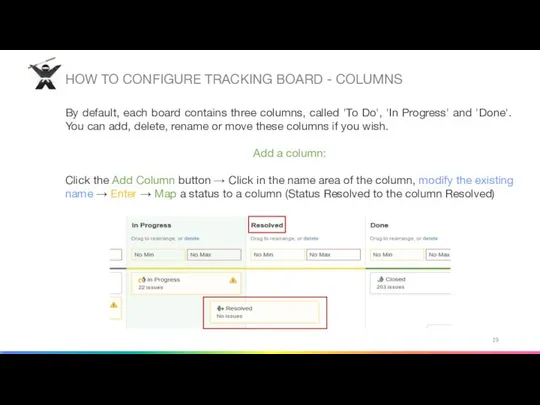
HOW TO CONFIGURE TRACKING BOARD - COLUMNS
By default, each board contains
HOW TO CONFIGURE TRACKING BOARD - COLUMNS
By default, each board contains
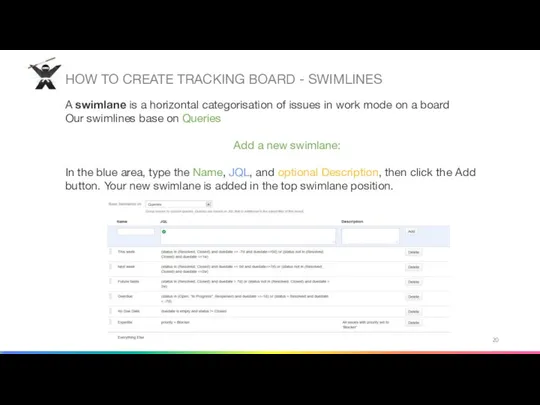
HOW TO CREATE TRACKING BOARD - SWIMLINES
A swimlane is a horizontal
HOW TO CREATE TRACKING BOARD - SWIMLINES
A swimlane is a horizontal
 Оформление проектных и исследовательских работ
 Представление целых положительных чисел в компьютере. Разрядная сетка с фиксированной точкой
 Программирование на языке Python
 Аттестационная работа. Компьютерная графика
 新編維修教材
 Система по сбору обратной связи
 Сервис онлайн голосования собственников МКД №С1-53417
 Презентация "Что такое пиксель. Масштаб изображения" - скачать презентации по Информатике
 ТЕМА 4. ОБЩИЕ ПРИНЦИПЫ ПОСТРОЕНИЯ МОДЕЛЕЙ ДАННЫХ В ГИС
  Особенности языка “SMS”
 Fluent Interface
 Cуперскалярные и суперконвейерные процессоры. (Лекция 4а)
 Презентация на тему Форматы графических файлов
  Алгоритм работы с фрагментами рисунка: поворот, наклон
 Групповая деятельность на уроках информатики
 Базы данных в Microsoft Office Access
 Безопасный интернет
 Презентация "Массив вида NxN" - скачать презентации по Информатике
 Владивостокский государственный университет экономики и сервиса Институт информатики инноваций и бизнес систем Владивосто
 Канальний рівень
 Всемирная компьютерная сеть Интернет
 Интерфейсы ПK Студент группы п12-1д Франко дмитрий
  Отраслевые информационные ресурсы
 Аттестационная работа. Образовательная программа внеурочной деятельности Триггер-технологии в PowerPoint
 ADO.Net Disconnected model For Student
 Обработка цифровых изображений Digital Image Processing
 Основы профессиональных информационных технологий
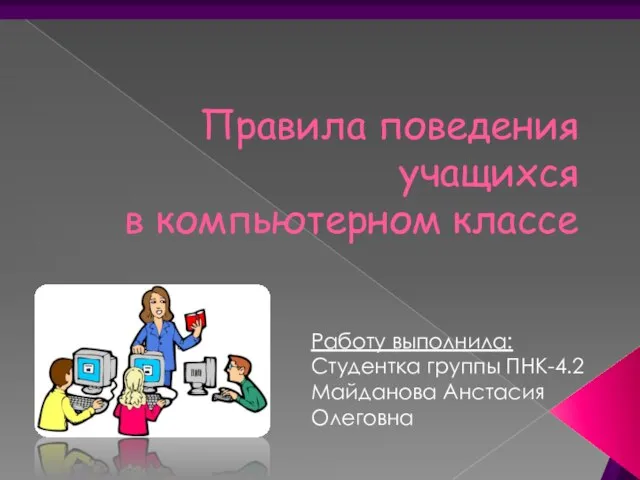 Правила поведения в компьютерном классе