- Remotely Controlling Devices

Содержание
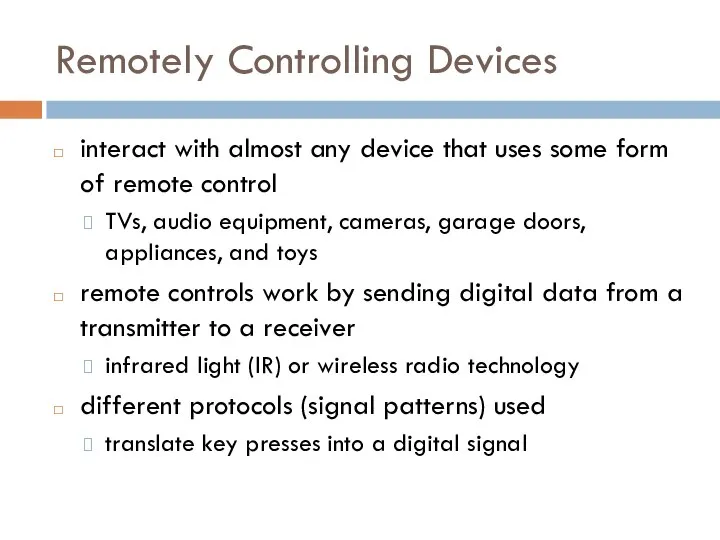
- 2. Remotely Controlling Devices interact with almost any device that uses some form of remote control TVs,
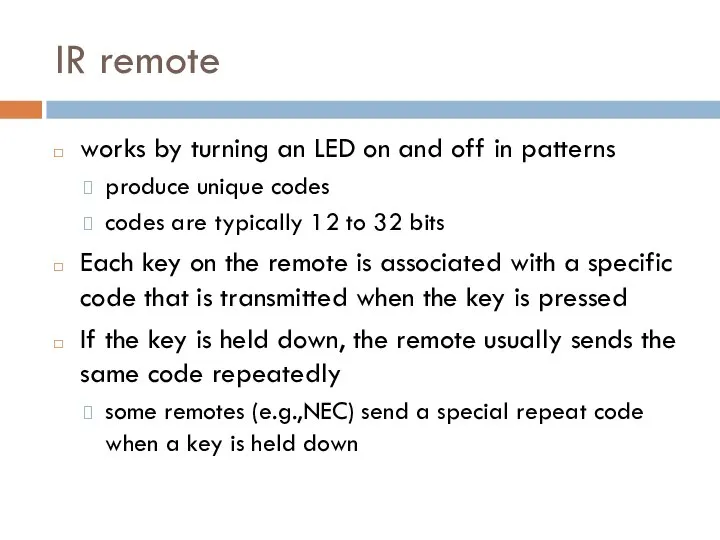
- 3. IR remote works by turning an LED on and off in patterns produce unique codes codes
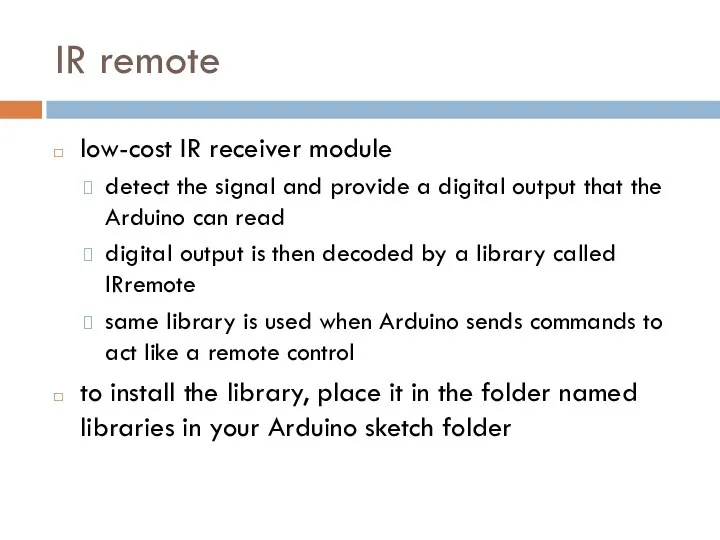
- 4. IR remote low-cost IR receiver module detect the signal and provide a digital output that the
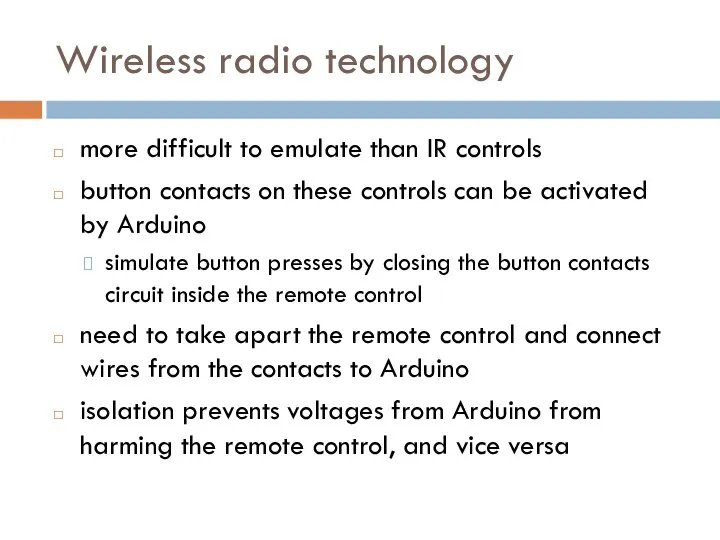
- 5. Wireless radio technology more difficult to emulate than IR controls button contacts on these controls can
- 6. Optocouplers Components called optocouplers are used to provide electrical separation between Arduino and the remote control
- 7. Responding to an IR Control Arduino responds to IR remote signals using a device called an
- 8. Responding to an IR Control #include //adds the library code to the sketch const int irReceiverPin
- 9. IRremote library #include - makes the library code available to your sketch IRrecv irrecv(irReceiverPin); - creates
- 10. IRremote library irrecv.enableIRIn(); - start listening the IR receiver irrecv.decode(&decodedSignal); - check the results of receiver
- 11. Decoding IR Control Signals #include const int RECV_PIN = 2; const int NUM_OF_BUTS = 21; long
- 12. Imitating Remote Control Signals want to use Arduino to control a TV or etc Arduino controls
- 13. Imitating Remote Control Signals irsend.sendSony(code, nob); - send code in sony format which has nob bits
- 14. Imitating Remote Control Signals LED is connected with a current-limiting resistor to increase the sending range,
- 15. Imitating Remote Control Signals #include const int NUM_OF_BUTS = 21; long BUTTON_CODES[NUM_OF_BUTS] = { 0xE0E08877, //button
- 16. Liquid crystal displays (LCD) offer a convenient and inexpensive way to provide a user interface for
- 17. LCD vs. Graphical Display create your own symbols and block graphics with a text LCD small
- 18. Connecting and Using a Text LCD Display
- 19. Connecting and Using a Text LCD Display #include // include the library code //constants for the
- 20. LCD library functions LiquidCrystal(rs, enable, d4, d5, d6, d7) - Creates a variable of type LiquidCrystal
- 21. LCD library functions lcd.setCursor(col, row) - set the location (column and row) at which subsequent text
- 22. Formatting Text #include // include the library code: //constants for the number of rows and columns
- 23. Turning the Cursor and Display On or Off #include LiquidCrystal lcd(12, 11, 5, 4, 3, 2);
- 24. Displaying Special Symbols #include const int numRows = 2; const int numCols = 16; const byte
- 25. Character codes
- 26. Character codes
- 28. Скачать презентацию
Remotely Controlling Devices
interact with almost any device that uses some form
Remotely Controlling Devices
interact with almost any device that uses some form
IR remote
works by turning an LED on and off in patterns
produce
IR remote
works by turning an LED on and off in patterns
produce
IR remote
low-cost IR receiver module
detect the signal and provide a digital
IR remote
low-cost IR receiver module
detect the signal and provide a digital
Wireless radio technology
more difficult to emulate than IR controls
button contacts on
Wireless radio technology
more difficult to emulate than IR controls
button contacts on
Optocouplers
Components called optocouplers are used to provide electrical separation between Arduino
Optocouplers
Components called optocouplers are used to provide electrical separation between Arduino
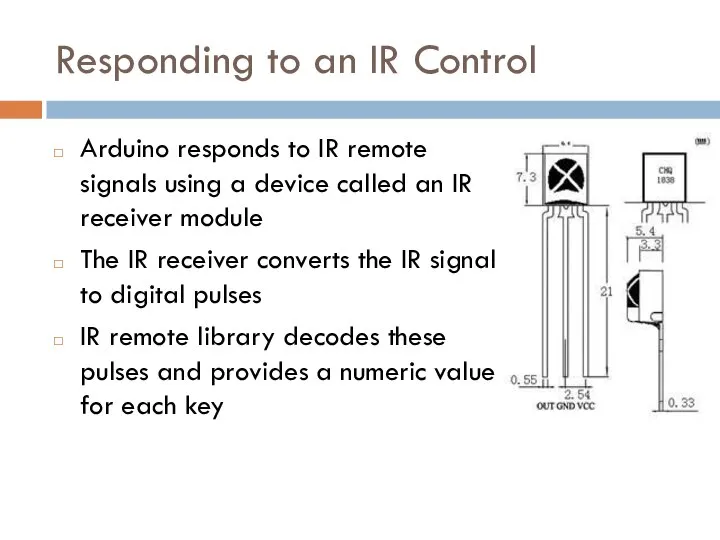
Responding to an IR Control
Arduino responds to IR remote signals using
Responding to an IR Control
Arduino responds to IR remote signals using
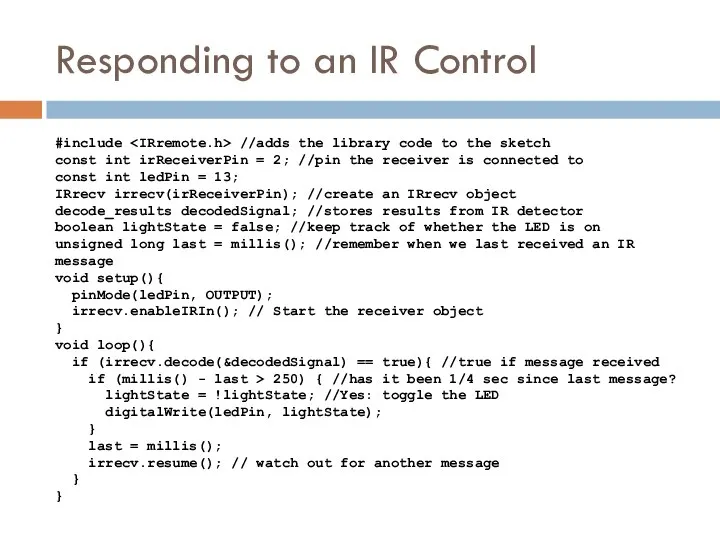
Responding to an IR Control
#include //adds the library code to
Responding to an IR Control
#include
IRremote library
#include - makes the library code available to your
IRremote library
#include
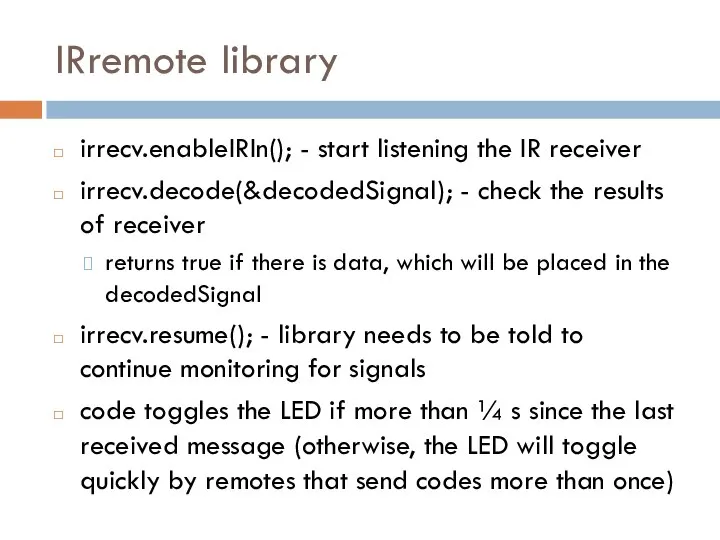
IRremote library
irrecv.enableIRIn(); - start listening the IR receiver
irrecv.decode(&decodedSignal); - check the
IRremote library
irrecv.enableIRIn(); - start listening the IR receiver
irrecv.decode(&decodedSignal); - check the
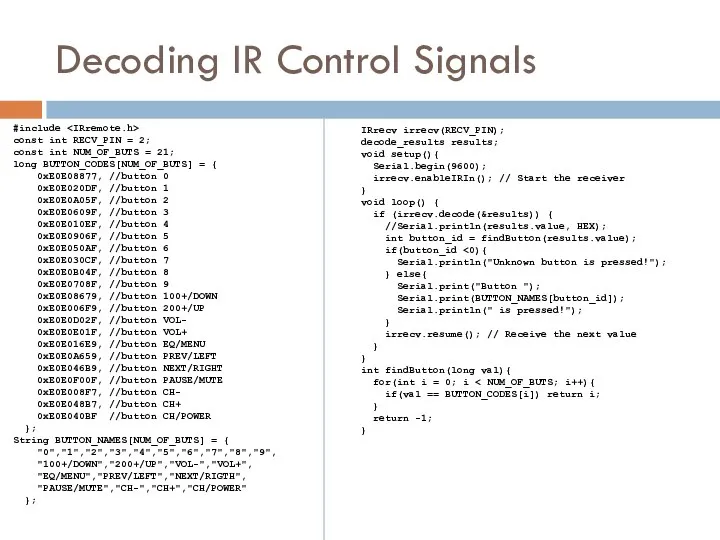
Decoding IR Control Signals
#include
const int RECV_PIN = 2;
const int NUM_OF_BUTS
Decoding IR Control Signals
#include
const int RECV_PIN = 2;
const int NUM_OF_BUTS
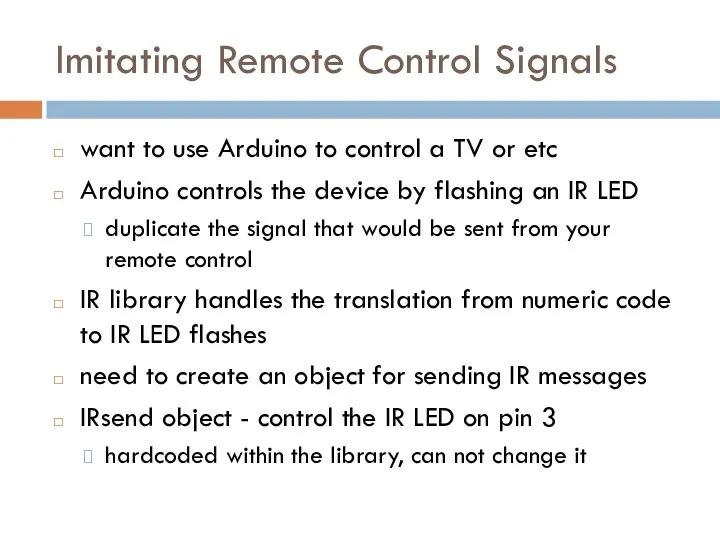
Imitating Remote Control Signals
want to use Arduino to control a TV
Imitating Remote Control Signals
want to use Arduino to control a TV
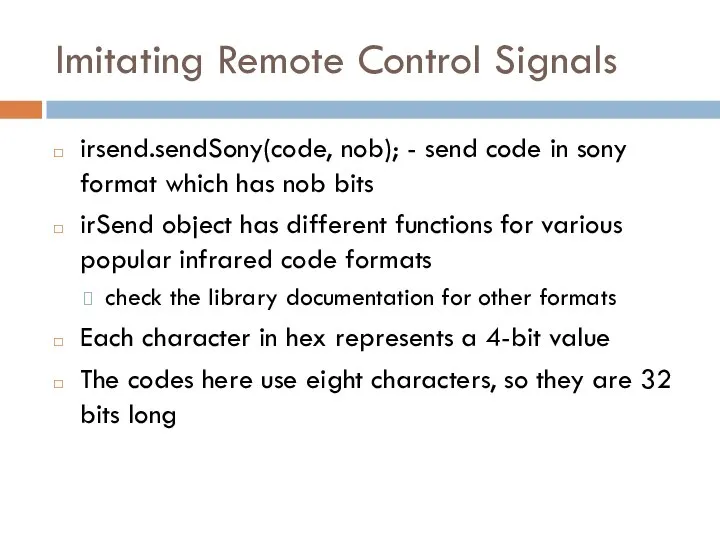
Imitating Remote Control Signals
irsend.sendSony(code, nob); - send code in sony format
Imitating Remote Control Signals
irsend.sendSony(code, nob); - send code in sony format
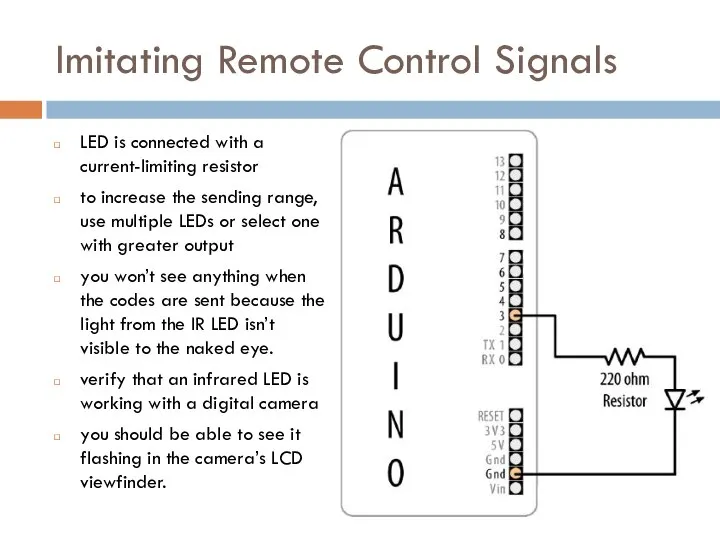
Imitating Remote Control Signals
LED is connected with a current-limiting resistor
to increase
Imitating Remote Control Signals
LED is connected with a current-limiting resistor
to increase
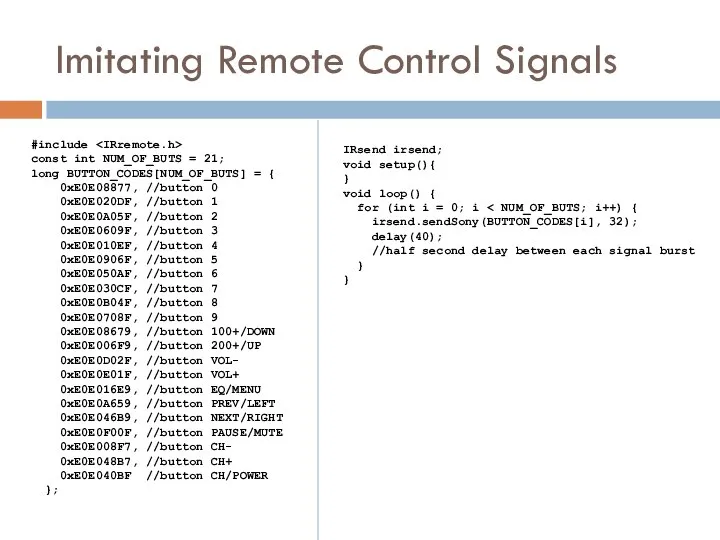
Imitating Remote Control Signals
#include
const int NUM_OF_BUTS = 21;
long BUTTON_CODES[NUM_OF_BUTS] =
Imitating Remote Control Signals
#include
const int NUM_OF_BUTS = 21;
long BUTTON_CODES[NUM_OF_BUTS] =
Liquid crystal displays (LCD)
offer a convenient and inexpensive way to provide
Liquid crystal displays (LCD)
offer a convenient and inexpensive way to provide
LCD vs. Graphical Display
create your own symbols and block graphics with
LCD vs. Graphical Display
create your own symbols and block graphics with
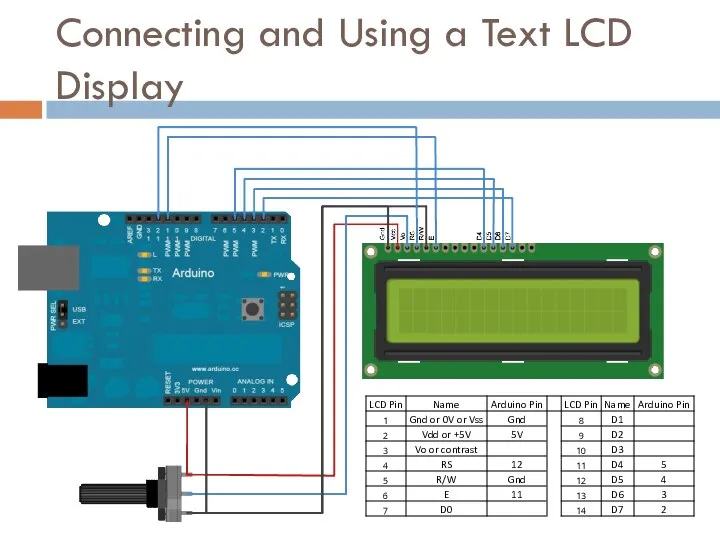
Connecting and Using a Text LCD Display
Connecting and Using a Text LCD Display
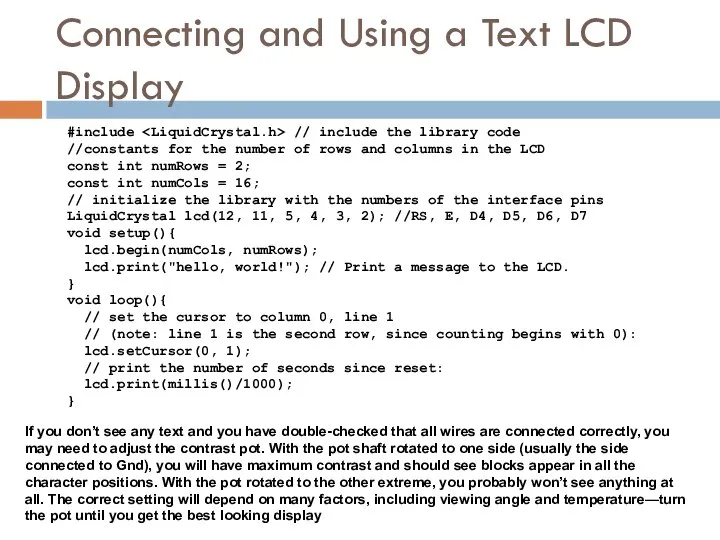
Connecting and Using a Text LCD Display
#include // include the
Connecting and Using a Text LCD Display
#include
LCD library functions
LiquidCrystal(rs, enable, d4, d5, d6, d7) - Creates a
LCD library functions
LiquidCrystal(rs, enable, d4, d5, d6, d7) - Creates a
LCD library functions
lcd.setCursor(col, row) - set the location (column and row)
LCD library functions
lcd.setCursor(col, row) - set the location (column and row)
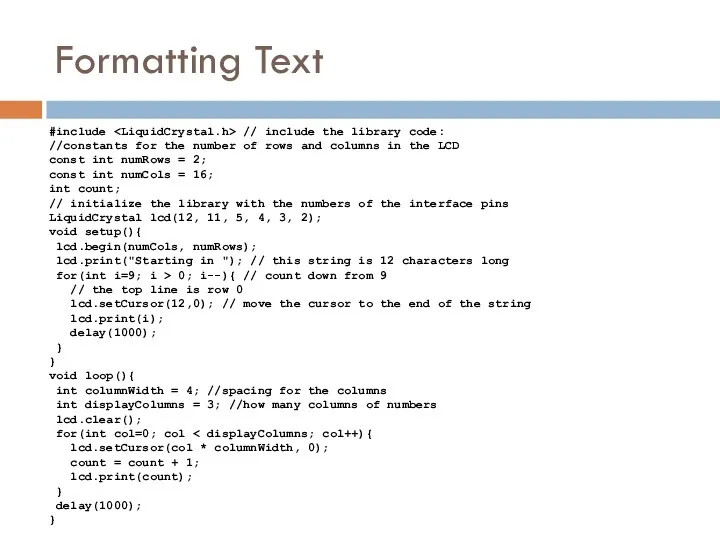
Formatting Text
#include // include the library code:
//constants for the number
Formatting Text
#include
//constants for the number
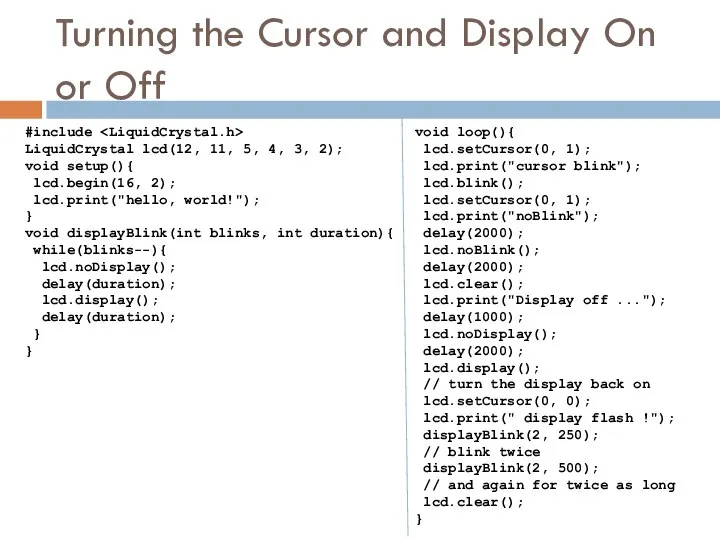
Turning the Cursor and Display On or Off
#include
LiquidCrystal lcd(12, 11,
Turning the Cursor and Display On or Off
#include
LiquidCrystal lcd(12, 11,
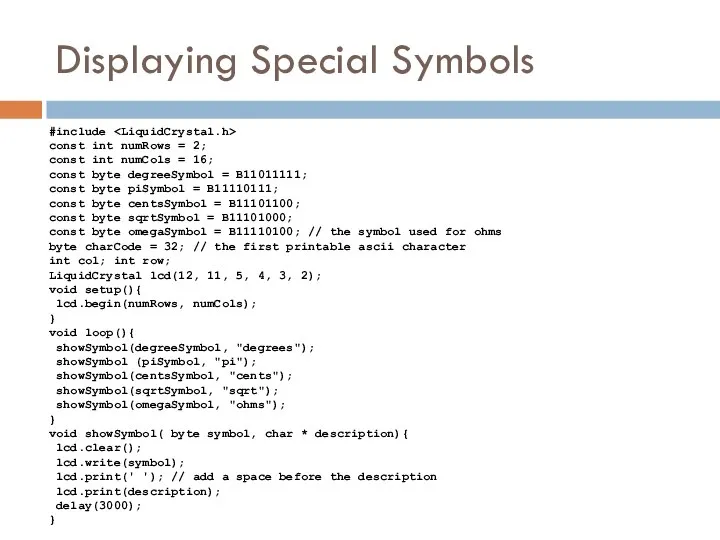
Displaying Special Symbols
#include
const int numRows = 2;
const int numCols =
Displaying Special Symbols
#include
const int numRows = 2;
const int numCols =
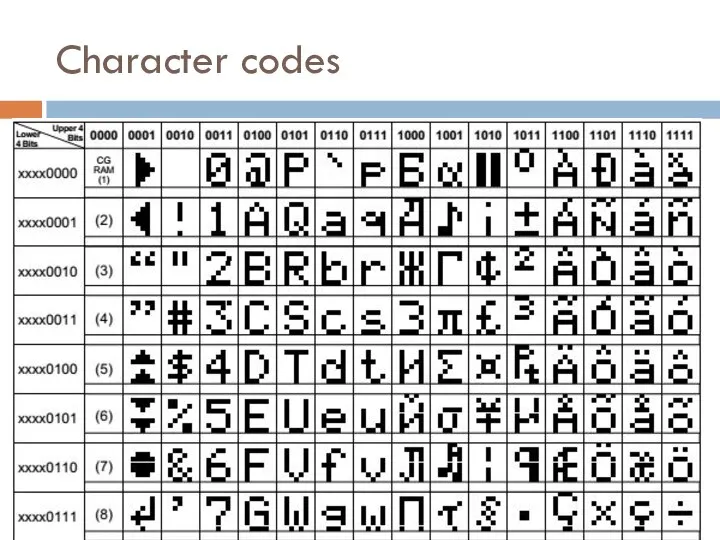
Character codes
Character codes
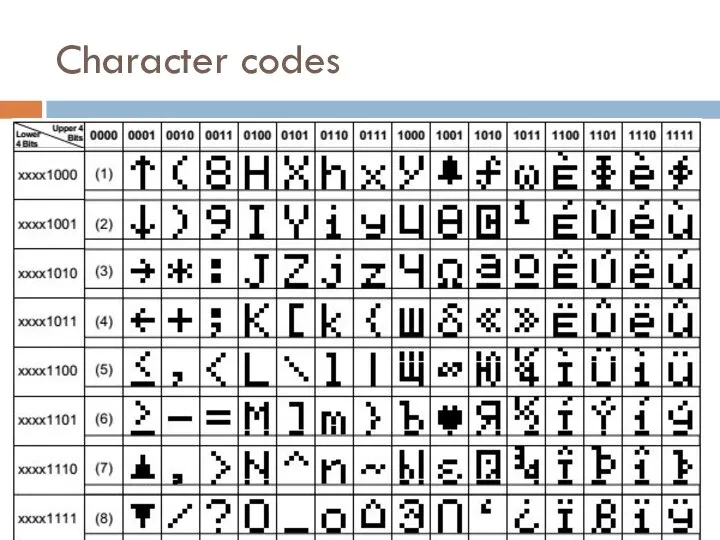
Character codes
Character codes
 Шестопсалмие
 Файловые архивы
 Технология OFDM
 2.19. Процессы горения. Опасности пожара.ppt
 КОРПОРАТИВНОЕ_НАКОПИТЕЛЬНОЕ_СТРАХОВАНИЕ нов проц
 Старый, Старый Новый год (2014) - презентация для начальной школы
 Исследование проблем конкурентоспособности в работах российских ученых Нечаева Анастасия, Юрлова Виктория
 Stanowisko pracy pracownik Mcdonald’s
 Основное назначение и возможности Word
  Жылыжайда қолданылатын жабынды материалдар
 Абылай хан дәуіріндегі Қазақстаның сыртқы және ішкі саяси жағдайы
 Презентация Виды ценных бумаг и их характеристика
 Технология полусухого прессования кирпича
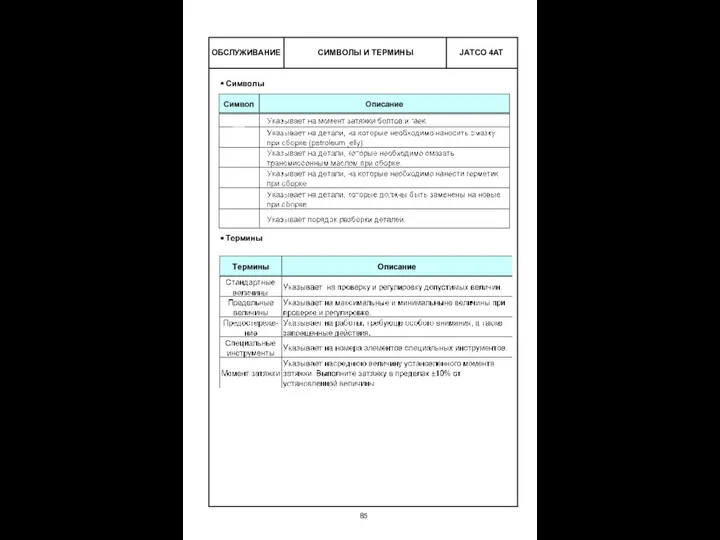 Обслуживание. Символы и термины
 «Дебат» технологиясы. Американдық парламенттік формат
 Презентация "Бордюры и орнаменты" - скачать презентации по МХК
 Презентация на тему "Оптимизация управления взаимодействием детского сада и семьи, через использование информационно – коммун
 Менеджмент разработки программных изделий 12. Знания, данные, умения
  Введение в программирование. Три версии Visual Studio
 Сертификация – это процедура подтверждения соответствия, посредством которой независимая от изготовителя и потребителя организ
 Режим дня в жизни школьника Составитель: учитель начальных классов МОУ ГИМНАЗИИ № 23 Ковалёва А.Ф.
 Урок русского языка 2 класс Путешествие по океану орфографических знаний. Написание безударных гласных в корнях слов. Коледова Га
 Нормативная деятельность Банка России
 Презентация на тему "Методика работы социального педагога с семьёй. Семейное консультирование" - скачать презентации по Педа
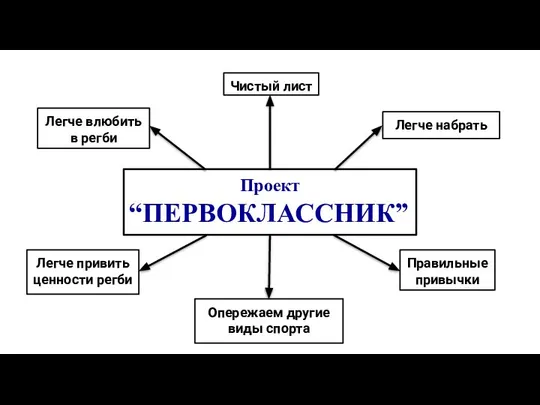 Проект “Первоклассник”. Регби
 Узлы элементов
 Повышение финансовой устойчивости предприятия
  Управление проектами. Управление проектами в строительстве