- Practice Activity

Содержание
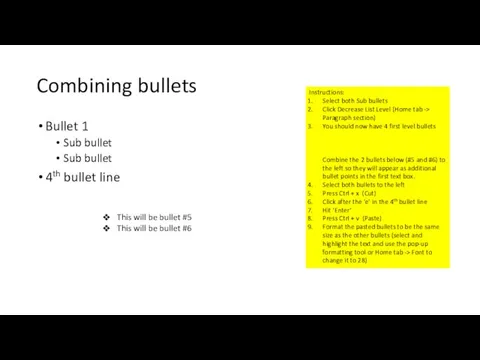
- 2. Combining bullets Bullet 1 Sub bullet Sub bullet 4th bullet line This will be bullet #5
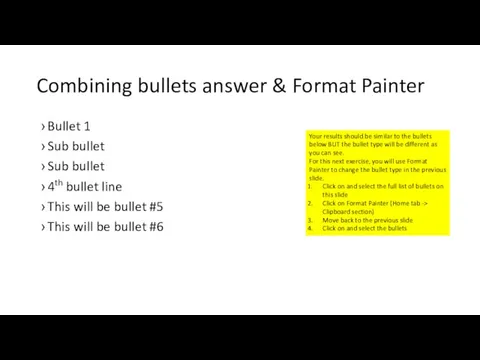
- 3. Combining bullets answer & Format Painter Bullet 1 Sub bullet Sub bullet 4th bullet line This
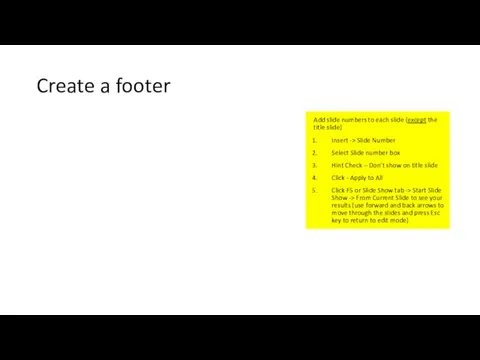
- 4. Create a footer Add slide numbers to each slide (except the title slide) Insert -> Slide
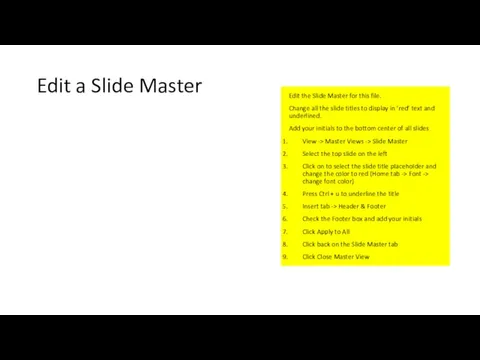
- 5. Edit a Slide Master Edit the Slide Master for this file. Change all the slide titles
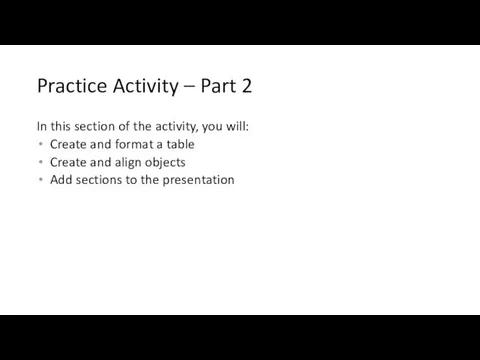
- 6. Practice Activity – Part 2 In this section of the activity, you will: Create and format
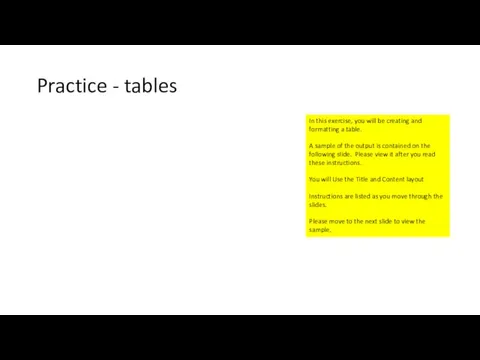
- 7. Practice - tables In this exercise, you will be creating and formatting a table. A sample
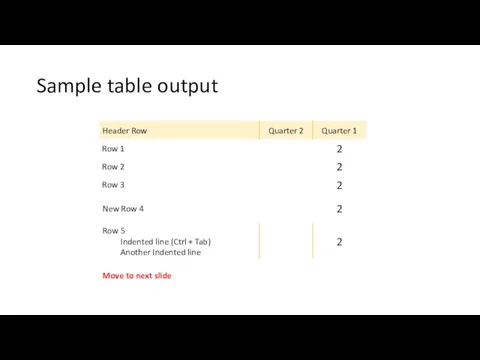
- 8. Sample table output Move to next slide
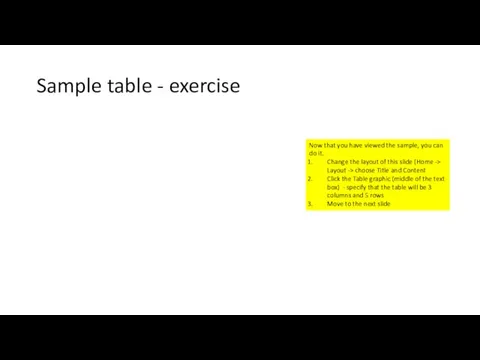
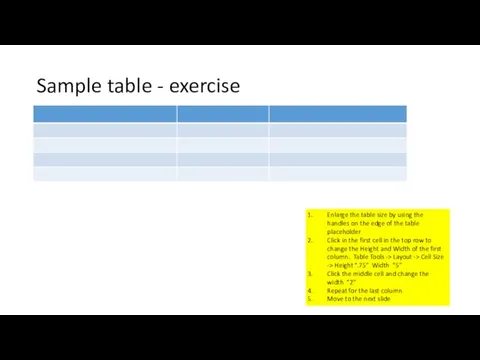
- 9. Sample table - exercise Now that you have viewed the sample, you can do it. Change
- 10. Sample table - exercise Enlarge the table size by using the handles on the edge of
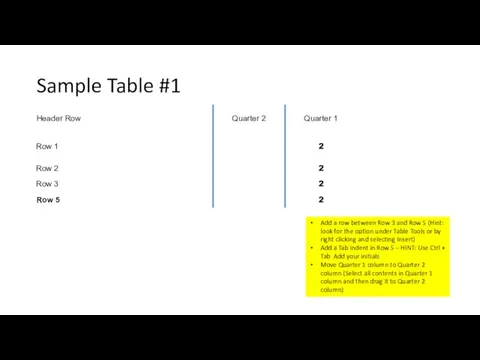
- 11. Sample Table #1 Add a row between Row 3 and Row 5 (Hint: look for the
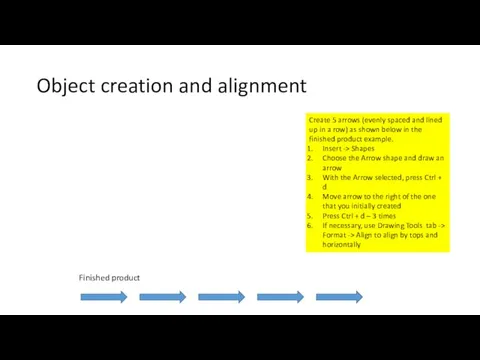
- 12. Object creation and alignment Create 5 arrows (evenly spaced and lined up in a row) as
- 14. Скачать презентацию
Combining bullets
Bullet 1
Sub bullet
Sub bullet
4th bullet line
This will be bullet #5
This
Combining bullets
Bullet 1
Sub bullet
Sub bullet
4th bullet line
This will be bullet #5
This
Combining bullets answer & Format Painter
Bullet 1
Sub bullet
Sub bullet
4th bullet line
This
Combining bullets answer & Format Painter
Bullet 1
Sub bullet
Sub bullet
4th bullet line
This
Create a footer
Add slide numbers to each slide (except the title
Create a footer
Add slide numbers to each slide (except the title
Edit a Slide Master
Edit the Slide Master for this file.
Change
Edit a Slide Master
Edit the Slide Master for this file.
Change
Practice Activity – Part 2
In this section of the activity, you
Practice Activity – Part 2
In this section of the activity, you
Practice - tables
In this exercise, you will be creating and formatting
Practice - tables
In this exercise, you will be creating and formatting
Sample table output
Move to next slide
Sample table output
Move to next slide
Sample table - exercise
Now that you have viewed the sample, you
Sample table - exercise
Now that you have viewed the sample, you
Sample table - exercise
Enlarge the table size by using the handles
Sample table - exercise
Enlarge the table size by using the handles
Sample Table #1
Add a row between Row 3 and Row 5
Sample Table #1
Add a row between Row 3 and Row 5
Object creation and alignment
Create 5 arrows (evenly spaced and lined up
Object creation and alignment
Create 5 arrows (evenly spaced and lined up
 Введение в специальность. Труд
 Обучение судовождению
 Жоба+әдістемесінің+ерекшеліктері
 Проектная деятельность. Метод учебных проектов
 Где логика? Интерактивная игра
 Виды журналистских профессий на ТВ
 Требования к условиям реализации основной образовательной программы дошкольного образования
 Интерактивный учебно-методический комплекс для детей дошкольного возраста по изучению казахского, русского и английского языков
 Аттестационная работа. Организация исследовательской деятельности в детских объединениях дополнительного образования
 Развитие личностной эффективности
 Изучение истории в 10 - 11 классе на базовом уровне. Рекомендации для организации процесса обучения
 Проектирование программ психолого-педагогического сопровождения в дошкольном, начальном, основном и дополнительном образовании
 Аттестационная работа. Включенность каждого школьника в учебный процесс средствами проектной деятельности
 Образование XXI века. Путь трансформации
 Система образования в США
 Аттестационная работа. Влияние развития силовых показателей для сдачи нормативов ГТО
 Усовершенствование технологии изготовления отливки Коробка сальника с использованием MS Project
 Башкирский Государственный Педагогический Университет
 Инновационные и традиционные методы и средства обучения
 Основы трудового законодательства. Дистанционное обучение молодых специалистов образовательных организаций Омской области
 Проектирование основной образовательной программы дошкольного образования. Целевой раздел
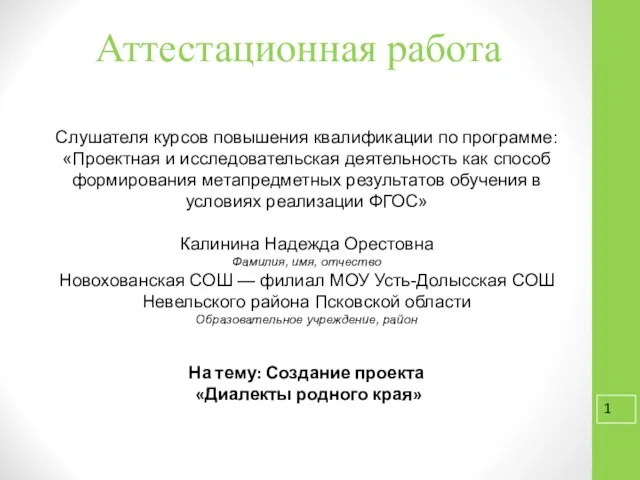 Аттестационная работа. Создание проекта Диалекты родного края
 Знание научное и знание художественное
 Диагностические методы изучения личности учащегося
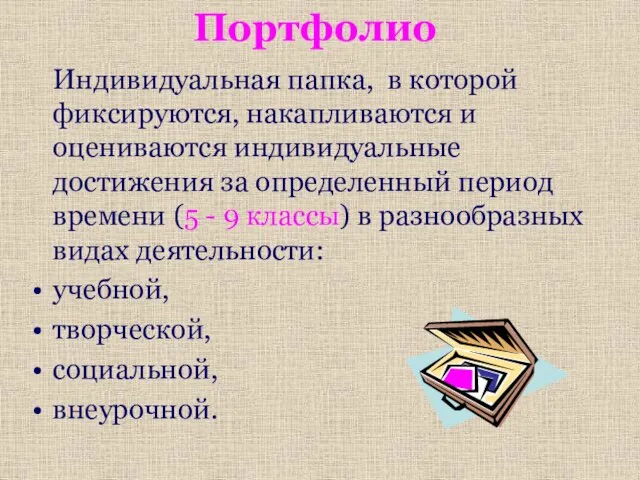 Портфолио ученика 5-9 кл., образец
 Инновационные педагогические технологии в образовательном процессе
 Нижегородская государственная сельскохозяйственная академия
 Итоговое сочинение 2021-2022