- P770 disassembly guide

Содержание
- 2. Contents 1.Disassembly tool 2.Phone structure 3. Follow chart 4. Explosive view
- 3. 1. Disassembly tools ①crossing screwdriver ②tweezer ③crowbar ④chip 1、 Take proper anti-static measures: put on anti-static
- 4. Front view Rear view 2 . Phone structure
- 5. Follow chart Battery cover Rear housing Cable line TP Main PCBA Rear\front camera、p-sensor FPC、p-sensor FPC holder
- 6. 4 . Disassembly steps Attention Before the disassembly of P770: Be sure that it’s powered off
- 7. Step1:battery cover 4. Disassembly steps
- 8. Step2:Rear housing Loosen and take down the screws 4. Disassembly steps
- 9. Step2:Rear housing USB and earphone connector 4. Disassembly steps
- 10. Step3:Main PCBA Loosen screws Volume key FPC LCD FPC 松开螺丝 Front camera FPC P-SENSOR FPC TP
- 11. Step3:Main PCBA ① Loosen buckle Loosen SUB PCBA FPC buckle 4. Disassembly steps
- 12. Step4:sim board 4. Disassembly steps
- 13. Step5:SUB PCBA glue buckle 4. Disassembly steps
- 14. Step6:TP FPC处 FPC 4. Disassembly steps ①use blow drier to heat up the TP around uniformity.
- 15. Step7:TP 4. Disassembly steps After glue is soft ,use the sucker to take down TP Take
- 16. Step8:LCD LCD FPC Glue around back of LCD 4. Disassembly steps
- 17. FINISH 5. Explosive view
- 19. Скачать презентацию
Contents
1.Disassembly tool
2.Phone structure
3. Follow chart
4. Explosive view
Contents
1.Disassembly tool
2.Phone structure
3. Follow chart
4. Explosive view
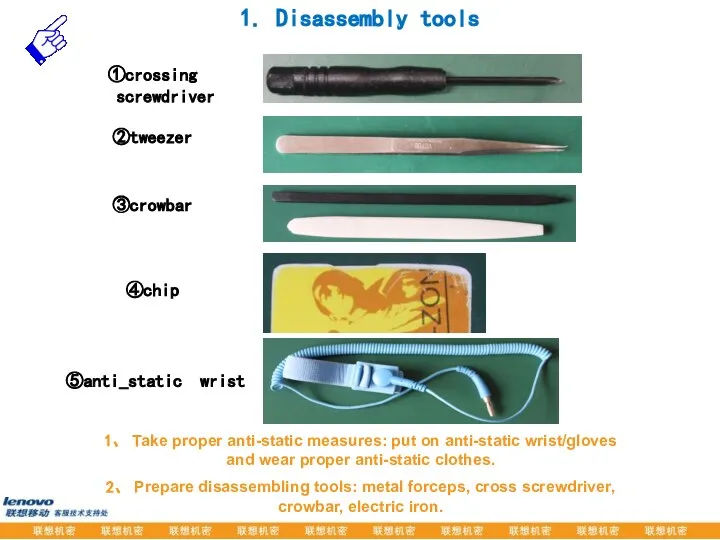
1. Disassembly tools
①crossing screwdriver
②tweezer
③crowbar
④chip
1、 Take proper anti-static measures: put on anti-static
1. Disassembly tools
①crossing screwdriver
②tweezer
③crowbar
④chip
1、 Take proper anti-static measures: put on anti-static
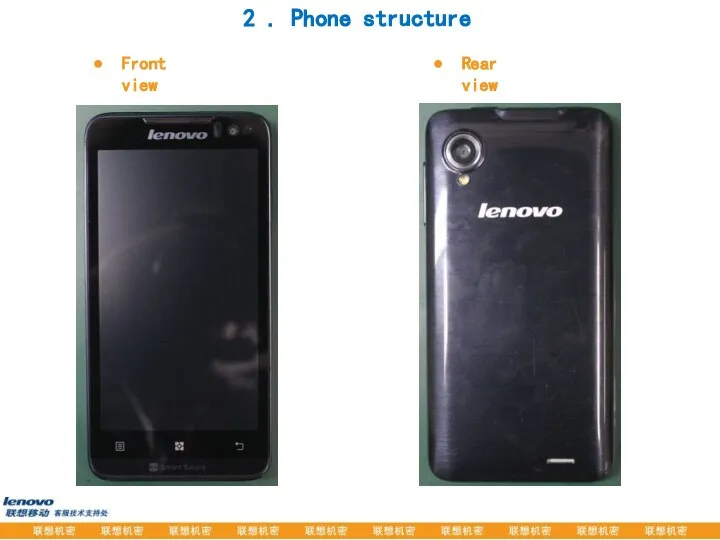
Front view
Rear view
2 . Phone structure
Front view
Rear view
2 . Phone structure
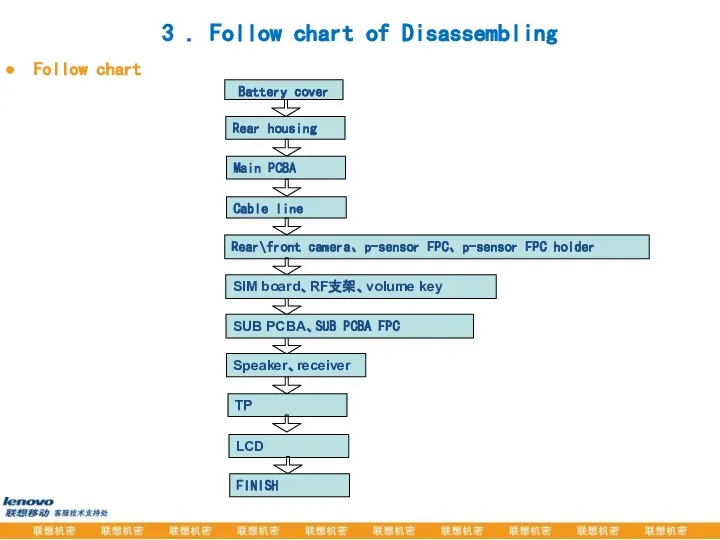
Follow chart
Battery cover
Rear housing
Cable line
TP
Main PCBA
Rear\front camera、p-sensor FPC、p-sensor FPC holder
SIM board、RF支架、volume
Follow chart
Battery cover
Rear housing
Cable line
TP
Main PCBA
Rear\front camera、p-sensor FPC、p-sensor FPC holder
SIM board、RF支架、volume

4 . Disassembly steps
Attention
Before the disassembly of P770:
Be sure that it’s
4 . Disassembly steps
Attention
Before the disassembly of P770:
Be sure that it’s
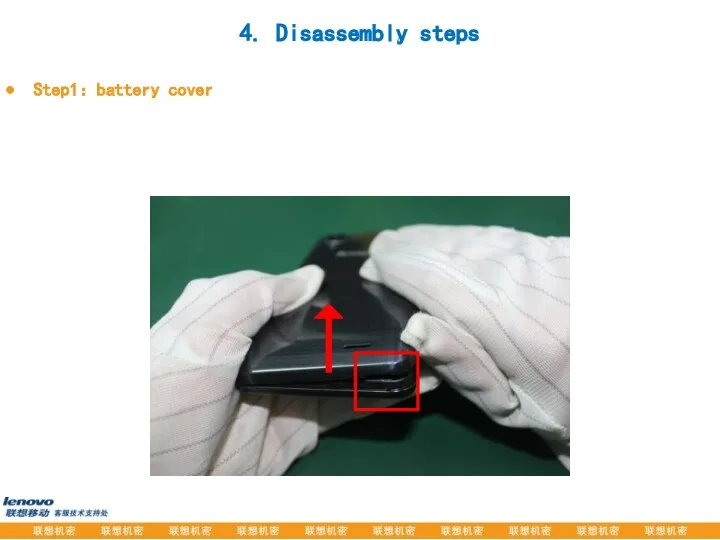
Step1:battery cover
4. Disassembly steps
Step1:battery cover
4. Disassembly steps
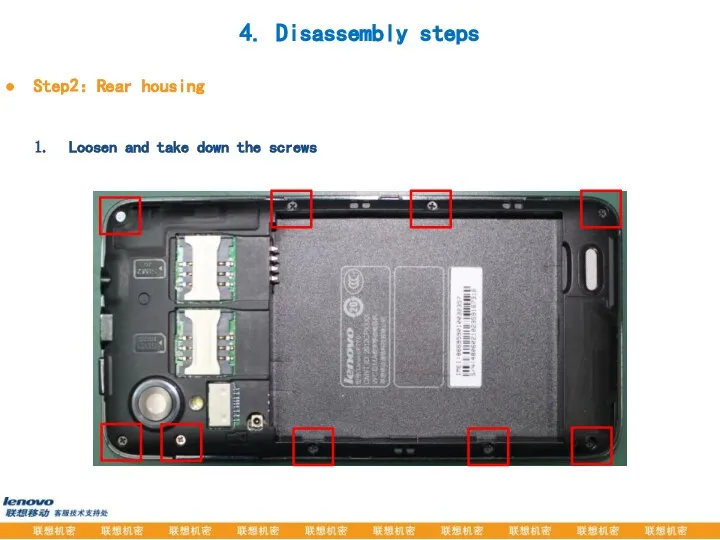
Step2:Rear housing
Loosen and take down the screws
4. Disassembly steps
Step2:Rear housing
Loosen and take down the screws
4. Disassembly steps
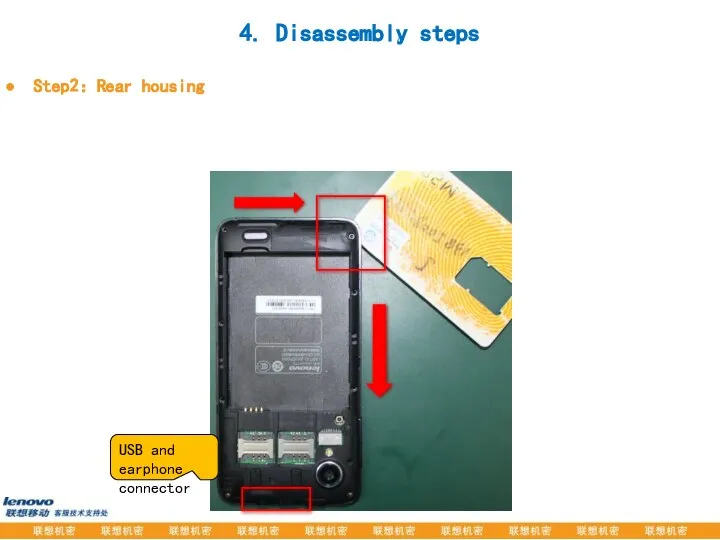
Step2:Rear housing
USB and earphone connector
4. Disassembly steps
Step2:Rear housing
USB and earphone connector
4. Disassembly steps
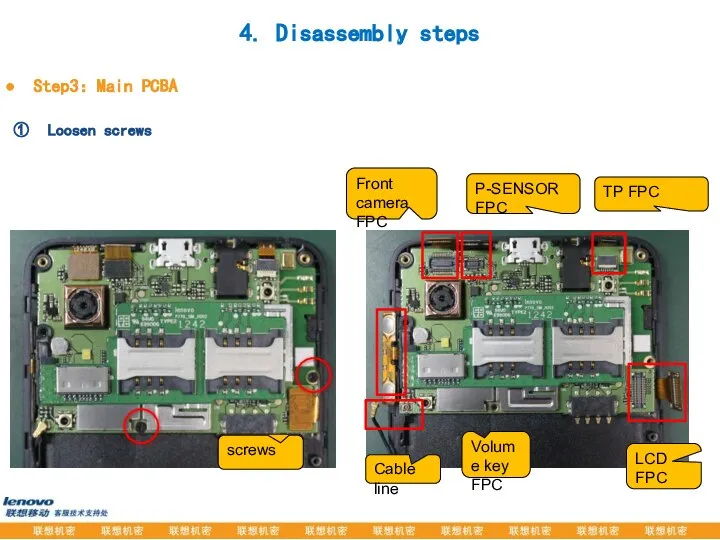
Step3:Main PCBA
Loosen screws
Volume key FPC
LCD FPC
松开螺丝
Front camera FPC
P-SENSOR FPC
TP FPC
screws
Cable line
4.
Step3:Main PCBA
Loosen screws
Volume key FPC
LCD FPC
松开螺丝
Front camera FPC
P-SENSOR FPC
TP FPC
screws
Cable line
4.
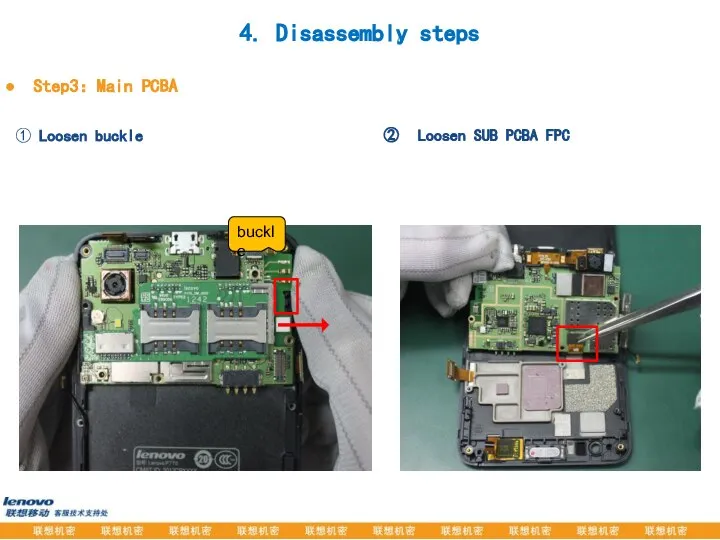
Step3:Main PCBA
① Loosen buckle
Loosen SUB PCBA FPC
buckle
4. Disassembly steps
Step3:Main PCBA
① Loosen buckle
Loosen SUB PCBA FPC
buckle
4. Disassembly steps
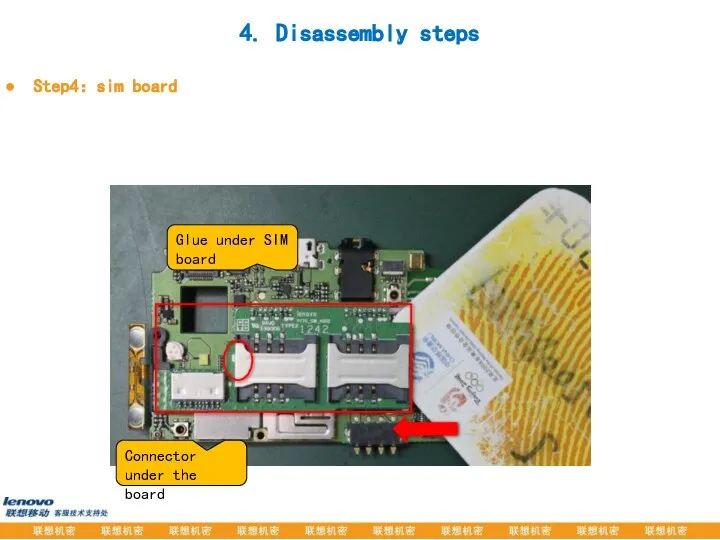
Step4:sim board
4. Disassembly steps
Step4:sim board
4. Disassembly steps
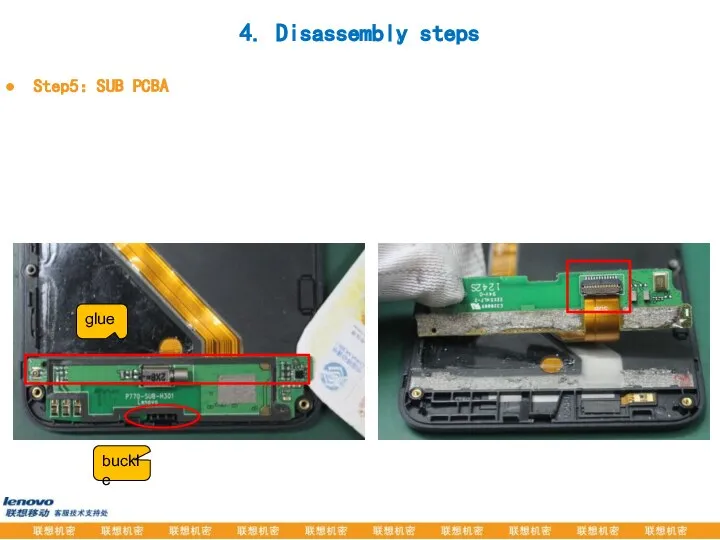
Step5:SUB PCBA
glue
buckle
4. Disassembly steps
Step5:SUB PCBA
glue
buckle
4. Disassembly steps
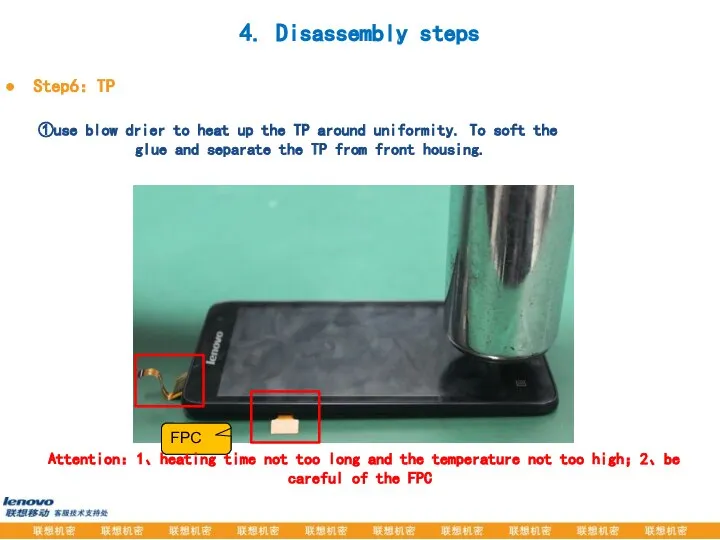
Step6:TP
FPC处
FPC
4. Disassembly steps
①use blow drier to heat up the TP around
Step6:TP
FPC处
FPC
4. Disassembly steps
①use blow drier to heat up the TP around

Step7:TP
4. Disassembly steps
After glue is soft ,use the sucker to take
Step7:TP
4. Disassembly steps
After glue is soft ,use the sucker to take
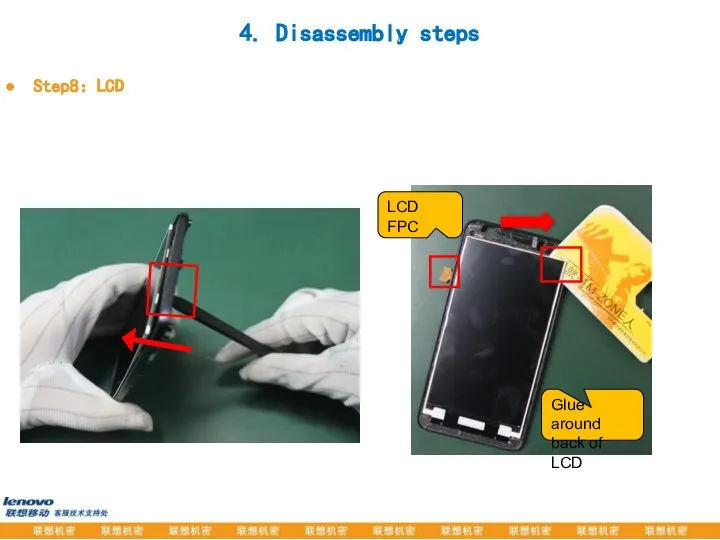
Step8:LCD
LCD FPC
Glue around back of LCD
4. Disassembly steps
Step8:LCD
LCD FPC
Glue around back of LCD
4. Disassembly steps
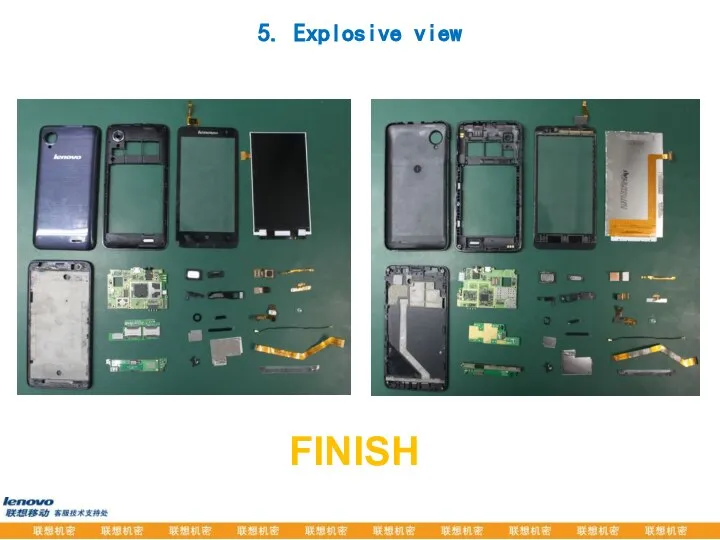
FINISH
5. Explosive view
FINISH
5. Explosive view
 Автоматизация послеуборочной обработки зерна
 “Безработица равна 100%, если безработный – это Вы”. Адам Смит
 SkyDNS-облачный контент-фильтр
 Виды работ при построении триангуляции
  Этапы разработки технического задания
 Авторитет и лидерство. Формы власти и влияния, стили руководства
 Генетика и медицина О разрешите мне загадку жизни, Мучительно старинную загадку… Скажите, что такое человек. Г.Гейне Наши врачи должны, как азбуку, знать законы наследственности. И.П. Павлов
 Уроки рисования пастелью
 Место игры в применяемых педагогических образовательных технологиях и ее влияние на укрепление здоровья детей
 Всички плодове и зеленчуци си имат цвят. Едни са жълти, други зелени, червени, лилави оранжеви. - презентация
 Презентация Роль таможенно-тарифного регулирования в обеспечении экономической безопасности страны
  Методы физической культуры
 Дифференциальные уравнения Однородные дифференциальные уравнения Линейные дифференциальные уравнения Уравнения Бернулли
 Обменное взаимодействие. Симметрия координатных и спиновых функций
  Организация и проведение криминологического исследования
 РЕШЕНИЕ НЕРАВЕНСТВ С ОДНИМ НЕИЗВЕСТНЫМ
 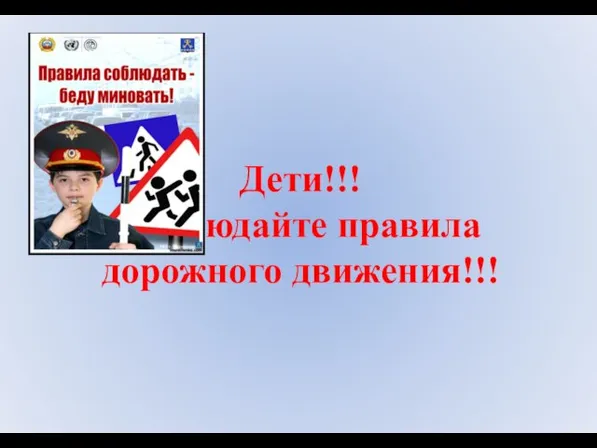 Выйдя на улицу, юный пешеход должен вежливо передвигаться только по тротуару или обочине! - презентация
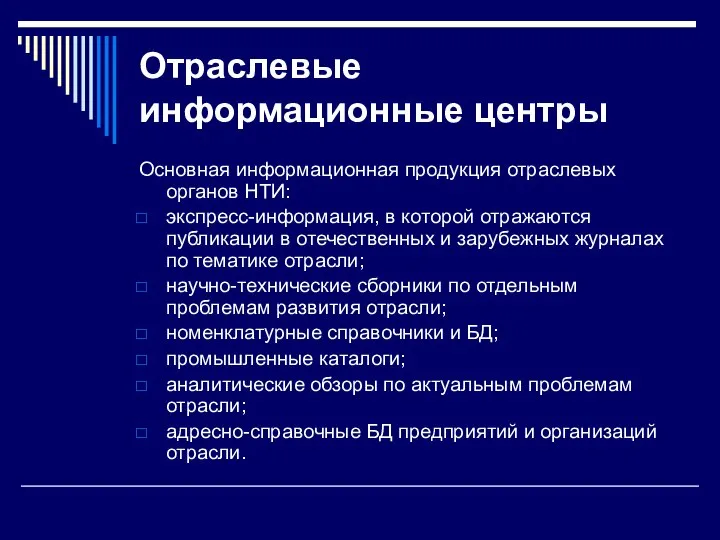 Отраслевые информационные центры
 Публикация материалов на сервисе Calaméo © Збицкая Наталья Юрьевна, учитель математики МОУ «Средняя школа №13» г. Балаково Саратовской области
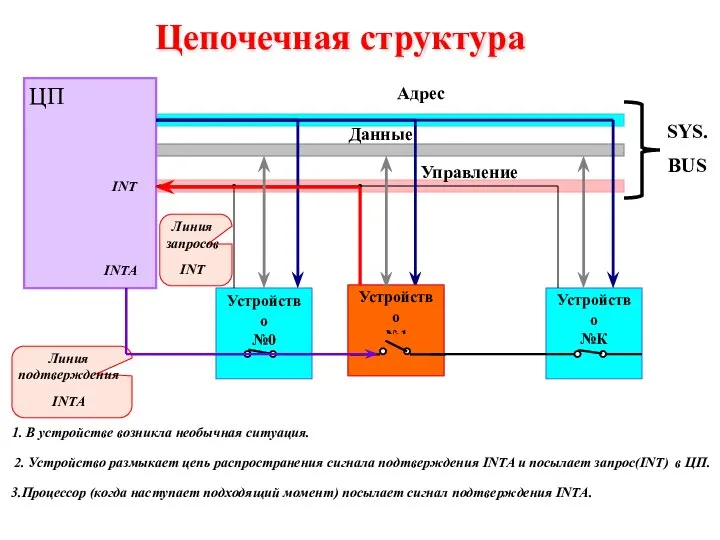 Цепочечная структура
 Рейтинговая система оценивания достижений учащихся (материалы к выступлению на методическом семинаре) Выполнила зам.директора
  Монтаж конструкций
 Права и свободы человека и гражданина РФ
 Средства и методы физического воспитания
 American versus British English
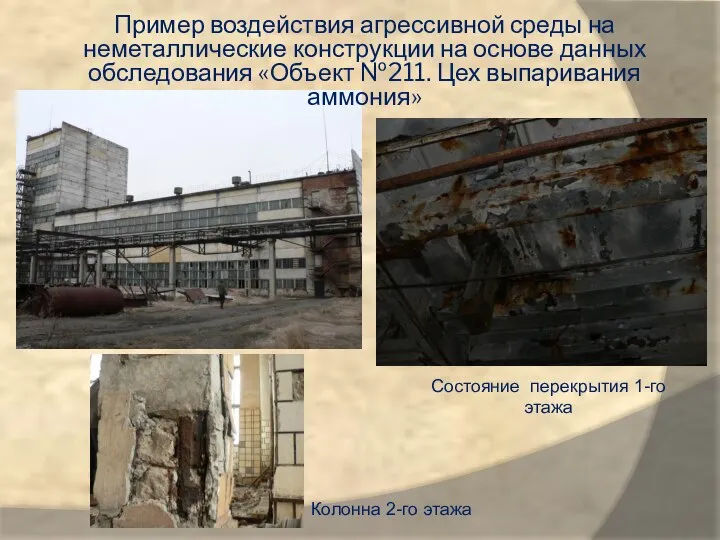 Пример воздействия агрессивной среды на неметаллические конструкции
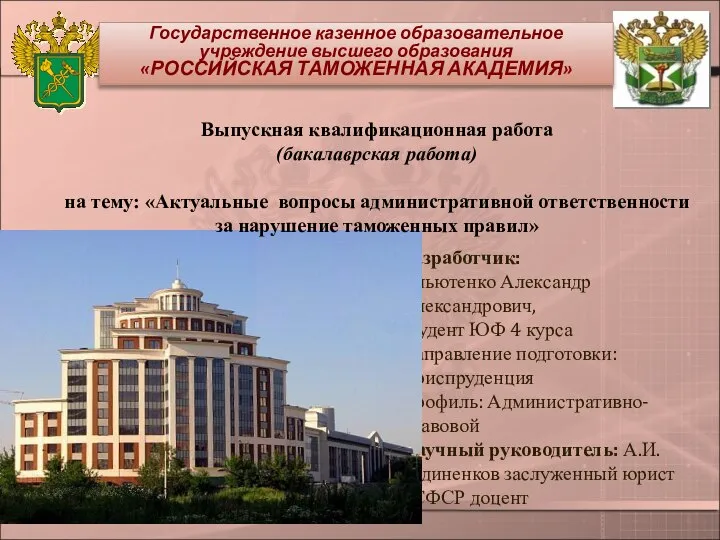 Презентация Актуальные вопросы административной ответственности за нарушение таможенных правил
  Презентация "Кредитный брокер - для физических лиц" - скачать презентации по Экономике